Soft and Chewy Key Lime Cookies with Key Lime Glaze

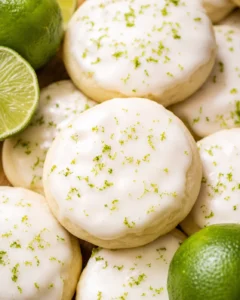
Move over key lime pie: these soft, chewy Key Lime Cookies bring bright citrus flavor to a simple cookie. The dough is scented with fresh key lime zest, baked just until the edges begin to set, and finished with a sweet key lime glaze that adds another layer of fresh lime flavor.
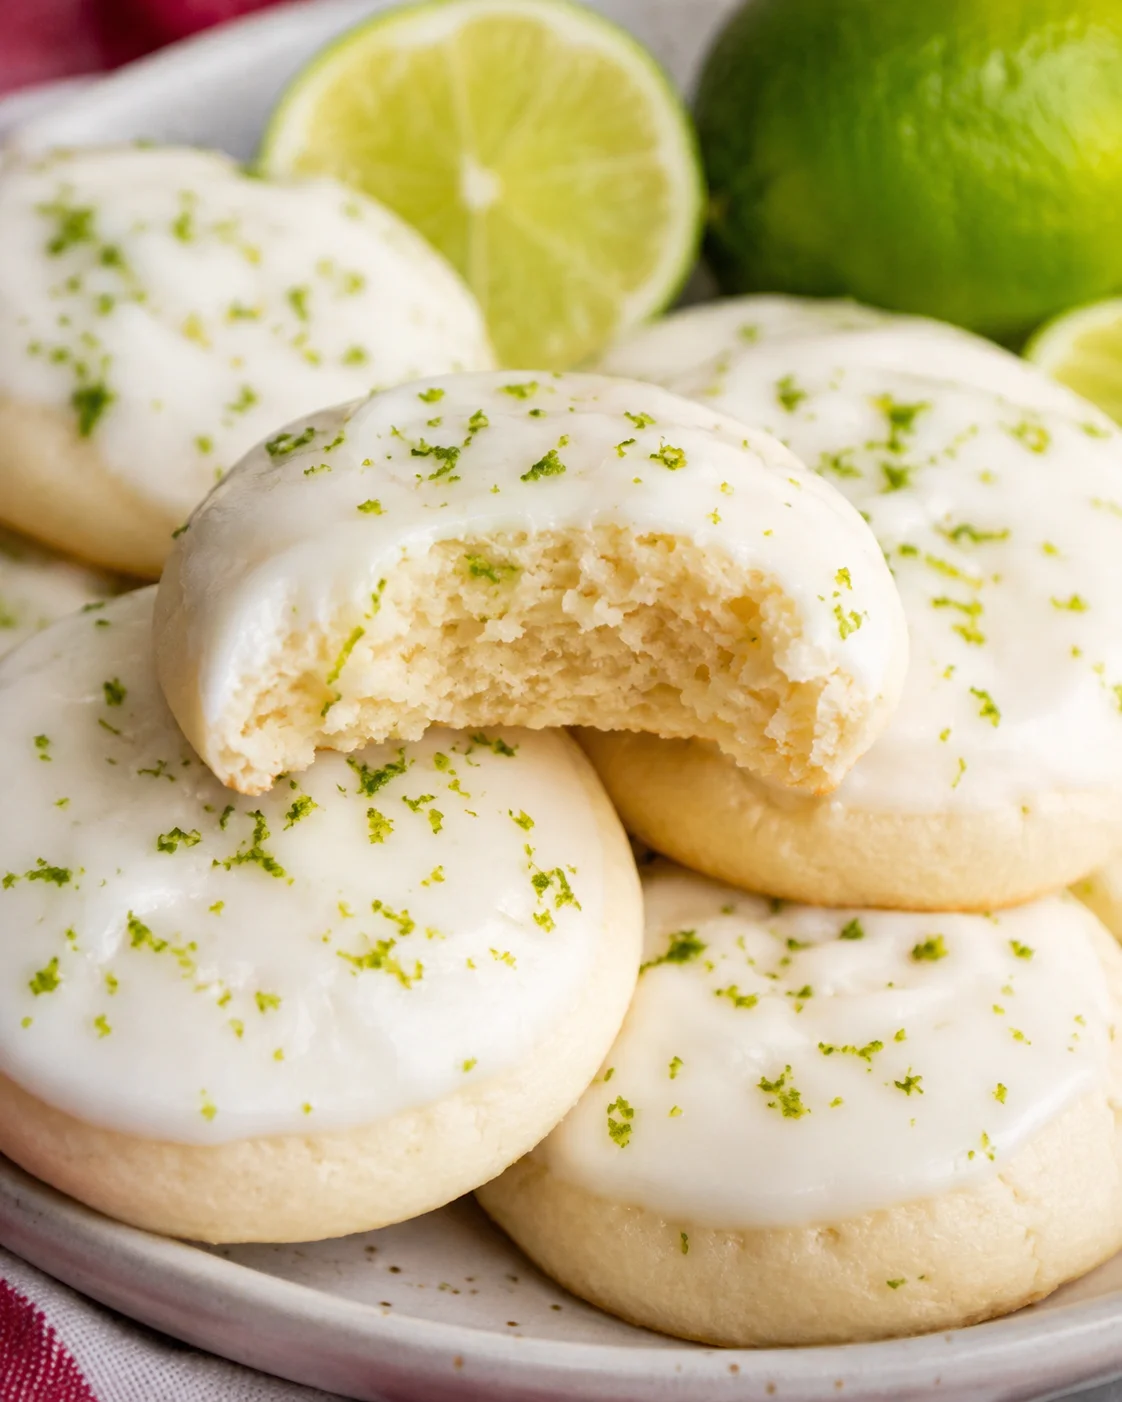
With about 10 minutes of prep time and no required chilling, this is an easy bake for a sunny afternoon, a summer dessert table, or any time you want to switch up a usual cookie recipe. The finished cookies are refreshing and slightly tart, with a tender center and a pretty drizzle of icing.
Fresh key limes give the cookies their most distinctive flavor, but regular limes can also be used when key limes are difficult to find. The difference will be subtle once the cookies are baked, and both options keep the citrus flavor lively.
At a glance: The recipe makes 24 cookies, with about 10 minutes of prep time, 9 minutes of cook time, and 30 minutes total time in the recipe details. The timing includes cooling and finishing the cookies, so plan on letting them cool completely before glazing.
The most important texture cues happen at two points: cream the softened butter and sugars until light and fluffy, then stop mixing soon after the flour is incorporated. At the end of baking, the edges should be just set rather than deeply brown. Those small details help preserve the soft center that makes these lime cookies different from a crisp cookie.
Why You Will Love This
- Soft and chewy texture. The cookies are pulled from the oven while the edges are only beginning to set. They may still look a little puffy, but that is part of how they stay soft instead of turning dry.
- Fresh, bright lime flavor. Key lime zest flavors the dough, while key lime juice and zest go into the glaze. The result is a vibrant citrus cookie with a slightly tart finish.
- Simple preparation. The dough uses familiar baking ingredients and does not need to be chilled before baking. If the shaped dough spreads more than you want, a short chill of about 15 minutes can help.
- A summery cookie for any season. These cookies are especially fitting for warm-weather baking, but the refreshing lime flavor works whenever you want a lighter-feeling dessert.
Ingredients
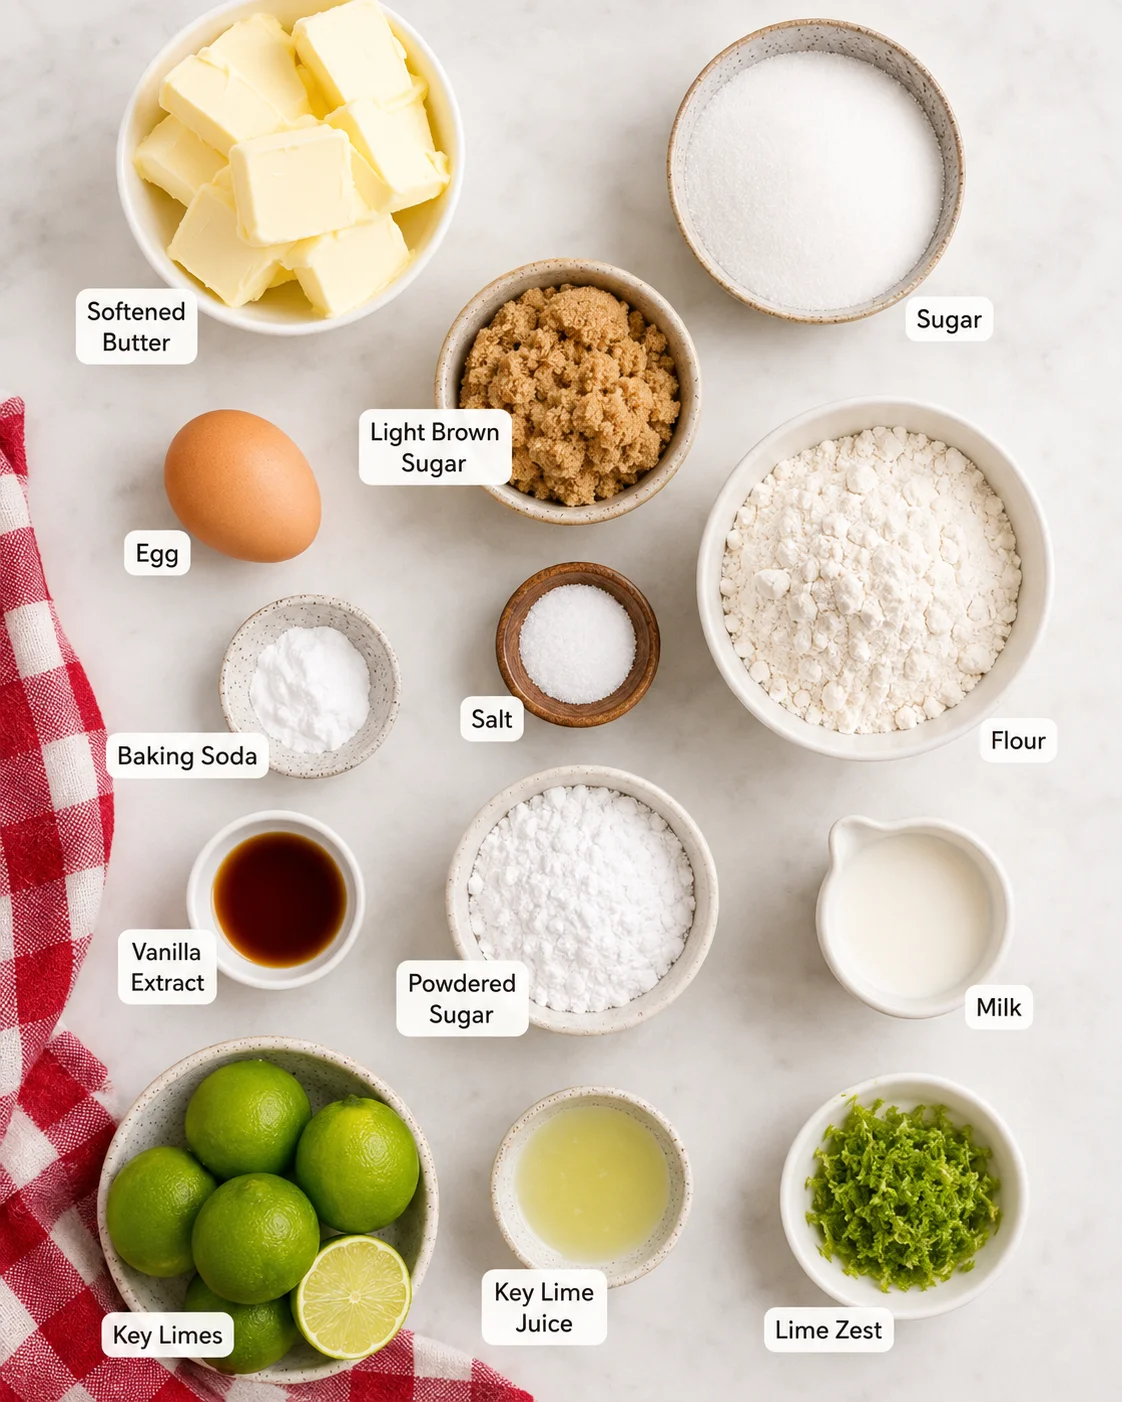
This recipe makes about 24 cookies. For the best texture, bring the butter and egg to room temperature as noted below, and measure the flour carefully. If you weigh it, use 219 grams. Otherwise, spoon the flour into a measuring cup to aerate it, then scoop and level the top rather than packing it down.
For the cookies
- ½ cup unsalted butter (113g), softened to room temperature: The butter should hold its shape but leave a slight imprint when pressed with a finger. It should not be hard, starting to melt, or liquid.
- 1 large egg, at room temperature: A room-temperature egg blends smoothly into the creamed butter and sugar.
- ¾ cup sugar (150g)
- ¼ cup light brown sugar (50g): Light brown sugar is the preferred choice for these cookies.
- 1 teaspoon vanilla extract: For a stronger lime profile, the vanilla can instead be adjusted to ½ teaspoon and combined with ½ teaspoon lime extract.
- 2–3 teaspoons key lime zest: Use the zest in the cookie dough for a fresh, concentrated lime flavor.
- 1¾ cups all-purpose flour (219g)
- ½ teaspoon baking soda
- ½ teaspoon salt
For the key lime glaze
- 1 cup powdered sugar: Also called confectioners’ sugar. Keep a little extra available in case the glaze becomes too thin.
- 1 tablespoon key lime juice
- 1–2 tablespoons milk: Add enough to reach a thick but pourable consistency.
- ¼ teaspoon vanilla
- ½ teaspoon key lime zest
- A pinch of salt, optional
Key limes and regular limes
Key limes are small and round, with thinner skin than the larger, familiar regular lime. Their flavor is more tart and aromatic, with floral notes. If fresh key limes are unavailable, use regular lime zest and juice instead. The flavor will be a little different, but it is less noticeable after baking than it is in the raw ingredients.
Before you begin
Set out the ingredients that need to lose their chill, especially the butter and egg. The butter should soften at room temperature without becoming glossy or melted. The egg is easiest to blend when it is also at room temperature. Zest the limes before juicing them so the zest is easy to collect for both the dough and glaze.
A large bowl and a small bowl are enough for mixing. Use an electric hand mixer or a stand mixer for the butter and sugars. You will also need a parchment-lined cookie sheet and a wire rack. Parchment helps the shaped dough release cleanly, while the rack allows air to circulate as the cookies finish cooling.
If you cannot fit all the cookies on the pan at once, keep the remaining shaped dough at room temperature while the first batch bakes. The dough can sit for the roughly 15 minutes that one batch takes, then the next batch can be baked. Keep the portions covered or in the mixing bowl so the surface does not dry out.
Instructions
Set out a large mixing bowl, a small bowl for the dry ingredients, an electric hand mixer or stand mixer, a parchment-lined cookie sheet, and a wire rack. The dough does not normally need to be chilled, so the cookies can move from mixing to shaping without a long wait.
- Prepare the oven and dry ingredients. Preheat the oven to 350°F. In a small bowl, whisk together the flour, baking soda, and salt, then set the mixture aside.
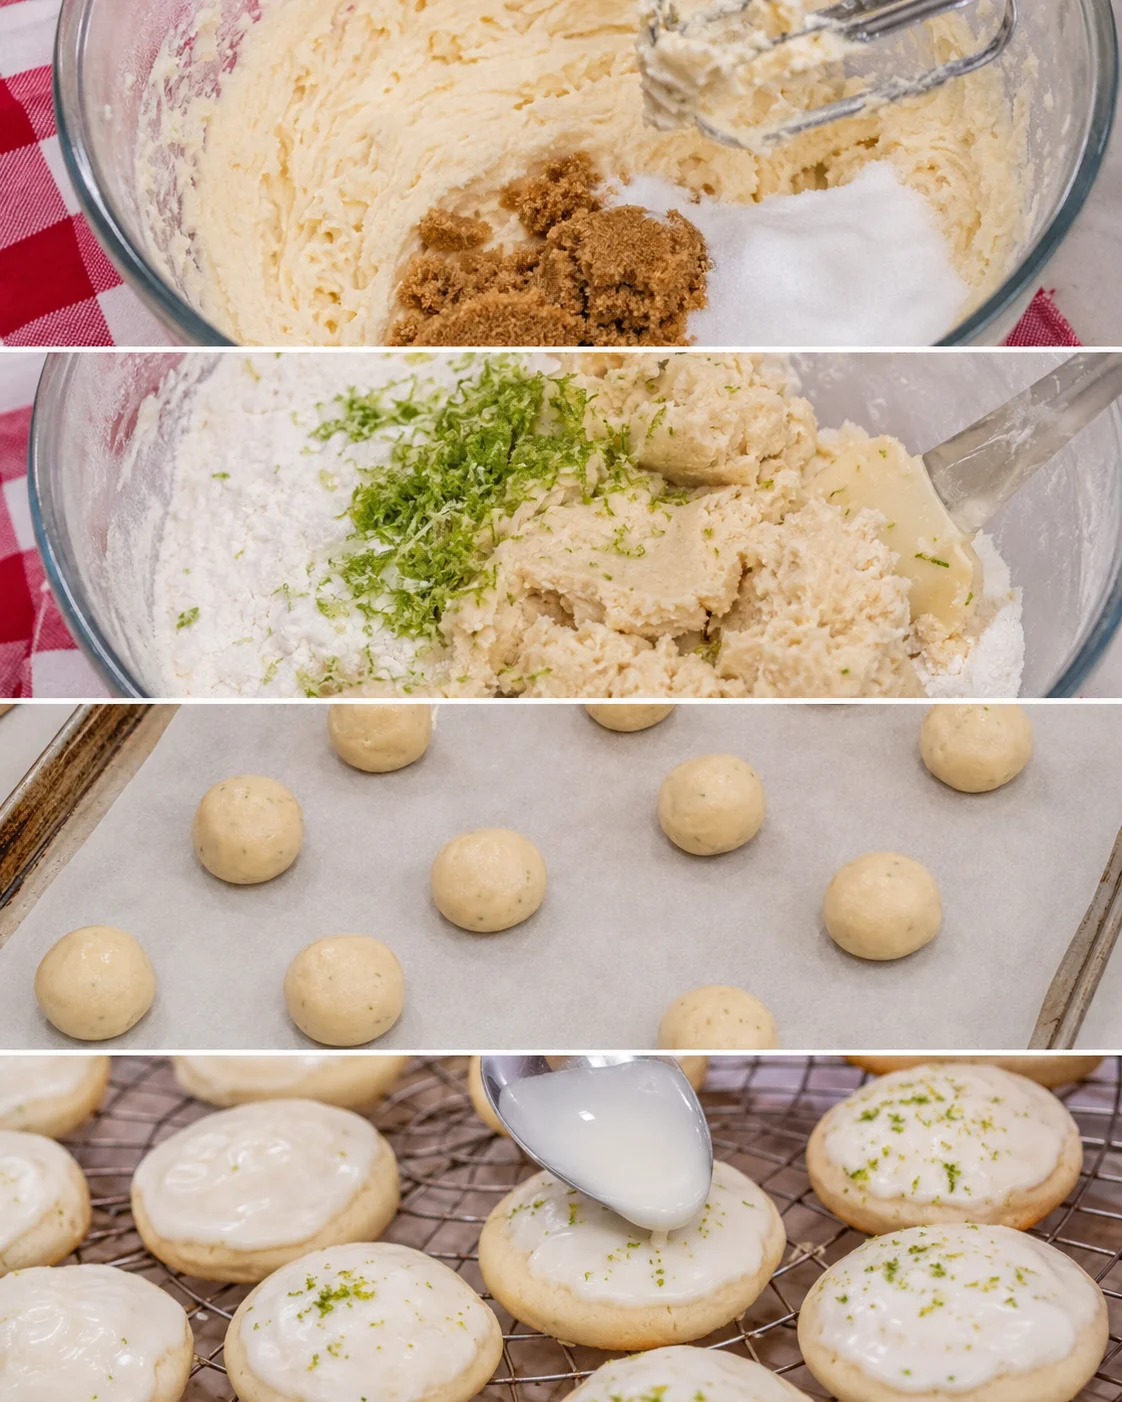
- Cream the butter and sugars. In a separate large bowl, combine the softened butter, sugar, and light brown sugar. Beat on high with an electric mixer for about 1–2 minutes, until the mixture is light and fluffy. This step is important for the cookie texture, so keep beating until the mixture has visibly changed rather than stopping as soon as the ingredients are combined.
- Add the egg and vanilla. Beat in the room-temperature egg and vanilla until they are mixed into the butter mixture.
- Add the zest and dry ingredients gradually. Mix in the key lime zest. Add about one-third of the flour mixture at a time, beating only until each addition is incorporated. Continue slowly until a dough forms. Once the flour goes in, avoid overmixing.
- Shape the dough. Pull the dough together and roll it into smooth balls about 1½ inches across. Arrange the balls on a parchment-lined cookie sheet, leaving room for them to spread. Smooth balls give the baked cookies a neater appearance than a scoop-shaped portion, although either shaping method works.
- Chill only if needed. The dough should not require chilling. If the shaped cookies appear likely to spread too much, chill the dough balls for about 15 minutes before baking.
- Bake until just set. Bake at 350°F for about 8–10 minutes, checking early. The broader guidance for a soft, chewy cookie is about 9–11 minutes, so use the appearance as well as the timer: the edges should just begin to set, the cookies may remain slightly puffy, and the edges generally will not brown much. Pull them out just before they look completely finished if a soft center is the goal.
- Cool the cookies. Let the cookies rest on the cookie sheet for 2–3 minutes, then transfer them to a wire rack. Allow them to cool completely before adding the glaze.
- Mix the glaze. Whisk together the powdered sugar, key lime juice, milk, vanilla, key lime zest, and the optional pinch of salt. Adjust the consistency with a little more liquid if it is too thick, or more powdered sugar if it is too thin. Let the glaze sit for about 5–10 minutes, or several minutes, so it becomes less runny.
- Ice and finish. Dip the cooled cookies into the glaze or spread it over the tops with a knife. Let the icing set, then add a little extra key lime zest if desired.
Tips
Use properly softened butter
Butter has a large effect on the texture of these cookies. Properly softened butter should still hold its shape, but your finger should make a slight imprint when you press into it. Butter that is too hard will not cream well with the sugars. Butter that has started to melt can change the dough and make it harder to achieve the intended soft, chewy texture.
Do not overmix after adding flour
Beat the butter, sugars, egg, and vanilla until they are combined, but switch to a light touch once the flour mixture is added. Add the dry ingredients in thirds and stop mixing as soon as a dough forms. This keeps the dough from being worked more than necessary.
Watch the cookies rather than waiting for deep browning
These cookies do not need deeply browned edges to be done. For a soft center, take them out when the edges are just beginning to set and the centers still look a little puffy. The cookies will continue to settle as they cool on the pan, then finish cooling on the rack.
Shape smooth dough balls
Rolling the dough into smooth balls is a presentation preference rather than a flavor requirement. A cookie scoop can still portion the dough, but hand-rolled balls create a smoother, prettier surface.
Give the glaze time to thicken
The glaze should be thick enough to sit on the cookie while remaining easy to dip or spread. If it is runny, add a little more powdered sugar. If it is too thick, add liquid gradually. Resting the glaze for a few minutes before icing also makes it less runny.
Variations
- Use regular limes. Replace the key lime zest and juice with regular lime zest and juice when necessary. The flavor will be slightly different, but the cookies will still have a refreshing lime character.
- Boost the lime flavor. For a stronger lime note, use ½ teaspoon vanilla in the dough plus ½ teaspoon lime extract instead of the full teaspoon of vanilla extract.
- Change the shape slightly. The dough can be portioned with a cookie scoop, or rolled into smooth balls for a more polished look. The choice affects appearance, not the taste.
- Adjust the glaze. Dip the cookies, spread the icing with a knife, or leave some cookies unglazed. The cookies are enjoyable without the glaze, while the icing adds sweetness and more citrus flavor.
Storage
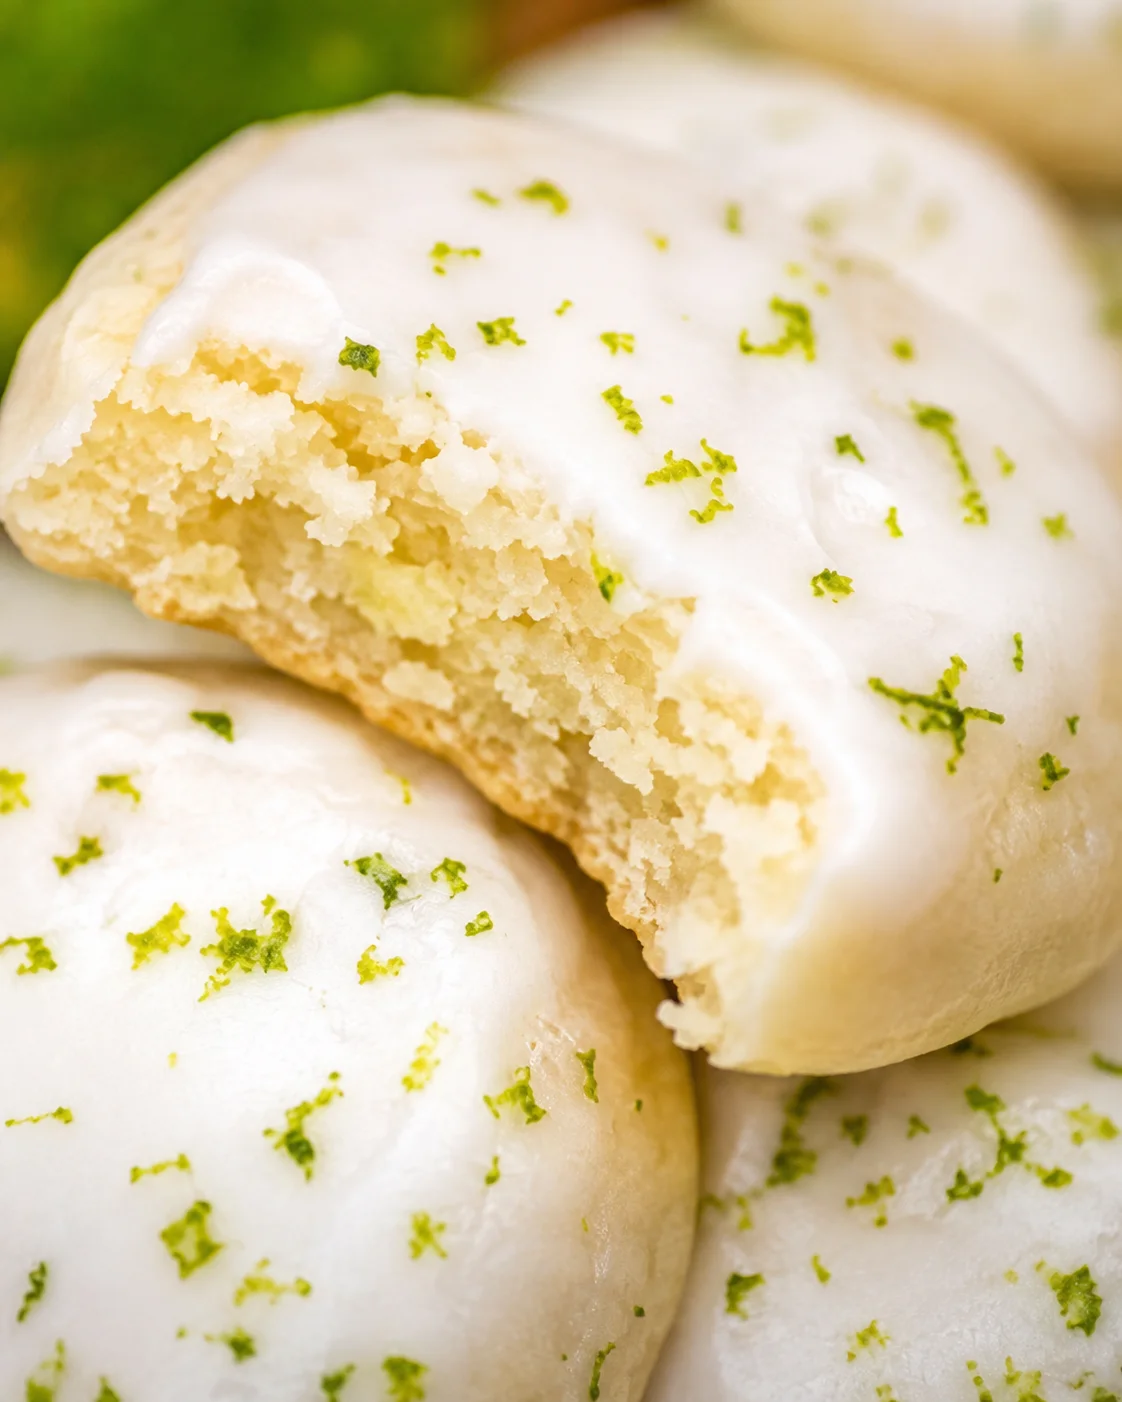
Keep the baked cookies in an airtight container at room temperature for up to 4–5 days. Their best texture is within the first three days, although they remain edible for the additional couple of days.
If preferred, refrigerate the cookies for about 5 days. For stacking, separate each cookie with parchment or wax paper so the icing does not stick to the cookie above it.
To freeze baked cookies, cool them completely first. Freezing them without the glaze is preferred because the glaze can be added after the cookies thaw, but the iced cookies can also be frozen if that is more convenient. Separate the cookies with parchment or wax paper before stacking.
Freezing the cookie dough
For make-ahead dough, roll it into balls before freezing. Place the dough balls in a freezer-safe bag or container, spaced apart until frozen. The dough can be frozen for up to 3 months.
Bake the dough directly from frozen by adding about 2–4 minutes to the baking time, or thaw it to room temperature and bake according to the normal directions. Begin checking for the soft, just-set edges early, since the exact timing can vary with the dough’s starting temperature.
Serving Suggestions
Serve these cookies once the icing has set, with the glaze left as a simple drizzle or finished with extra key lime zest. Their bright citrus flavor makes them a natural choice for a summer dessert spread, and they also pair well with coffee or tea. For a colorful cookie plate, serve them alongside other favorites such as chocolate chip, orange, lemon, or other citrus cookies.
The cookies can also be served without glaze for a less sweet finish. If you do glaze them, allow the icing to set before stacking or packing them so the tops stay neat.
FAQ
Do I need to chill the cookie dough?
No. Chilling is not normally required for this dough. If the shaped cookies spread too much, chill the dough balls for about 15 minutes before baking and then continue with the recipe.
Can I use regular limes instead of key limes?
Yes. Use regular lime zest in the dough and regular lime juice and zest in the glaze. Key limes are more tart and aromatic, but the difference is less noticeable once the cookies are baked, and regular limes still provide a refreshing result.
How do I know when the cookies are done?
Look for edges that are just beginning to set. The cookies may still be slightly puffy, and the edges generally will not be deeply brown. For a soft, chewy cookie, take them out just before they look completely finished. The recipe guidance gives an oven time in the 8–11 minute range, so begin checking early.
Why is my glaze too thin or too thick?
Adjust the glaze gradually. Add a little more powdered sugar if it is too thin, or a little more milk or key lime juice if it is too thick. Letting the mixed glaze rest for about 5–10 minutes also helps it become less runny before you dip or spread it.
Can I freeze these cookies?
Yes. Cool baked cookies completely before freezing. Freezing them without the glaze is preferred so you can glaze them after thawing, but iced cookies can also be frozen. Store the dough for up to 3 months, either as frozen balls to bake directly or thawed to room temperature before baking.
Nutrition
The listed nutrition information is an estimate: 123 calories, 21g carbohydrates, 1g protein, 4g fat, 3g saturated fat, 1g polyunsaturated fat, 1g monounsaturated fat, 1g trans fat, 17mg cholesterol, 76mg sodium, 19mg potassium, 1g fiber, 13g sugar, 129IU vitamin A, 1mg vitamin C, 6mg calcium, and 1mg iron.
PrintSoft, chewy cookies flavored with fresh key lime zest and finished with a sweet, tart key lime glaze. These cookies have a tender center and a refreshing citrus flavor, perfect for warm-weather baking or anytime you want a bright, lively dessert.
- Prep Time: 10 minutes
- Cook Time: 9 minutes
- Total Time: 30 minutes
- Yield: 24 cookies 1x
- Category: Dessert
Ingredients
- ½ cup unsalted butter (113g), softened to room temperature
- 1 large egg, at room temperature
- ¾ cup sugar (150g)
- ¼ cup light brown sugar (50g)
- 1 teaspoon vanilla extract (or ½ teaspoon vanilla extract plus ½ teaspoon lime extract for a stronger lime flavor)
- 2–3 teaspoons key lime zest
- 1¾ cups all-purpose flour (219g)
- ½ teaspoon baking soda
- ½ teaspoon salt
- For the key lime glaze:
- 1 cup powdered sugar
- 1 tablespoon key lime juice
- 1–2 tablespoons milk (to reach a thick but pourable consistency)
- ¼ teaspoon vanilla
- ½ teaspoon key lime zest
- A pinch of salt (optional)
Instructions
- Preheat the oven to 350°F (175°C). In a small bowl, whisk together the all-purpose flour, baking soda, and salt; set aside.
- In a large bowl, cream the softened butter, sugar, and light brown sugar using an electric hand mixer or stand mixer on high speed for 1–2 minutes until light and fluffy.
- Beat in the room-temperature egg and vanilla extract until fully incorporated.
- Mix in the key lime zest.
- Add the flour mixture gradually in about three parts, mixing just until each addition is incorporated. Avoid overmixing once the flour is added.
- Shape the dough into smooth balls about 1½ inches in diameter and arrange them on a parchment-lined cookie sheet, leaving space for spreading.
- If the dough appears likely to spread too much, chill the dough balls for about 15 minutes before baking (optional but not normally required).
- Bake in the preheated oven for about 8–10 minutes, checking early. The cookies are done when the edges just begin to set and the centers still look slightly puffy. They should not be deeply browned.
- Allow the cookies to rest on the cookie sheet for 2–3 minutes before transferring them to a wire rack to cool completely.
- Prepare the glaze by whisking together powdered sugar, key lime juice, milk, vanilla extract, key lime zest, and an optional pinch of salt. Adjust the consistency by adding more milk if too thick or more powdered sugar if too thin.
- Let the glaze rest for 5–10 minutes to thicken slightly.
- Dip the cooled cookies into the glaze or spread it over the tops with a knife.
- Allow the glaze to set completely before serving or storing.
Notes
Use room temperature butter that holds its shape but yields a slight indentation when pressed; this helps achieve the soft and chewy texture., Do not overmix after adding the flour to prevent tough cookies., Pull cookies from the oven just before edges are fully set to keep centers soft and tender., Rolling dough into smooth balls creates a neater appearance but is optional., Rest the glaze before icing to prevent it from being too runny., Cookies can be stored in an airtight container at room temperature for 4–5 days, refrigerated for up to 5 days, or frozen (preferably without glaze) for up to 3 months., Cookie dough balls can be frozen and baked directly from frozen, adding 2–4 minutes to baking time if needed.
Nutrition
- Serving Size: 1 cookie
- Calories: 123 calories per cookie
- Fat: 4g fat per cookie
- Carbohydrates: 21g carbohydrates per cookie
- Protein: 1g protein per cookie