Key Lime Cheesecake Recipe

Key lime cheesecake brings together a bright, tangy lime filling, a smooth and creamy cheesecake center, and a buttery Graham cracker crust. The finished dessert is rich and dense in the way a cheesecake should be, but the lime juice and zest keep each bite fresh rather than heavy. A softly sweet whipped topping adds a light finish, while berries, lime wedges, lime zest, or mint can add color when you are serving it for a spring or summer gathering.
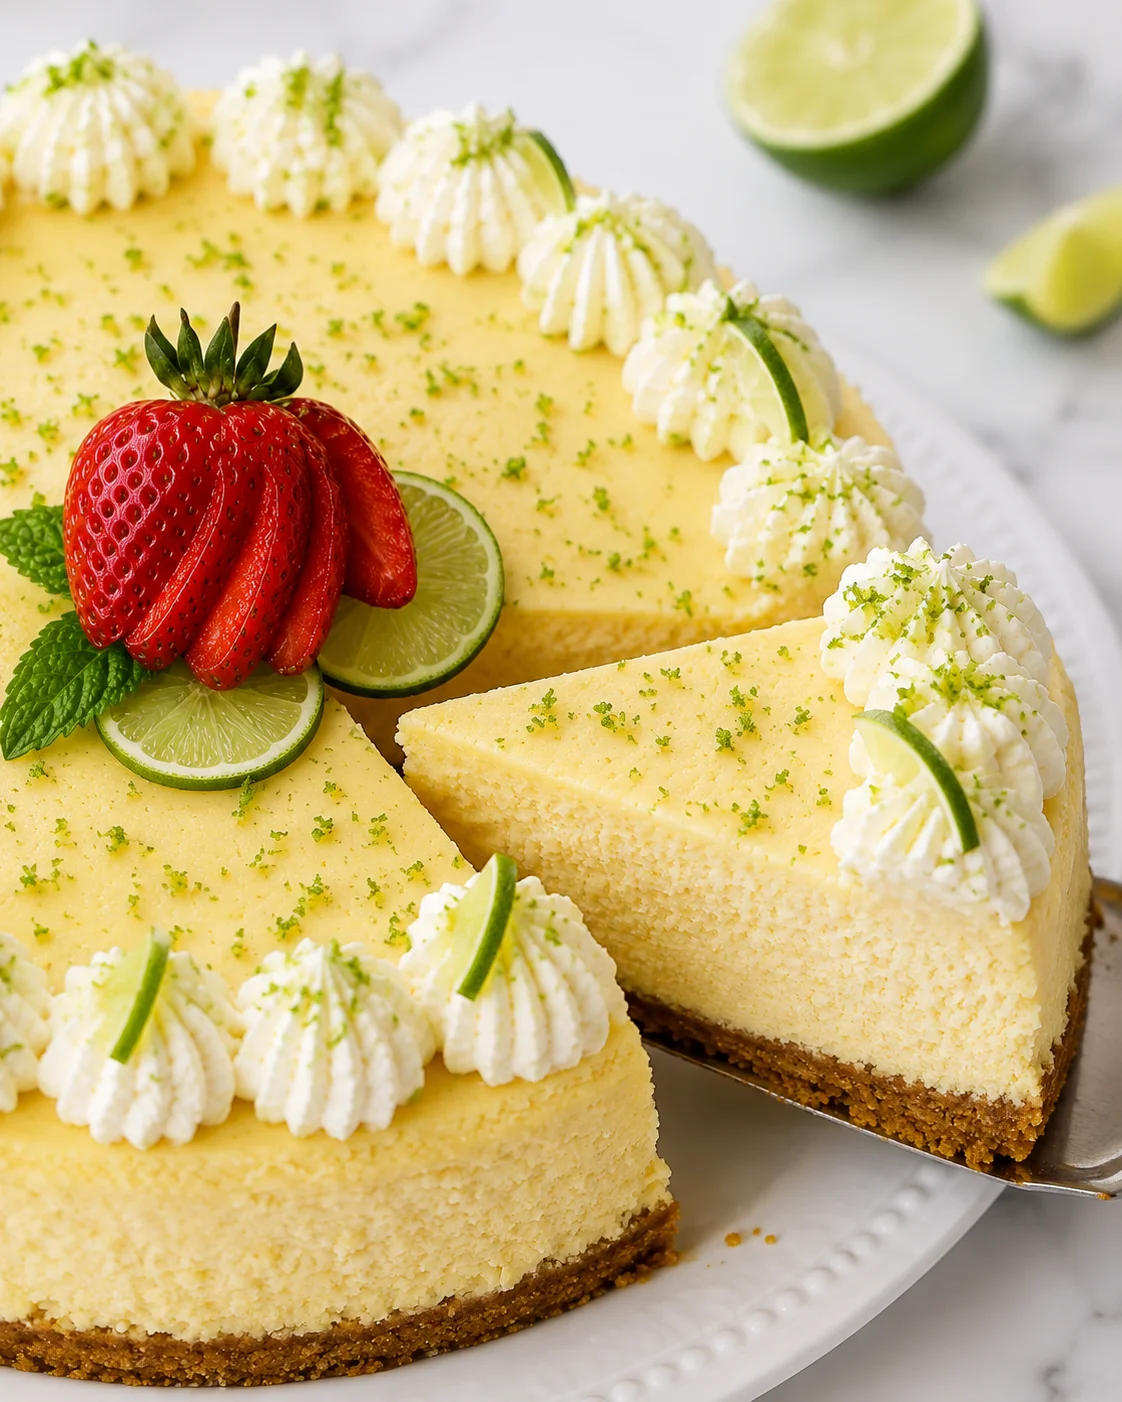
This key lime cheesecake recipe is designed around patient preparation rather than complicated pastry work. The crust is pressed firmly and baked before the filling goes in, the cheesecake cooks in a water bath, and the gradual cooling process gives the center time to settle. None of those steps is difficult, but each one matters. Once the cheesecake is chilled, it slices cleanly and can be finished well ahead of serving time.
The stabilized whipped cream is optional, but it is useful when you want the entire dessert ready in advance. Gelatin gives the whipped cream structure without changing its basic vanilla-and-cream flavor. If you prefer traditional whipped cream, leave out the gelatin and water and plan to add the topping just before serving.
Why You Will Love This
This is a dessert for anyone who wants an impressive cheesecake without building layers, making frosting, or juggling several complicated components. The filling is mixed in one bowl with an electric mixer, and much of the total time is hands-off baking, cooling, and chilling. The method is detailed because cheesecake rewards careful timing, but the individual tasks are straightforward.
The flavor is balanced between sweet cream cheese and lively citrus. Key lime juice and zest provide the main flavor, while the sour cream contributes moisture and a luxuriously creamy texture. The result is not meant to taste like a sharp lime pie filling; it is a full cheesecake with a fresh lime profile and a buttery crumb crust.
A water bath surrounds the springform pan with gentle, insulated heat. Along with room-temperature ingredients, restrained mixing after the eggs are added, and gradual cooling, it helps the cheesecake bake evenly and reduces the chance of a cracked or sunken center. The useful doneness cue is visual: firm edges with only a small, slightly wobbly circle in the middle.
Make-ahead planning is another reason to choose this recipe. The finished cheesecake can be refrigerated for up to 7 days, with the best texture and flavor described at 24 to 48 hours after making. It can also be frozen for up to 2 months. Stabilized whipped cream may be piped onto the cooled cheesecake before refrigeration, or it can be added later, so the topping does not have to be a last-minute task.
You also have practical options if a particular ingredient or piece of equipment is unavailable. Bottled key lime juice works, regular lime juice can be paired with lemon juice, and regular lime zest can stand in for key lime zest. A 9-inch springform pan is the easiest choice, but a 9-by-13-inch baking dish can be used for cheesecake bars with a shorter bake. The crust can use a favorite cookie, with the butter adjusted for filled vanilla sandwich cookies.
Ingredients
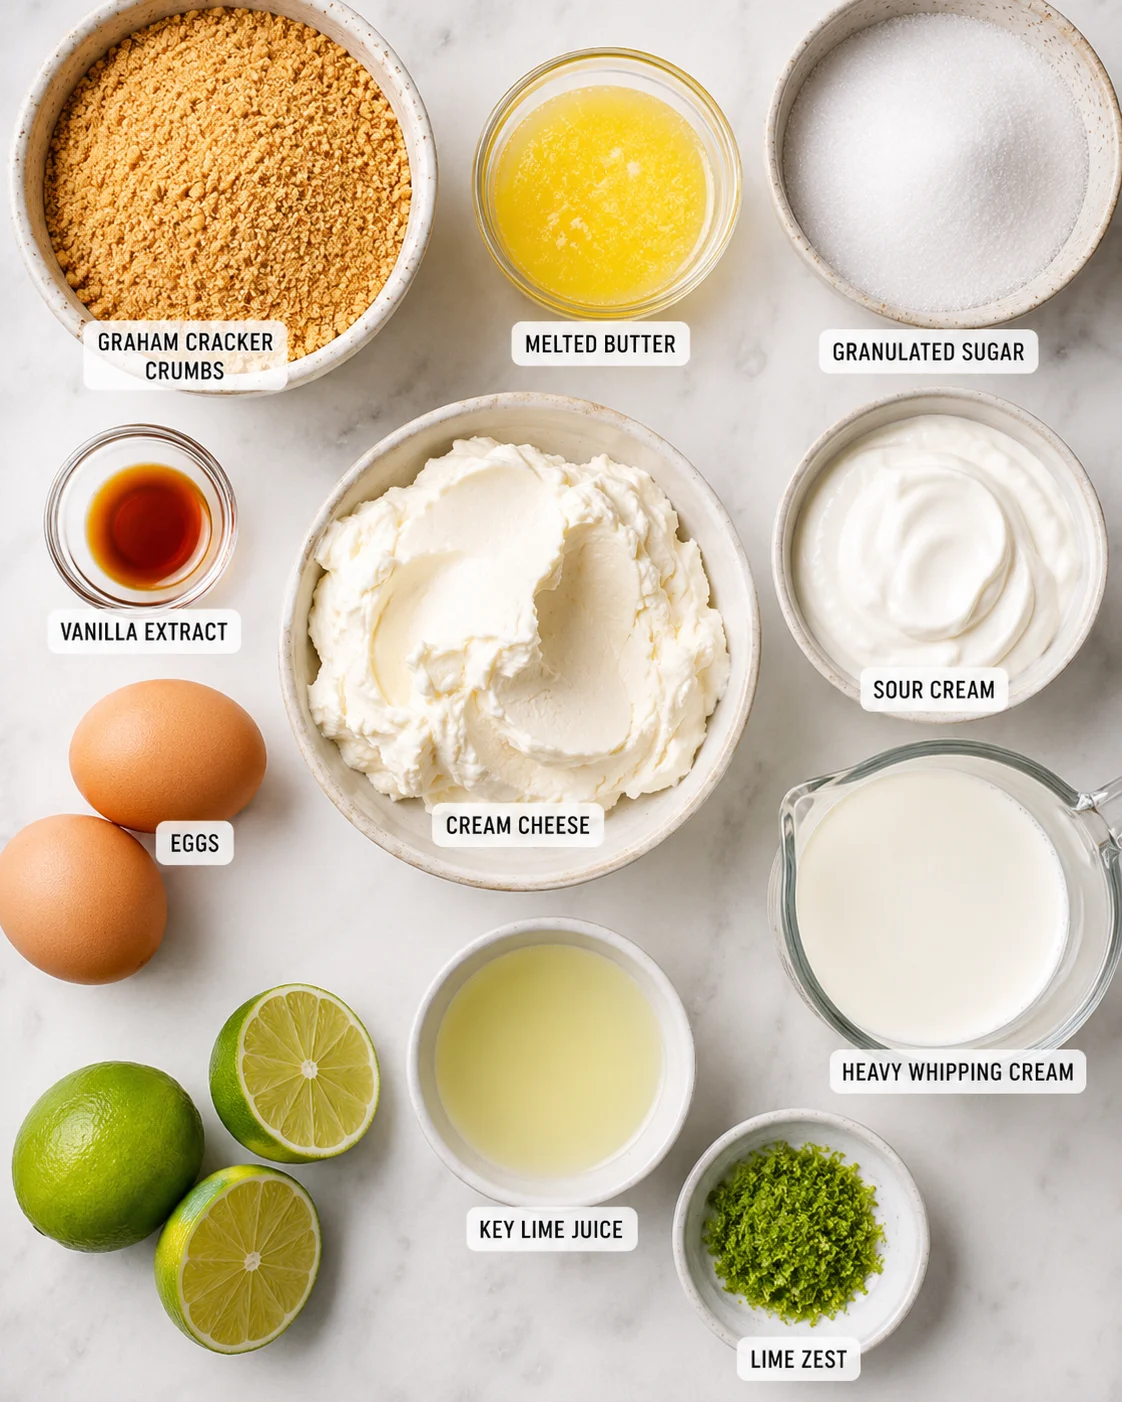
Gather the ingredients before beginning. Room-temperature cream cheese, sour cream, lime juice, eggs, and egg yolk blend more readily, which lets you mix the filling smoothly without needing to beat the eggs longer than necessary. Keep the heavy cream cold until you are ready to whip it.
Special Equipment
- 9-inch round springform pan: Use a pan that is about 2 3/4 inches high. A 10-inch springform pan can also be used, but the cheesecake will be shallower and the baking time should be reduced as needed.
- Slow cooker liner or large oven roasting bag: This is optional for the second waterproofing layer, but it is strongly recommended when using a water bath.
- 18-inch-wide heavy-duty aluminum foil: You will need two large 18-by-18-inch pieces for the first waterproofing layer.
- Large roasting pan: The roasting pan needs to hold the springform pan and enough water to reach halfway up its side.
- Parchment paper and nonstick cooking spray: Parchment helps the chilled cheesecake slide onto a platter, while greasing the pan helps prevent the filling from sticking to the sides.
- Electric mixer: Use a paddle attachment for the filling and a hand mixer or electric mixer for the whipped topping.
- Food processor, rolling pin, or side of a can: A food processor makes fine crumbs quickly. A sealable bag and a rolling pin or can work when you do not have one.
- Microwave-safe bowl and piping bag: These are needed only if you are making stabilized whipped cream.
For the Graham Cracker Crust
- 14 full Graham cracker sheets, or 2 scant cups crumbs: Honey Graham crackers keep the crust pleasantly neutral so the lime filling remains the focus. Fine crumbs compact more easily and make a less crumbly base.
- 3 tablespoons granulated sugar: This lightly sweetens the crust.
- 8 tablespoons unsalted butter, melted: Unsalted butter lets you control the salt in the crust and supplies the moisture that binds the crumbs.
For the Cheesecake Filling
- Four 8-ounce packages cream cheese, very soft: Full-fat cream cheese gives the filling the fullest flavor and creamiest texture. A lower-fat product can work, but reduced fat also means less richness. Do not use nonfat cream cheese. The cream cheese should be soft enough that a finger can press into it; otherwise, lumps are likely.
- 1 cup plus 2 tablespoons granulated sugar: This sweetens the filling while allowing the lime flavor to remain noticeable.
- 2 tablespoons cornstarch: Cornstarch helps the filling set. If needed, use 3 tablespoons flour in its place.
- 1 cup full-fat sour cream, at room temperature: Sour cream adds moisture, smoothness, and creaminess. Its flavor blends into the finished cheesecake.
- 1/2 cup key lime juice, at room temperature: Bottled or fresh key lime juice is fine. If key lime juice is unavailable, use 6 tablespoons regular Persian lime juice plus 2 tablespoons lemon juice.
- 1 teaspoon key lime zest: Regular lime zest can be used when key limes are not available.
- 1 1/2 teaspoons vanilla extract: A quality extract gives the filling a rounded vanilla note.
- Four large eggs plus one large egg yolk, all at room temperature: The eggs bind the filling, and the extra yolk contributes additional creaminess. Use five eggs in total, counting the yolk separately.
For the Whipped Topping
- 1 teaspoon unflavored gelatin: Use this for stabilized whipped cream. It gives the whipped cream structure.
- 1 1/2 tablespoons cold water: The water hydrates the gelatin.
- 1 cup cold heavy whipping cream: Heavy cream is essential for the stabilized version; other cream substitutions are not recommended. Take it from the refrigerator when you are ready to use it.
- 3 tablespoons powdered sugar: Powdered sugar works well with gelatin and sweetens the cream.
- 1 teaspoon vanilla extract: This flavors the topping.
Optional Toppings
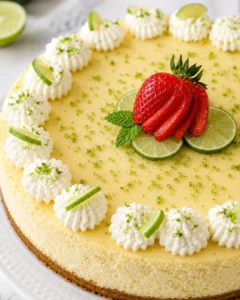
Finish the cheesecake with fresh raspberries, sliced strawberries, lime wedges, lime zest, and fresh mint. Use any combination you like, or leave the cheesecake with only its piped whipped topping. These additions are for serving and decoration rather than part of the filling.
Gluten-Free Crust Option
For a gluten-free version, use your favorite gluten-free cookies or gluten-free Graham crackers in the crust. Keep the crumb quantity close to 2 scant cups and follow the same sugar, butter, pressing, and baking method.
Instructions
Read through the complete method before starting. The cheesecake needs time to cool gradually and chill overnight, and the water bath is easiest to manage when the pan is prepared before it goes into the oven. Begin boiling about 4 quarts of water; you may not need all of it.
1. Prepare the Oven and Pan
- Preheat the oven to 325°F. Begin boiling a large pot of water for the water bath.
- Line the bottom of a 9-inch springform pan with parchment paper. Lightly grease the inside of the entire pan with nonstick cooking spray, including the sides. The parchment will make it easier to move the cheesecake to a platter later.
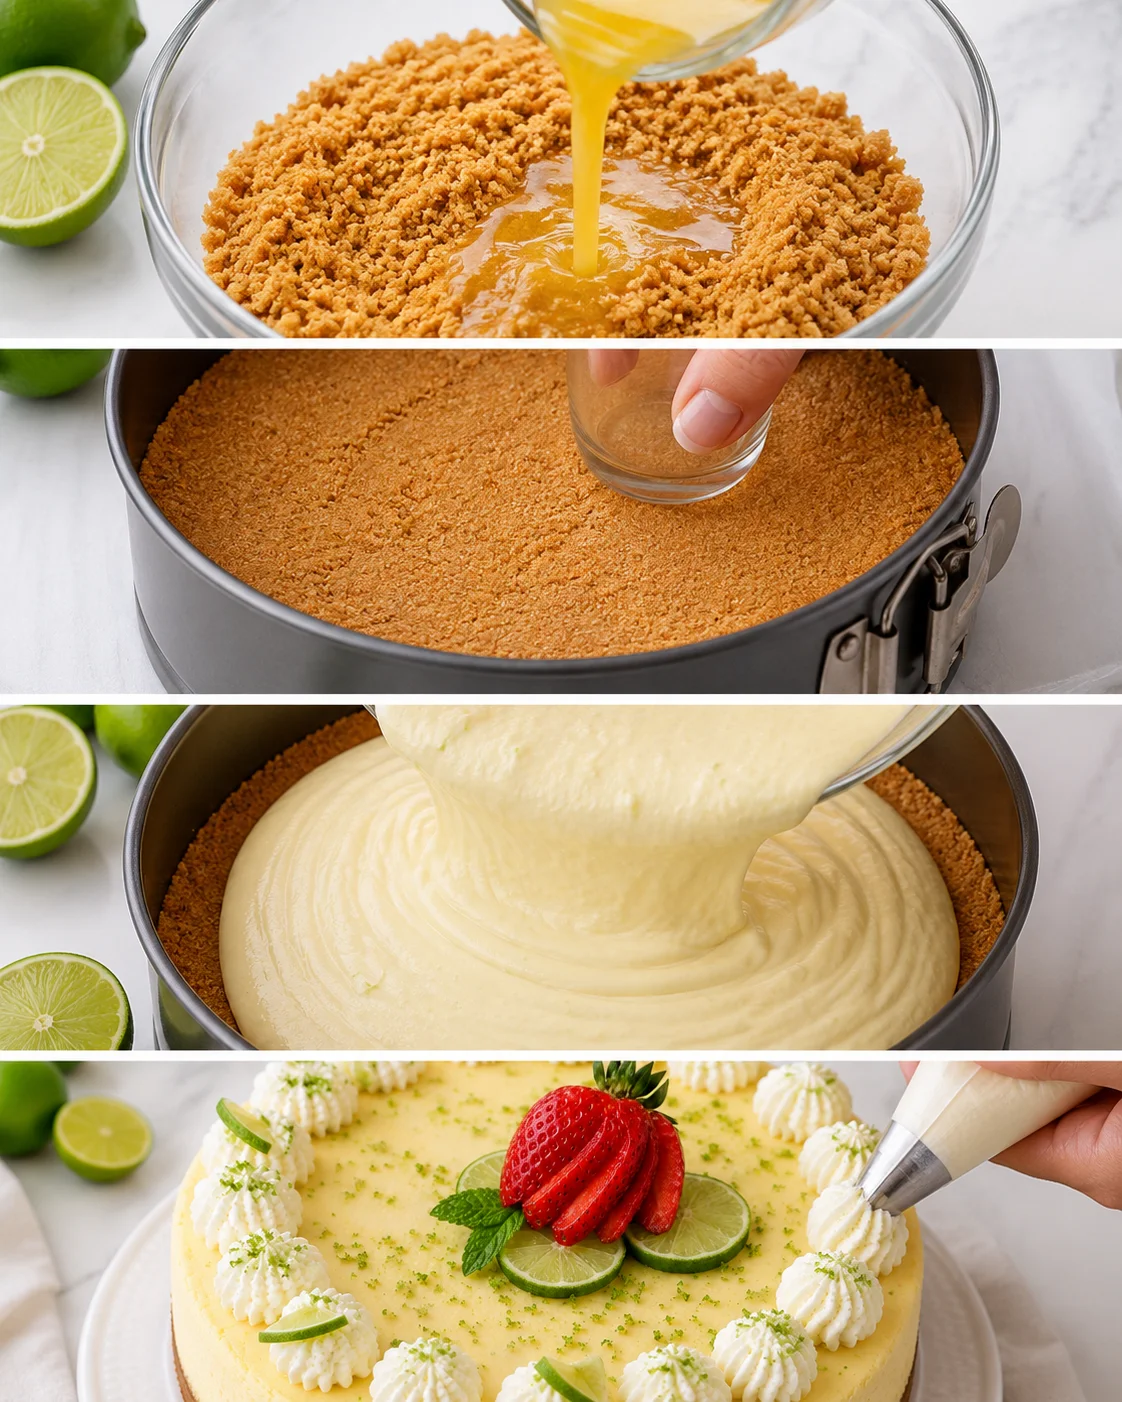
Preparing the pan completely at the beginning keeps the filling from sitting while you search for parchment or foil. Greasing the sides is also useful because the cheesecake contracts slightly as it cools; a filling that is stuck to the pan can pull and crack during that change.
2. Make and Bake the Crust
- Add the Graham crackers to a food processor and pulse until very finely ground. Alternatively, put the crackers in a sealable bag and crush them with a rolling pin or the side of a can.
- Add the melted butter and granulated sugar to the crumbs. Pulse until evenly moistened, or stir everything together in a bowl if you crushed the crackers separately.
- Transfer the crumb mixture to the greased springform pan. Press it firmly over the bottom in a level layer, using the bottom of a small bowl or measuring cup to compact it.
- Bake the crust at 325°F for 10 minutes. Cool it completely on a wire rack before adding the cheesecake filling. You can prepare the filling while the crust cools.
Fine crumbs are important here. Larger pieces leave gaps, while a finely ground mixture packs together into a more cohesive crust. Press from the center outward and pay attention to the edge, where a loose layer is most likely to crumble when a slice is lifted. Baking seals the crust, and cooling prevents the filling from making the base soggy.
3. Waterproof the Springform Pan
- Place two large 18-by-18-inch pieces of heavy-duty aluminum foil on a flat surface in a plus sign. Set the springform pan in the center and gently fold the foil up the sides. Fold carefully so you do not make holes.
- For the optional second layer, set the foil-lined pan in the center of the bottom of a slow cooker liner or large oven roasting bag. Bring the liner up to the top of the pan, gather the excess to one side, and tie it in a knot.
- If you skip the liner or roasting bag, double-wrap the springform pan with two additional layers of foil. The goal is to keep bath water from seeping through the springform seam and into the crust.
The water bath is helpful, but only when the pan is protected. Foil alone is not as dependable as the two-step method, because a small fold or hole can let water through. Do not place the cheesecake in the bath until the water protection is finished and the pan is ready to move as one stable package.
4. Mix the Cheesecake Filling
- Add the very soft cream cheese to the bowl of an electric mixer fitted with the paddle attachment. Beat on medium speed until light and fluffy, about 4 minutes. Do not shorten this step.
- Add the sugar and cornstarch. Beat on medium speed for 5 additional minutes. The long mixing time helps create a smooth, creamy base before the eggs enter the mixture.
- Add the sour cream, room-temperature lime juice, lime zest, and vanilla. Beat only until the ingredients are blended.
- Add the four eggs one at a time, followed by the egg yolk. After each addition, beat as little as possible, just until combined.
- Pour the filling onto the completely cooled crust. Tap the pan on the counter a few times to release large air bubbles.
Soft cream cheese is the first defense against lumps. If it is still firm, you can cube it and microwave it on a microwave-safe plate for 30 seconds, then continue in 15-second intervals, flipping or stirring the cubes each time. Stop as soon as it is very soft; the goal is to soften it, not cook it. Another option is to microwave the cubes in short intervals and let them sit at room temperature for about 30 minutes to finish softening.
Eggs behave differently from the cream cheese mixture. They trap air, and too much air can rise during baking, contribute to cracks, or make the cheesecake deflate. That is why the filling is beaten thoroughly before the eggs are added and mixed gently afterward. Room-temperature eggs, sour cream, lime juice, and cream cheese incorporate more easily, so you can use the shortest mixing time needed after each egg.
5. Set Up the Water Bath
- Place the waterproofed springform pan in the center of a large roasting pan.
- Put the roasting pan in the preheated oven before adding the water. Moving a heavy pan full of boiling water is more likely to cause sloshing.
- Using a glass liquid measuring cup or pitcher with a spout, carefully pour boiling water into a corner of the roasting pan. Add it slowly and keep the stream low so water does not splash onto the cheesecake.
- Continue adding water until it reaches halfway up the side of the springform pan.
The water around the springform pan creates an insulated baking environment. Adding it after the roasting pan is in the oven also gives you more control and keeps the heavy setup steady. Keep the oven door closed once the cheesecake is baking; a sudden draft or temperature drop can contribute to cracking.
6. Bake the Cheesecake
- Bake at 325°F for 65 to 85 minutes. Do not open the oven door before 65 minutes.
- Begin checking at 65 minutes. The edges should be firm, while only a small 2- to 3-inch circle in the center should still wobble slightly when the pan is gently shaken.
- If the jiggling area is larger than a few inches, continue baking and check again as needed. Ovens, pans, and mixing times vary, so the visual cue matters more than a single exact minute.
Cheesecake is creamiest when it is not baked until the middle is completely firm. The center continues to set as the cheesecake cools, so a small wobble is desirable. If there is no movement at all, the cheesecake may be overbaked; an overbaked filling can become dry and heavy, shrink as it cools, and crack.
7. Cool the Cheesecake Gradually
- Turn off the oven and crack the oven door open. Leave the cheesecake in the oven for 60 minutes.
- Remove the roasting pan from the oven, then remove the springform pan from the water bath and place it on a wire rack.
- Fill a large glass with hot water. Dip a thin-bladed knife in the water, or run the knife under hot water until hot. Wipe it dry and run it carefully around the edge of the cheesecake.
- Unclamp the springform pan. The warm knife helps loosen the filling from the sides as it contracts, which can help prevent cracking.
- Continue cooling the cheesecake on the counter for 2 to 3 hours, or until it is completely cool.
- Cover the cheesecake with foil or place it in a lidded cake caddy. Refrigerate overnight, with 24 hours preferred for the fullest flavor and most settled texture.
Cooling in stages is not a formality. Moving directly from a hot oven to a cold refrigerator creates a sharp temperature change, while gradual cooling gives the filling time to settle. The hot-knife step should be repeated as needed around the edge, with the blade wiped dry so water does not run onto the crust or filling.
8. Make the Whipped Topping
Choose stabilized or traditional whipped cream. For regular whipped cream, omit the gelatin and water and proceed with the cream, powdered sugar, and vanilla. Regular whipped cream is best added just before serving. For a make-ahead topping, use the stabilized method below.
- For stabilized whipped cream, add the unflavored gelatin to a microwave-safe bowl. Pour the cold water over it and let the mixture stand for 5 minutes.
- Microwave the gelatin mixture for 10 seconds. Stir it, then set it aside to cool slightly.
- While the gelatin cools, add the very cold heavy cream, powdered sugar, and vanilla to a large mixing bowl. Whip with an electric hand mixer just until soft peaks form. Soft peaks fold over when the beaters are lifted.
- Turn the mixer to low and slowly pour in the cooled gelatin mixture. Mix until it is well combined.
- Increase the speed to medium and continue mixing until stiff peaks form. Stiff peaks stand straight up when the beaters are lifted.
- Transfer the whipped cream to a piping bag fitted with a large tip. Pipe it onto the room-temperature cheesecake before refrigeration or at any time afterward.
- Garnish with berries, lime wedges, lime zest, and mint if desired.
The timing of the gelatin matters. It should be cool enough that it is not hot when added to the cream, but it should still be fluid. If it hardens before you are ready, microwave it again for 10 seconds and stir. Chilling the bowl and beaters for about 15 minutes is optional, but it can help the cream thicken more quickly and increase its volume.
9. Slice and Serve
- Fill a large glass with hot water and dip the knife in it before each cut.
- Wipe the blade clean with a paper towel after every cut, then rewarm it before making the next cut.
- Cut through the chilled cheesecake with the hot knife and serve.
A warmed, clean knife glides through the cold filling and leaves a neater edge. The wipe between cuts matters because crumbs and cream on the blade can drag across the next slice.
Tips for Success
Build a Firm, Dry Crust
Use fine crumbs rather than rough cracker pieces. The smaller particles create more contact with the butter and press into a tighter layer. A food processor takes only seconds, but a rolling pin or the side of a can inside a sealed bag works as well. Once the crumbs are in the pan, use the flat bottom of a cup or measuring cup to compact them firmly. A well-pressed base is less likely to crumble later.
Baking the crust for 10 minutes at 325°F gives it a chance to set before the moist filling is added. Let it cool completely on a wire rack. Adding filling to a hot crust can soften the crumb layer and make the base less distinct after baking.
Keep the Filling Smooth
Very soft cream cheese is essential. It should be soft enough for a finger to press into it. If it is not, use the careful microwave method: cube it, microwave for 30 seconds, then use 15-second intervals, flipping or stirring between intervals. A microwave-safe plate and close attention help prevent scorching. You can also let the cubed cream cheese rest at room temperature for about 30 minutes after a few short microwave intervals.
Beat the cream cheese for about 4 minutes, then beat in the sugar and cornstarch for 5 minutes. This is longer than a quick stir, but it establishes the smooth base that the rest of the ingredients depend on. Scrape the bowl if needed so no firm cream cheese remains along the sides.
Once the eggs are added, slow down. Add them one at a time and mix only until each disappears into the batter. Eggs can trap air, and excessive beating can create bubbles that expand in the oven. It can also encourage cracking and deflation. The filled pan can be tapped gently on the counter a few times to release larger bubbles before it goes into the water bath.
Use the Water Bath Carefully
Two crossed pieces of 18-by-18-inch heavy-duty foil form the first waterproofing layer. Fold them gently around the pan rather than pressing hard against the metal, since sharp folds can create holes. A slow cooker liner or large baking bag gathered and tied around the foil-covered pan supplies a second layer. If you do not use it, add two more foil layers.
Place the springform pan in the roasting pan before pouring in the boiling water. Use a glass measuring cup or pitcher with a spout, pour into a corner, and add water slowly until it reaches halfway up the springform. This arrangement reduces movement and helps keep water out of the cheesecake.
Read the Doneness Cue
Start checking at 65 minutes, but do not open the oven earlier. The edges should look firm. The center should have a small 2- to 3-inch circle that wobbles slightly when the pan is gently shaken. A much larger jiggling circle needs more time. A completely motionless center can mean the cheesecake has gone too far and may be dry or heavy after cooling.
Ovens, pans, and beating times differ, so the 65-to-85-minute range is a guide rather than a promise of one exact finish time. A slightly wobbly center is not rawness; the filling continues setting during its long cool and overnight chill.
Avoid Cracks
- Use room-temperature ingredients: Eggs, sour cream, lime juice, and softened cream cheese combine more easily, reducing the need to overmix.
- Do not overbeat the eggs: Mix as little as possible once they are added.
- Grease the pan: The filling can contract without pulling against stuck sides.
- Use a water bath: The water insulates the outer edges so they do not bake much faster than the middle.
- Keep the oven closed early: Do not open the door before 65 minutes. A draft and a sudden temperature drop can cause a sinking center or large cracks.
- Do not overbake: Firm edges and a small center wobble are the target.
- Cool gradually: Leave the cheesecake in the turned-off oven with the door cracked for 60 minutes, then cool it on the counter before refrigerating.
If a crack does appear, cover the entire top with whipped cream and add raspberries if desired. The topping provides a simple finish for an imperfect surface without changing the cheesecake underneath.
Whipped Cream Troubleshooting
Use heavy whipping cream and keep it very cold. Chilling the bowl and beaters for about 15 minutes can help, though it is not essential. For stabilized whipped cream, allow the gelatin to stand in water for 5 minutes, microwave for 10 seconds, stir, and cool it slightly. It should be fluid when it goes into the soft-peaked cream. If it has set, microwave it again for 10 seconds.
Stop mixing as soon as stiff peaks form. Over-whipped cream becomes grainy. If it has only just reached a grainy stage, try adding a few tablespoons of fresh cream and gently mixing by hand with a wire whisk. If the cream has separated, it cannot be fixed. Traditional whipped cream should be piped just before serving; stabilized whipped cream can be piped onto the cooled cheesecake in advance.
Variations and Substitutions
Lime Juice and Zest
Fresh or bottled key lime juice can be used. Bottled key lime juice is often found near regular lime juice. If key limes are unavailable, use 6 tablespoons regular Persian lime juice plus 2 tablespoons lemon juice. The lemon adds the brighter acidity that makes the substitute closer to key lime juice. Regular lime zest is suitable when key lime zest is not available.
Fresh key limes are small, so juicing them takes longer than juicing larger limes. About 20 key limes yielded 1/2 cup of juice in the original quantity. A citrus press can help; press each half down again with your fingers while it is still in the juicer because small limes can compact below the press and leave juice behind. Strain freshly squeezed juice through a fine-mesh sieve to remove small seeds.
Crust Options
Replace the Graham crackers with a favorite cookie, using about 2 scant cups of crumbs. Shortbread cookies and vanilla wafers can be mixed with the sugar and butter as written. Vanilla sandwich cookies already contain a filling that helps bind their crumbs, so reduce the butter to 4 tablespoons when using them. Gluten-free Graham crackers or another favorite gluten-free cookie can be used for a gluten-free crust.
Whipped Topping
Use traditional whipped cream by omitting the gelatin and water. It should be added just before serving. Use the stabilized version when you want to pipe the cream 1 to 2 days in advance or place it on the cheesecake before the cheesecake goes into the refrigerator. You can pipe the topping around the edge only or cover the entire top.
Fruit Toppings
Add raspberries or strawberries as a garnish. For a different fruit finish, cover the cheesecake with raspberries and add a layer of whipped topping beneath them. The topping can remain simple, with lime zest and a few wedges, or it can be arranged with sliced strawberries and fresh mint.
Alternative Pan
A springform pan is the most practical choice because it is tall enough for the filling and opens at the sides for easy removal. If you do not have one, use a 9-by-13-inch baking dish and make cheesecake bars. Bake the bars at 325°F for approximately 45 to 55 minutes, watching for firm edges and a slight center wobble. A standard cake pan is not recommended because it is not deep enough and makes the chilled cheesecake difficult to remove.
Storage
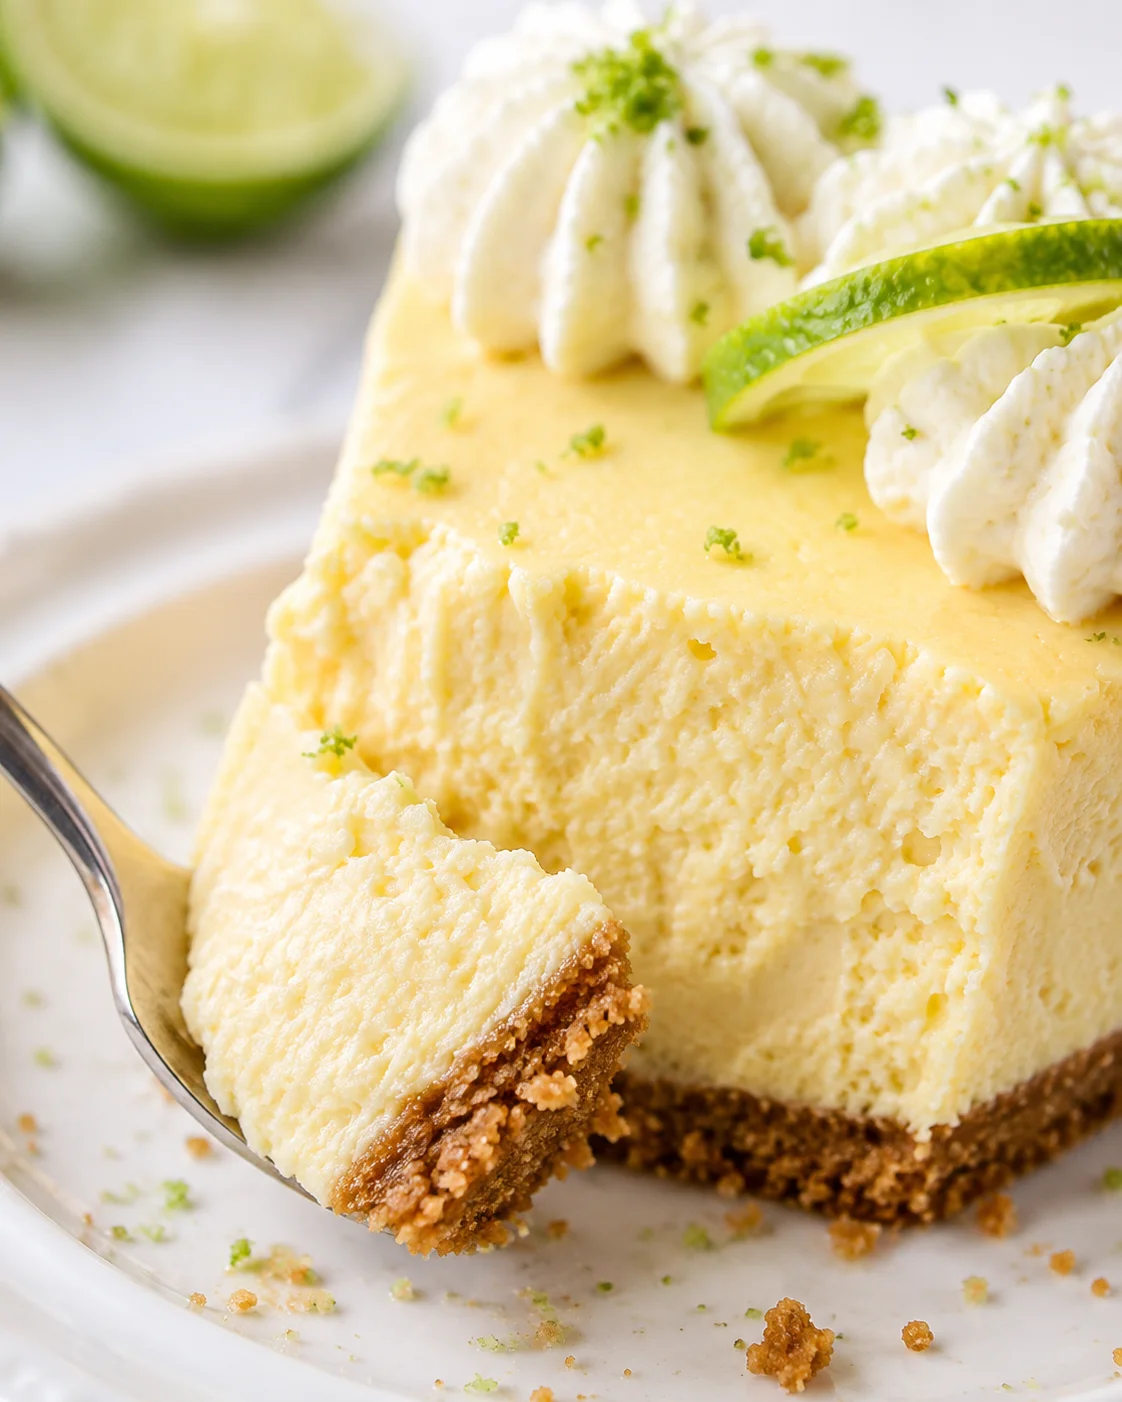
Cover the cheesecake and store it in the refrigerator. It is at its prime 24 to 48 hours after making and is good for up to 7 days. A cake container is useful because it protects the piped whipped cream from being pressed flat. Without one, cover the cheesecake with a large inverted bowl or tent it loosely with foil.
Make Ahead
The complete cheesecake can be assembled, baked, cooled, and chilled ahead of time. For a staged preparation, bake and cool the crust, cover it with foil, and keep it at room temperature for up to 24 hours before adding the filling. The uncooked cheesecake filling can be beaten, covered, and chilled for up to 48 hours; whisk it before spreading it over the cooled crust and baking.
Stabilized whipped cream can be whipped, transferred to a piping bag, and refrigerated for 1 to 2 days before use. You can pipe it onto the room-temperature cheesecake before chilling or add it after the cheesecake has chilled. Traditional whipped cream should be held for just before serving so it retains its best shape.
Freezing
- Cool the cheesecake completely and refrigerate it for at least 8 hours.
- Place the chilled cheesecake on a baking pan and freeze it uncovered until firm.
- Remove it from the freezer and wrap it first in plastic wrap, then in heavy-duty aluminum foil, and finally in a large heavy-duty freezer bag.
- Freeze for up to 2 months.
- To thaw, move the wrapped cheesecake from the freezer to the refrigerator and let it thaw overnight.
- Top with whipped cream and serve.
Freezing the chilled cheesecake uncovered until firm helps the surface set before wrapping. The multiple layers of wrapping protect it during storage. Add the whipped topping after thawing so it is fresh when the cheesecake reaches the table.
Serving Suggestions
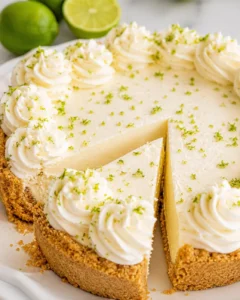
For the cleanest slices, serve the cheesecake well chilled and use the hot-knife method: dip a thin knife in hot water, wipe it dry, make one cut, clean the blade, and repeat. Pipe stabilized whipped cream around the edge or over the entire top. Add lime wedges, lime zest, sliced strawberries, raspberries, or fresh mint for a colorful finish.
This dessert suits spring and summer get-togethers, Easter entertaining, and any meal that benefits from a make-ahead finish. The tangy filling is substantial enough for a special dessert, while the citrus keeps the presentation bright. If the cheesecake has a crack, cover the surface with whipped cream and berries before slicing.
Planning the Texture and Finish
The texture of this cheesecake develops in stages. The baked crust begins firm and buttery, while the filling is still delicate when it leaves the oven. During the 60-minute rest in the turned-off oven, the center continues to settle without the shock of a sudden temperature change. The additional 2 to 3 hours on the counter let the pan cool completely, and the overnight refrigerator rest gives the cheesecake its sliceable structure.
That timing is why it helps to think of this as a dessert to schedule rather than a dessert to rush. The cheesecake may be served after at least 12 hours of chilling, but a full 24 hours is recommended for the best flavor. At 24 to 48 hours, the lime and vanilla notes have had time to mingle with the creamy filling, and the cold texture is firm enough for clean cuts without losing its soft cheesecake quality.
There are several points where the finished texture is protected. Very fine crumbs make the crust cohesive. Fully softened cream cheese keeps the batter smooth. The long cream cheese and sugar mixing time builds a light, even base, while the short mixing time after the eggs limits trapped air. Sour cream adds moisture, and the extra egg yolk contributes creaminess. A slightly wobbly center at the end of baking is part of the plan because it will firm as the cheesecake cools and chills.
The topping can be matched to your schedule. Traditional whipped cream is a simple, fresh finish, but it belongs close to serving time because it can lose its shape. Stabilized whipped cream takes a few extra steps, yet gelatin gives it enough structure to be piped onto the room-temperature cheesecake before the cheesecake is refrigerated. It can also be prepared in a piping bag 1 to 2 days ahead. The gelatin does not replace the cold cream or the soft- and stiff-peak cues; it supports the whipped cream after those stages are reached.
For a clean presentation, protect the top while the cheesecake chills. A cake caddy leaves space for piped cream, while a large inverted bowl or a loose foil tent can work when a caddy is not available. If you are freezing the cheesecake, add the whipped cream after thawing. This keeps the topping separate from the wrapping and lets you choose a fresh garnish at serving time.
Slice only after the cheesecake is thoroughly chilled. A hot knife warms a narrow path through the cold filling, and wiping the knife after every cut prevents cream and crumbs from marking the next slice. The same small routine makes the difference between a rough cut and a clean wedge that shows the distinct crust, creamy lime center, and whipped topping.
A Simple Make-Ahead Schedule
For a relaxed serving day, bake the cheesecake one or two days before the gathering. On baking day, prepare the crust, mix the filling, set up the protected water bath, and bake. Let the cheesecake cool for 60 minutes in the turned-off oven, then cool it on the counter for 2 to 3 hours and refrigerate it overnight. The following day, it can remain covered in the refrigerator while the flavor and texture continue to settle.
If you need to divide the work further, bake and cool the crust up to 24 hours ahead and keep it covered at room temperature. The mixed filling can be covered and chilled for up to 48 hours; whisk it before pouring it over the cooled crust. Stabilized whipped cream can be prepared and placed in a piping bag 1 to 2 days ahead. This gives you several ways to fit the dessert around the rest of a meal without changing the baking sequence.
On serving day, add the topping if it is not already piped, arrange the fruit and lime garnish, and keep the cheesecake cold until slicing. If the cheesecake is frozen, thaw it overnight in the refrigerator before adding whipped cream. Whether it is made in one day or assembled in stages, the same visual cues remain important: a compact crust, a smooth filling, firm edges, and a small center wobble before the long cool.
FAQ
Can I use regular lime juice instead of key lime juice?
Yes. Use 6 tablespoons regular Persian lime juice plus 2 tablespoons lemon juice in place of the 1/2 cup key lime juice. Regular lime juice is very similar, while the lemon supplies an extra hint of bright acidity. You can also use bottled regular lime juice or bottled key lime juice.
Can I use bottled lime juice?
Yes. Bottled key lime juice or traditional lime juice works in the filling. If you have access to bottled key lime juice, choose it for the closest match to the recipe’s intended citrus flavor. Fresh lime zest still adds useful aroma, and either key lime or regular lime zest can be used.
How do I soften cream cheese for a smooth filling?
Cube the cream cheese and put it on a microwave-safe plate. Microwave for 30 seconds, then continue in 15-second intervals, flipping or stirring the cubes each time, until the cream cheese is very soft. Watch it carefully so it does not scorch. You can also give the cubed cream cheese a few short microwave intervals and then let it sit at room temperature for about 30 minutes. It should be soft enough for a finger to press into it before you begin mixing.
Why does this recipe use sour cream?
Sour cream contributes moisture, smoothness, and creaminess to the filling. Full-fat sour cream at room temperature is recommended. Its flavor blends into the cheesecake, so it does not make the finished dessert taste like a separate sour cream topping.
Why do I need a springform pan?
A 9-inch springform pan is tall enough for the cheesecake and opens at the side, making it easier to remove and slice the chilled dessert. A 10-inch springform can be used, but reduce the baking time as needed because the filling will be shallower. If you do not have a springform pan, use a 9-by-13-inch baking dish for bars and bake them at 325°F for about 45 to 55 minutes. A cake pan is not deep enough and makes removal difficult.
Why use a roasting pan and water bath?
The roasting pan holds the springform pan and the boiling water. Water reaching halfway up the springform pan surrounds the cheesecake with gentle, insulated heat, helping the outer edges bake at a pace closer to the middle. Waterproof the springform first with crossed foil and, preferably, a slow cooker liner or large baking bag.
How do I know when the cheesecake is done?
Check it after 65 minutes, without opening the oven before that point. The edges should be firm and only a small 2- to 3-inch circle in the center should wobble slightly when the pan is gently shaken. If the moving area is larger, continue baking. If the center is completely firm, the cheesecake may be overbaked and can become dry, heavy, or more likely to crack as it cools.
Why did my cheesecake crack?
Common causes include overbeating the eggs, baking until the center is fully firm, opening the oven too early, letting the cheesecake cool too quickly, or allowing the filling to stick to an ungreased pan. Use room-temperature ingredients, mix the eggs only until combined, keep the oven closed for at least the first 65 minutes, use a water bath, grease the pan, and cool the cheesecake gradually in the turned-off oven before moving it to the counter and refrigerator.
Can I make the whipped cream ahead?
Yes, if you make stabilized whipped cream with gelatin. The gelatin is hydrated in cold water, microwaved for 10 seconds, cooled slightly, and mixed into cream that has reached soft peaks. The stabilized cream can be piped onto the room-temperature cheesecake before refrigeration or added later. It can also be placed in a piping bag and refrigerated for 1 to 2 days. For traditional whipped cream, omit the gelatin and water and add the topping just before serving.
What if the gelatin hardens before I add it?
Microwave it again for 10 seconds and stir. The gelatin should be cool enough not to be hot when it enters the whipped cream, but fluid enough to pour slowly while the mixer runs on low. Do not let it sit so long that it becomes firm in the bowl.
Can I freeze key lime cheesecake?
Yes. Refrigerate the fully cooled cheesecake for at least 8 hours, freeze it uncovered on a baking pan until firm, then wrap it in plastic wrap, heavy-duty foil, and a large heavy-duty freezer bag. Freeze for up to 2 months. Thaw it overnight in the refrigerator and add whipped cream after thawing.
How long does key lime cheesecake keep?
Keep it covered in the refrigerator for up to 7 days. The texture and flavor are at their prime 24 to 48 hours after making. A cake container, large inverted bowl, or loose foil tent can protect the topping while the cheesecake is refrigerated.
How should I slice the cheesecake?
Use a thin knife warmed in hot water. Wipe the blade dry, make one cut, clean it with a paper towel, and warm it again before the next cut. This lets the knife glide through the cold cheesecake and keeps each slice’s edge clean.
Can I hide a crack?
Yes. Spread or pipe whipped cream over the entire top, then add raspberries if desired. The topping covers the surface while adding a fresh contrast to the lime filling. A crack does not prevent the cheesecake from being sliced and served.
How can I juice fresh key limes?
Key limes are small and may take about 10 minutes to juice. About 20 key limes yielded 1/2 cup of juice for this quantity. A citrus press is useful; press each lime half down again with your fingers while it is still in the juicer because small halves can compact below the reach of the press. Strain the juice through a fine-mesh sieve before measuring it to remove small seeds.
What can I use if I do not have a food processor?
Place the Graham crackers in a sealable bag and crush them with a rolling pin or the side of a can. Continue until the crumbs are very fine, then stir them with the melted butter and sugar in a bowl. The same compact pressing and 10-minute baking steps apply.
Can I make this crust gluten-free?
Use gluten-free Graham crackers or your favorite gluten-free cookie, keeping the crumb quantity near 2 scant cups. Combine the crumbs with the sugar and melted butter, press them firmly into the pan, and bake as directed before cooling and adding the filling.
With a firmly pressed crust, a smooth filling, a protected water bath, and a gradual cool, this key lime cheesecake becomes a calm make-ahead project rather than a last-minute dessert. Give it the overnight chill it needs, add the topping at the stage that suits your schedule, and use a hot knife for neat slices when it is time to serve.
PrintA rich and creamy cheesecake with a bright, tangy key lime filling and a buttery graham cracker crust, topped with optionally stabilized whipped cream.
- Prep Time: 30 minutes
- Cook Time: 1 hour 20 minutes
- Total Time: 24 hours 50 minutes
- Yield: 12 servings 1x
- Category: Dessert
- Cuisine: American
Ingredients
- 14 full Graham cracker sheets or 2 scant cups crumbs
- 3 tablespoons granulated sugar (for crust)
- 8 tablespoons unsalted butter, melted (for crust)
- Four 8-ounce packages cream cheese, very soft (full-fat)
- 1 cup plus 2 tablespoons granulated sugar (for filling)
- 2 tablespoons cornstarch (or 3 tablespoons flour as substitute)
- 1 cup full-fat sour cream, at room temperature
- 1/2 cup key lime juice (bottled or fresh) or 6 tablespoons regular Persian lime juice plus 2 tablespoons lemon juice
- 1 teaspoon key lime zest (or regular lime zest)
- 1 1/2 teaspoons vanilla extract (for filling)
- Four large eggs plus one large egg yolk, all at room temperature
- 1 teaspoon unflavored gelatin (for stabilized whipped cream, optional)
- 1 1/2 tablespoons cold water (for gelatin hydration)
- 1 cup cold heavy whipping cream (for topping)
- 3 tablespoons powdered sugar (for topping)
- 1 teaspoon vanilla extract (for topping)
Instructions
- Preheat oven to 325°F. Boil about 4 quarts of water for the water bath.
- Line bottom of a 9-inch springform pan with parchment paper and lightly grease sides with nonstick spray.
- Prepare graham cracker crust: crush crackers finely, mix with melted butter and 3 tablespoons sugar; press firmly into pan bottom; bake 10 minutes at 325°F; cool completely.
- Waterproof the springform pan by wrapping with two large crossed pieces of heavy-duty foil. Optionally, place wrapped pan inside slow cooker liner or roasting bag and tie the top to prevent water seepage.
- Prepare cheesecake filling: beat very soft cream cheese on medium speed for 4 minutes until light and fluffy. Add sugar and cornstarch; beat 5 minutes. Mix in sour cream, lime juice, zest, and vanilla until blended.
- Add eggs one at a time plus egg yolk, mixing gently after each addition just until combined.
- Pour filling onto cooled crust and tap pan to release air bubbles.
- Place foil-wrapped springform pan into a large roasting pan. Place roasting pan into oven and slowly pour boiling water into roasting pan until it reaches halfway up sides of springform pan.
- Bake cheesecake at 325°F for 65 to 85 minutes. From 65 minutes on, check for doneness: edges firm, center slightly wobbling in a 2- to 3-inch circle.
- Turn oven off and crack door open. Leave cheesecake in oven for 60 minutes.
- Remove pan from water bath and set on wire rack. Run heated knife around pan edges to loosen cheesecake, then unclamp springform pan.
- Cool cheesecake on counter for 2 to 3 hours, then cover with foil or place in cake caddy and refrigerate overnight (24+ hours recommended).
- To make stabilized whipped cream (optional): hydrate gelatin in cold water for 5 minutes, microwave 10 seconds, stir and cool slightly.
- Whip cold heavy cream, powdered sugar, and vanilla to soft peaks. With mixer on low, slowly add cooled gelatin mix. Whip to stiff peaks.
- Pipe stabilized whipped cream onto room-temperature cheesecake before refrigerating or add later before serving.
- For traditional whipped cream, omit gelatin and water; whip cream, powdered sugar, and vanilla to stiff peaks and add topping just before serving.
- To serve: dip thin knife in hot water, wipe dry, and slice chilled cheesecake. Clean and warm knife between cuts for neat slices.
- Optionally garnish with fresh raspberries, sliced strawberries, lime wedges, lime zest, and mint.
Notes
Use room-temperature cream cheese, sour cream, lime juice, and eggs for best mixing and smooth texture., Avoid overmixing after adding eggs to prevent cracking and deflation., Use a water bath with proper waterproofing to bake cheesecake evenly and reduce cracking., Allow gradual cooling in oven then on counter to settle texture and prevent cracking., Use stabilized whipped cream for make-ahead topping to maintain shape; traditional whipped cream is best added just before serving., Graham cracker crust can be substituted with other cookies, adapting butter amount when using sandwich cookies., For gluten-free crust, substitute with gluten-free cookies or crackers of similar crumb amount., Cheesecake is best after 24 to 48 hours chilling but can be refrigerated up to 7 days or frozen up to 2 months., Freeze by chilling cheesecake first, freezing uncovered until firm, then wrapping tightly. Thaw overnight in refrigerator before serving.
Nutrition
- Serving Size: 1 slice
- Calories: 450 per serving
- Fat: 35 g per serving
- Carbohydrates: 30 g per serving
- Protein: 7 g per serving