No-Bake Key Lime Pie

When you want a dessert with bright lime flavor but do not want to turn on the oven, this key lime pie recipe is a practical answer. It has a buttery graham cracker crust, a smooth cream cheese filling, and a light, airy finish from whipped topping. The pie is creamy and tangy, but the filling chills firm enough to slice cleanly when you give it the time it needs.
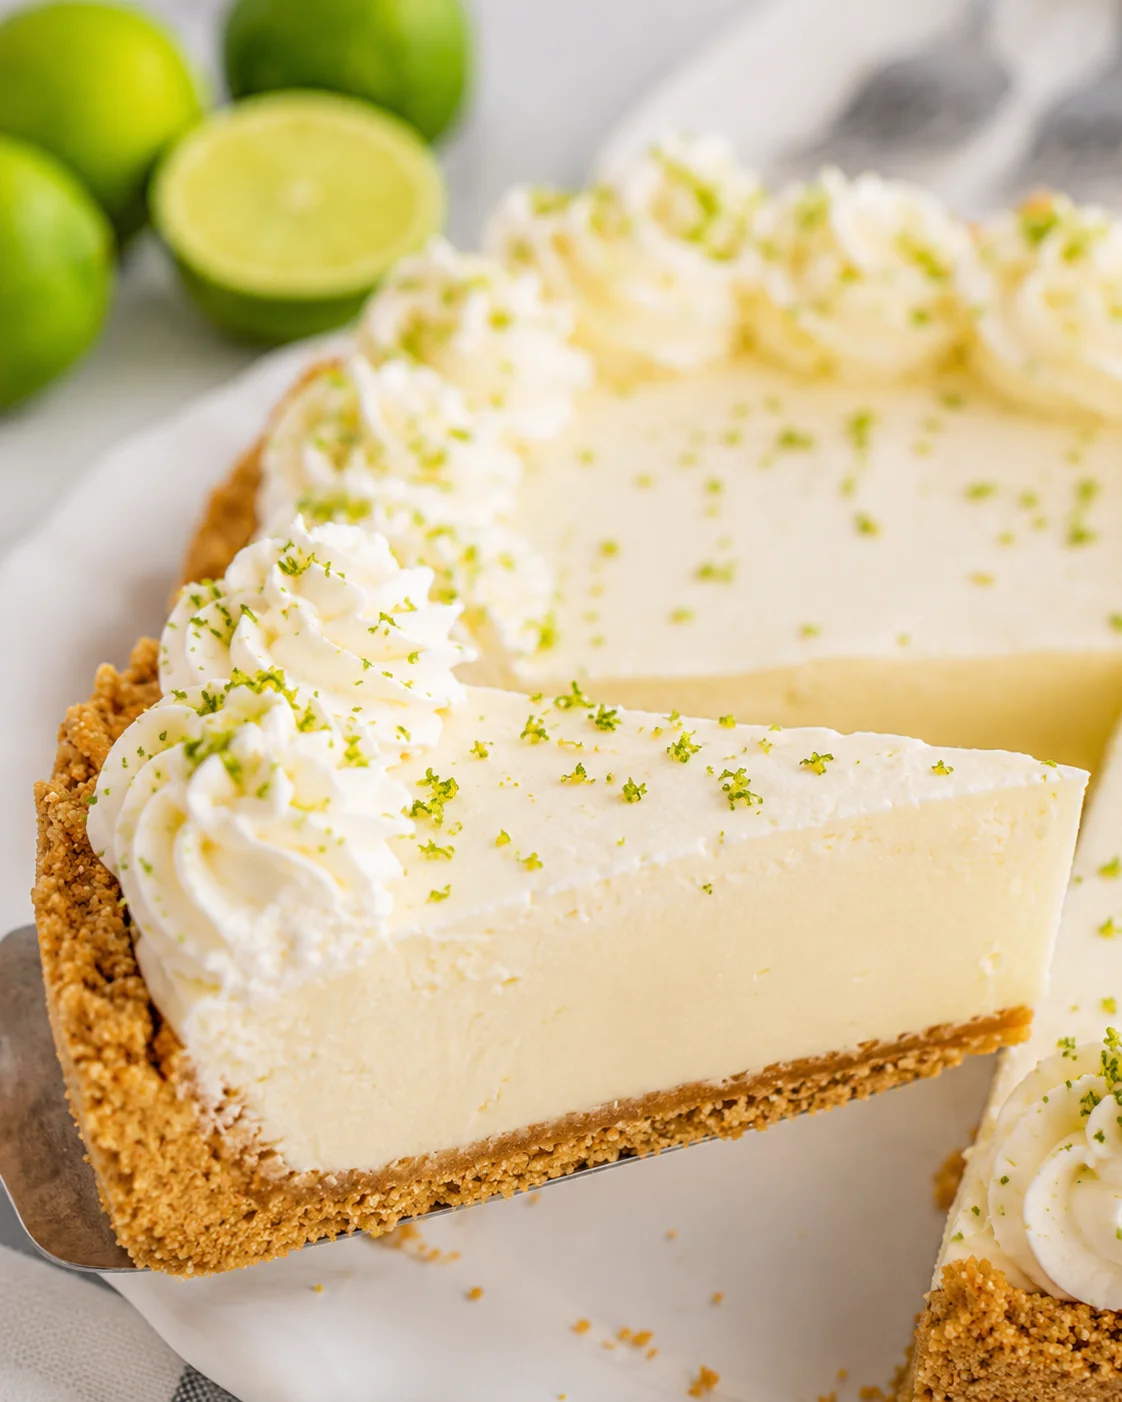
The hands-on work is short: the pie takes about 15 minutes of preparation, and the assembled filling is ready to chill in roughly 20 minutes. The total time is at least 4 hours and 15 minutes because the refrigerator does the important finishing work. Four hours gives the pie enough time to set; an overnight chill makes the slices especially tidy and lets the lime flavor settle into the filling.
This is a relaxed dessert for a summer table, a weekend gathering, or any meal when a cool finish sounds better than a warm one. It makes 10 slices. The crust and filling can be assembled ahead, while the whipped cream and lime zest garnish are best added close to serving so the top looks fresh.
Why You Will Love This Recipe
This no-bake key lime pie recipe keeps the ingredient list familiar and the method easy to follow. The crust is built from graham cracker crumbs, melted unsalted butter, sugar, and optional salt. The filling uses softened full-fat cream cheese, sweetened condensed milk, fresh lime juice, lime zest, and thawed Cool Whip. A little whipped cream and additional lime zest finish each slice.
The best part is the contrast between the two layers. A firmly pressed graham cracker crust gives the pie a buttery, lightly sweet base, while the filling is smooth, airy, and tangy. The lime brings a clean tartness that keeps the condensed milk from tasting heavy. Chilling changes the texture from thick and pourable to firm enough to cut, so the pie feels finished rather than simply cold.
There is also a useful rhythm to the preparation. The crust goes into the freezer while the filling is mixed, which means the steps overlap naturally. You do not need to wait for the crust before starting the cream cheese mixture, and you do not need an oven to set either part. Once the filling is folded together and spread into the chilled crust, the refrigerator takes over.
Full-fat cream cheese matters here because the filling is expected to set firmly. Reduced-fat cream cheese does not set the same way and produces a softer texture. The cream cheese also needs to be fully softened before beating. Starting with cold cream cheese is the most common path to a lumpy filling, and adding more mixing time will not reliably correct that problem.
Key limes and regular Persian limes both fit this pie. Key limes have a slightly more floral, aromatic character, while Persian limes provide straightforward tartness and are easier to find. The choice changes the flavor emphasis, not the basic method. If key limes are unavailable, regular limes still make a bright, balanced pie.
Finally, the dessert is flexible about how far ahead you plan. It can be refrigerated for up to 48 hours before serving, and leftovers keep in the refrigerator for 3 to 4 days. You can also freeze the whole pie or individual slices for up to 1 month. Those options make this a useful make-ahead dessert instead of something that must be finished at the last minute.
Ingredients
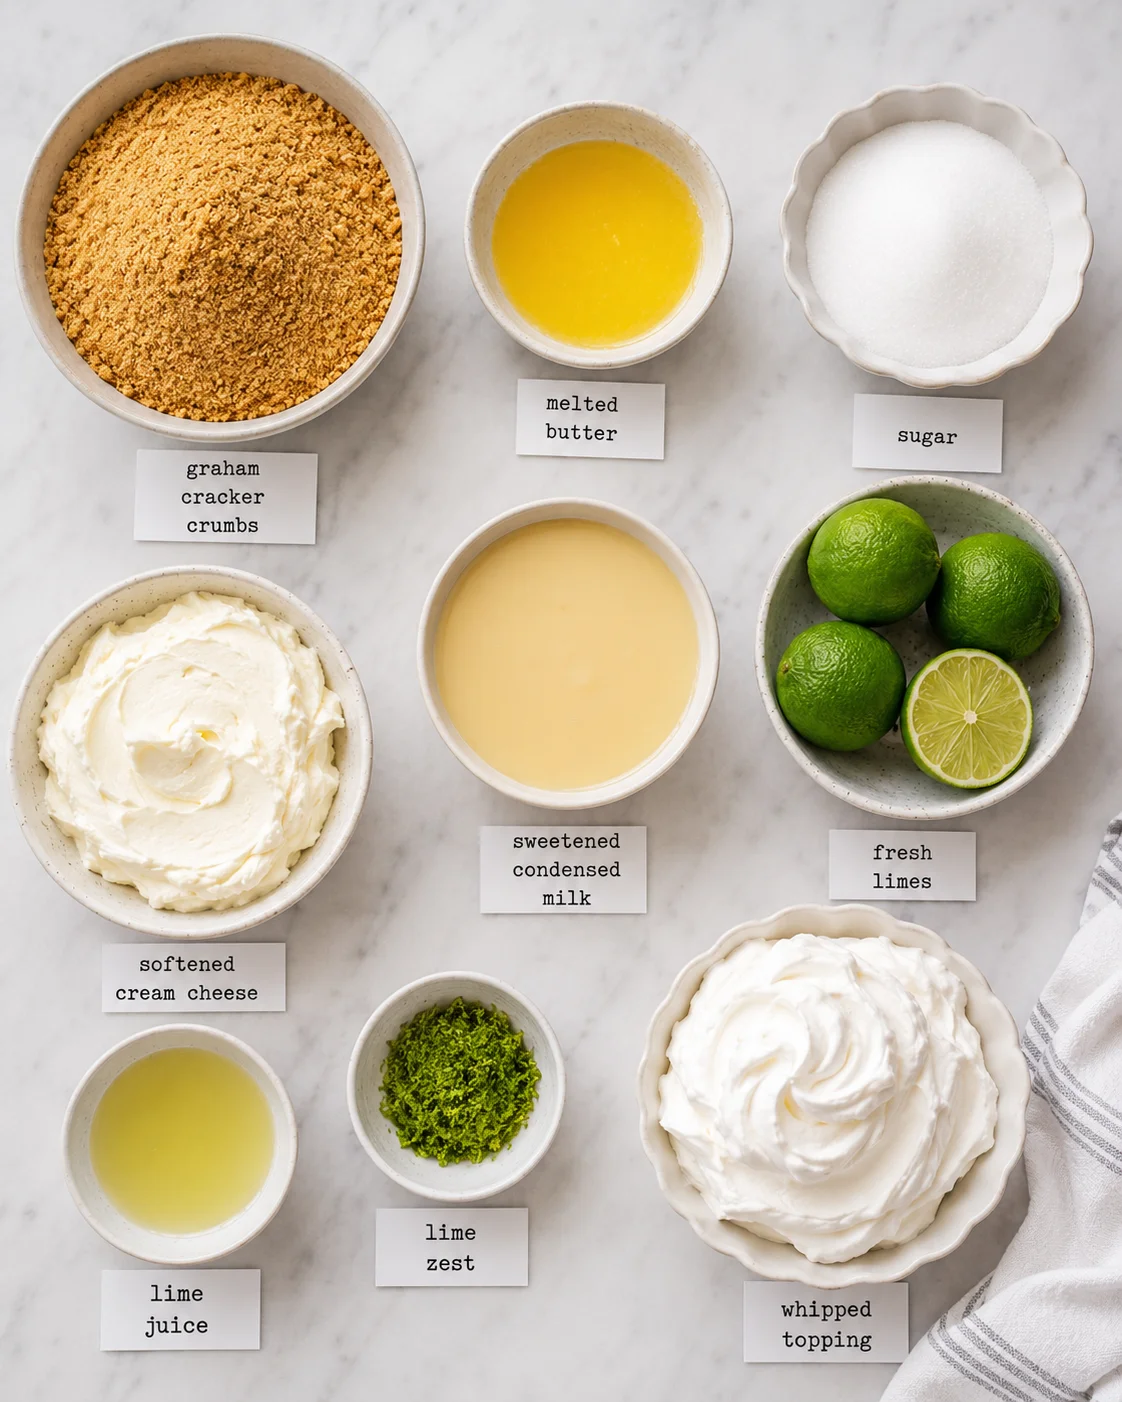
Gather the ingredients before starting because the crust and filling move quickly. Use the measurements below for a 10-inch pie plate and 10 slices. The toppings are listed without a fixed quantity so you can finish the surface as lightly or generously as you like.
Crust
- 2 sleeves graham cracker crumbs, about 1 3/4 cups: These form the crumb base. If using whole graham crackers, pulse them in a food processor until the crumbs are fine and even before measuring the amount.
- 1/2 cup unsalted butter, melted: Butter coats the crumbs and helps them compact into a crust. The mixture should look like wet sand and hold together when pressed between your fingers.
- 2 teaspoons sugar: This gives the crust a little additional sweetness without making it taste sugary.
- 1/4 teaspoon salt, optional: Salt can balance the sweetness. Leave it out if you prefer a simpler sweet crust.
Filling
- 24 ounces full-fat cream cheese, softened to room temperature: This is the body of the filling. Softening it fully helps it beat smooth before any other ingredients are added.
- 14 ounces sweetened condensed milk: It supplies sweetness and contributes to the thick, creamy consistency.
- 3/4 cup fresh lime juice: Fresh juice gives the filling its tart lime character. Key lime juice or regular Persian lime juice can be used according to the flavor you want.
- 1 teaspoon lime zest: Use the fine green outer layer of the peel. Avoid the white pith underneath because it is bitter.
- 8 ounces Cool Whip, thawed: Fold this in gently to keep the filling airy. Homemade whipped topping can be used in its place.
For the topping
- Whipped cream, as needed: Pipe or dollop it over the chilled pie just before serving.
- Lime zest, as needed: Sprinkle it over the cream for a fresh finish.
- Lime slices, optional for garnish: Add them with the whipped cream and zest when serving.
A 10-inch pie plate, food processor, mixing bowl, hand mixer, rubber spatula, measuring cup with a flat bottom, and offset spatula or spoon are useful for the method. Cooking spray is used to give the pie plate a light coating before the crust goes in. The spray helps the crust release when the pie is sliced and served.
Full-fat cream cheese is the ingredient worth making sure you have before beginning. The filling depends on its structure, and the reduced-fat version gives a softer result. Bring the cream cheese to room temperature in advance. If you are short on time, cutting it into small pieces and letting those pieces sit for about 20 minutes is another way to help it soften. Either way, the cream cheese should feel pliable before it goes into the bowl.
The butter should be melted before it is stirred into the crumbs. The exact appearance matters more than trying to force the mixture into a rigid texture: it should resemble wet sand, and a pinch should hold together. If the crumbs still fall apart loosely after mixing, a small drizzle of additional melted butter can help them compact. Add only enough to make the mixture pressable rather than greasy.
For the lime, a fine grater gives you small pieces of zest that disperse through the filling. Work across the outer green skin and stop before reaching the pale layer beneath. The zest adds aromatic lime flavor, while the juice supplies the sharper tart note. Keeping those two jobs in mind makes it easier to use the lime well without adding unnecessary pith.
Instructions
The method has three broad stages: prepare and chill the crust, mix the filling, and refrigerate the assembled pie. Follow the sequence so the crust can firm while you work on the filling. The pie will be assembled in under 25 minutes according to the recipe’s method, but it still needs at least 4 hours in the refrigerator before slicing.
- Prepare the pie plate. Lightly coat a 10-inch pie plate with cooking spray and set it aside. A light coat is enough. The goal is to make the finished crust easier to release when you slice and serve it, not to leave a layer of spray around the edge.
- Make fine graham cracker crumbs. Add the graham crackers to a food processor and pulse until the crumbs are fine and even. Uniform crumbs are important because large pieces leave weak spots in the crust. Continue pulsing until the mixture looks consistent rather than rough or chunky.
- Combine the crust ingredients. Transfer the crumbs to a mixing bowl. Stir in the sugar and optional salt, then add the melted butter. Mix until the crumbs look like wet sand. Press a little of the mixture between your fingers; it should hold together. If it crumbles immediately, add a small drizzle more melted butter and mix again.
- Press and freeze the crust. Pour the crumb mixture into the prepared pie plate. Press it firmly and evenly across the bottom and up the sides. A flat-bottomed measuring cup is useful for compacting the base and creating an even side wall. Place the crust in the freezer for at least 10 minutes while you prepare the filling.
- Beat the cream cheese. Put the fully softened cream cheese in a large mixing bowl. Using a hand mixer on medium-high speed, beat it until it is completely smooth and creamy, about 2 minutes. Scrape the bowl if needed. Do not move on while you can still see or feel lumps, because lumps present now remain noticeable in the finished filling.
- Add the condensed milk and lime. Add the sweetened condensed milk, fresh lime juice, and lime zest to the smooth cream cheese. Beat on medium speed until the mixture is fully combined and smooth. The finished mixture at this point should be thick but pourable, with the lime distributed throughout.
- Fold in the whipped topping. Add the thawed Cool Whip or homemade whipped topping. Use a rubber spatula and fold gently. Folding preserves the light texture; stirring aggressively deflates the topping and makes the filling denser. Turn the mixture from the bottom of the bowl over the top, rotating the bowl as you work, until no large streaks remain.
- Fill the chilled crust. Remove the crust from the freezer. Pour the filling into the center, then spread it outward with an offset spatula or the back of a spoon. Work from the center toward the edges and press lightly as you smooth the surface. This helps remove air pockets without crushing the crust.
- Chill the pie. Cover the pie loosely and refrigerate for at least 4 hours or overnight. The filling needs this time to become firm enough to slice. Overnight is the stronger choice when you want the cleanest cuts, and the lime flavor deepens as the pie rests.
- Garnish and serve. When you are ready to serve, pipe or dollop whipped cream over the top. Finish with fresh lime zest and lime slices if using them. Slice with a clean, sharp knife and wipe the blade between cuts. This keeps the bright filling and pale crust from building up on the blade and dragging across the next slice.
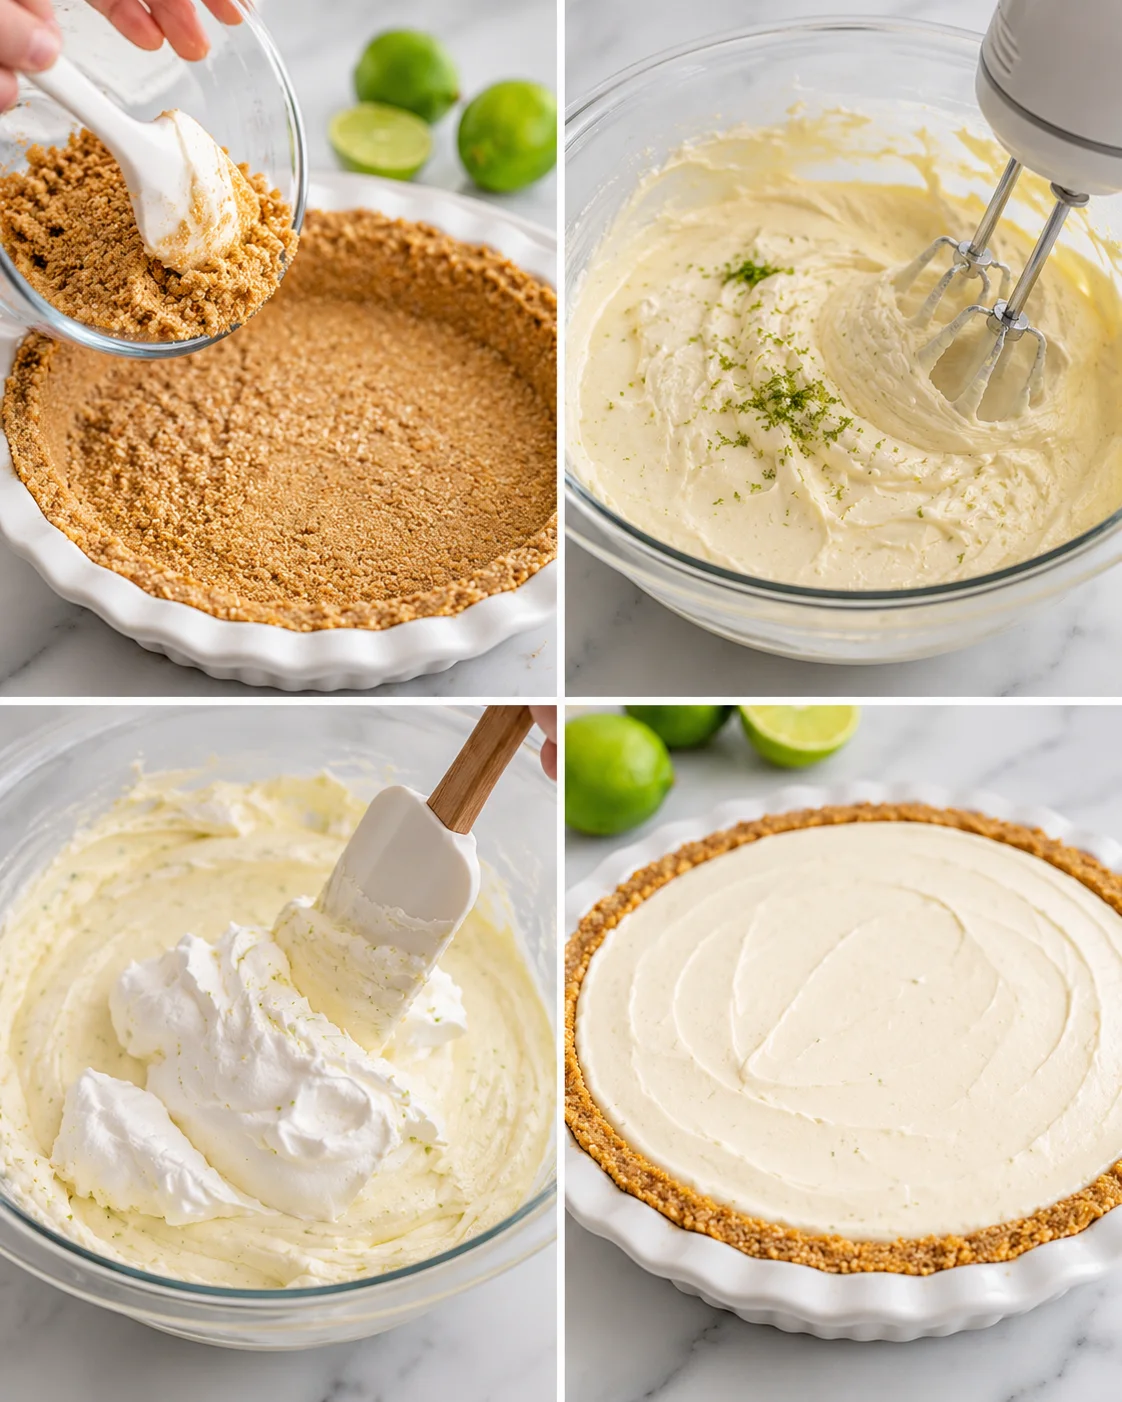
The crust stage is about creating an even, compact foundation. Fine crumbs are easier to press into a solid layer than coarse crumbs. When the crumb mixture is properly moistened with butter, it should respond to pressure and stay in place. Press the bottom and sides with the same firm, even approach. If some areas are loose and others are tightly packed, the crust will not support slices consistently.
The freezer rest is short but useful. Ten minutes gives the pressed crust time to firm while the filling is made. The crust does not need to be baked for the no-bake method. There is an optional baked-crust route if you want extra insurance: bake the pressed crust at 350°F for 7 to 10 minutes, then let it cool completely before adding the filling. The faster choice is freezing, while baking requires a full cool-down before assembly.
The filling should always begin with cream cheese alone. Beating it before adding the condensed milk, lime juice, or zest makes it easier to smooth the base. Cold cream cheese resists becoming creamy and leaves lumps even after extended mixing. Letting it soften before you start is more useful than trying to repair a lumpy mixture later.
Once the cream cheese is smooth, add the filling ingredients and beat until the texture is consistent. The mixture should not look separated, and the lime zest should be spread through it rather than gathered in one area. It will be thick and pourable before the whipped topping is folded in. That description is useful when deciding whether the condensed milk and lime have been incorporated fully.
Use a gentle hand for the whipped topping. The goal is a unified filling that still has a light quality. Folding and stirring are not interchangeable here: vigorous stirring pushes out the air that gives the finished pie a softer, more airy texture. Stop as soon as the topping is incorporated. A few final turns of the spatula are better than continued mixing after the filling is already even.
When the filling goes into the crust, start in the center and work toward the edge. The filling is thick enough to hold its shape while you smooth it. Pressing lightly while spreading helps remove obvious pockets without disturbing the crust wall. Take care not to scrape deeply into the crumb base as you level the top.
Chilling is not just a temperature step. The filling needs the refrigerator time to become firm enough to cut. Four hours is the minimum stated chill, while overnight gives the pie more time to stabilize. If the pie is intended for a dinner party or another occasion where the slices need to look neat, the overnight option is the better plan.
Tips
Soften the cream cheese fully
Room-temperature cream cheese is the starting point for a smooth filling. If it is cold, the mixer can leave small pieces behind. Those pieces are easy to miss while the mixture is in the bowl, but they become visible in the finished slice. Set the cream cheese out at least 30 minutes before beginning, or cut it into small pieces and let it sit for about 20 minutes. Beat it by itself first, then add the other filling ingredients.
Keep the cream cheese separate from the condensed milk until the cream cheese is smooth. This simple order creates a checkpoint. You can see whether the base is creamy before the other ingredients make the bowl more difficult to evaluate. If you find a lump, keep beating the cream cheese alone until the texture is even rather than trying to hide it with the lime mixture.
Press the crust firmly
A loosely pressed crust will not hold its shape when it is filled. Focus on an even layer across the bottom and up the sides. A flat-bottomed measuring cup gives you a broad surface for compacting the crumbs, especially in the center. Use your fingers along the edge so the side wall is not left thin or ragged.
Fine, even crumbs are easier to compact than coarse pieces. If the food processor leaves a handful of larger pieces, pulse again before mixing the butter in. The final crust should not feel loose when you press it. If it does, a small additional drizzle of melted butter can help the crumbs hold together, but the mixture should still look like crumbs rather than a paste.
Give the crust its freezer time
The crust needs at least 10 minutes in the freezer before the filling is added. This short rest helps the pressed crumbs become more stable. If you choose the optional baked method instead, use 350°F for 7 to 10 minutes and let the crust cool completely. Do not pour filling into a warm baked crust. The no-bake freezer method is the quicker path when you want to keep the dessert entirely oven-free.
Zest only the green outer skin
Use a fine grater and work lightly over the lime. The green outer layer carries the fresh lime aroma needed for the filling and garnish. Stop before reaching the white pith underneath because it is bitter and competes with the lime flavor. The same approach works whether you use key limes or Persian limes.
Fold instead of stirring
The whipped topping gives the filling its smoother, airier quality. Stirring can deflate it and leave a denser result. Fold with a rubber spatula by cutting down through the mixture, sweeping across the bottom, and lifting upward. Turn the bowl as you go and stop when the filling looks even. Overworking the mixture after it is combined does not improve it.
Plan the chill around serving
At least 4 hours in the refrigerator is required for a sliceable pie, and overnight is preferable when possible. If you need especially clean slices, freeze the finished pie for 1 to 2 hours before serving. After cutting, let the slices sit for about 10 minutes so they soften slightly. This combination gives you tidy edges without serving the pie at its firmest frozen texture.
Use a clean knife
A sharp, clean knife makes a difference with a chilled pie. Wipe the blade between cuts so the lime filling and crumbs do not collect along the edge. Begin each cut with a confident motion rather than sawing back and forth. If the pie has been frozen for a cleaner slice, give the cut portions the stated 10-minute rest before eating.
Keep the garnish for the end
Whipped cream, lime zest, and lime slices are the finishing touches. Add them right before serving, especially if the pie has been made ahead. This keeps the garnish from being pressed under covering and maintains the clean contrast between the pale filling, the green zest, and the golden crust.
What to do if the filling is lumpy
Most lumps trace back to cream cheese that was not soft enough before beating. Letting it sit at room temperature helps it blend smoothly, and beating it alone before adding anything else gives it the best chance of becoming creamy. If the bowl contains visible lumps, continue working on the cream cheese base rather than moving ahead and hoping chilling will fix the texture.
What to do if the crust feels loose
Check the crumb texture before the crust is pressed. The crumbs should look like wet sand and hold together when pinched. If they fall apart, add a small drizzle more melted butter and mix. Then press the crust firmly into the plate and freeze it for at least 10 minutes. The optional baked crust at 350°F for 7 to 10 minutes is another supported way to help the crust hold, but it must cool completely before filling.
Variations
Key limes or Persian limes
Key limes offer a slightly floral, aromatic flavor. Regular Persian limes are easier to find and provide clean tartness. Both work with the recipe’s filling, so use the limes that are available. The choice is a flavor preference rather than a reason to skip the pie.
Fresh juice or bottled key lime juice
Fresh lime juice is the primary choice in the ingredient list. Bottled key lime juice can be used instead. Its flavor is slightly flatter than fresh juice, but it is a practical option when fresh limes are not available. Nellie and Joe’s Famous Key West Lime Juice is the named bottled option associated with this variation.
Full-fat or reduced-fat cream cheese
Use full-fat cream cheese for the intended firm filling. Reduced-fat cream cheese produces a softer set and does not behave the same way in this pie. The lower-fat option is therefore not a like-for-like swap when clean slices are the goal.
Cool Whip or homemade whipped topping
Thawed Cool Whip is the stated topping folded into the filling, and homemade whipped topping can be used instead. The homemade option uses 1 cup of heavy cream whipped to stiff peaks with 2 tablespoons of powdered sugar. A pie made with homemade whipped cream is a little less stable for slicing, so plan on an overnight chill rather than relying on only 4 hours.
Alternative crusts
Golden Oreos, Nilla Wafers, gingersnaps, and shortbread cookies can stand in for the graham crackers. A gingersnap crust brings spice that works with lime. A store-bought graham cracker crust can also remove the crust-making step when you want the shortest possible assembly.
When changing the crust, keep the method’s main idea in place: the crumb mixture needs to be compacted firmly, and the filled crust needs enough chilling time to hold together. Different cookies may emphasize different flavors, but the filling remains the same. A store-bought crust also benefits from being handled gently when the thick filling is spread into it.
Plant-based alternatives
A plant-based version has been reported to set after freezing, but it is less firm than the dairy version. Because the result is softer, treat this as an experimental variation rather than an exact replacement. The classic version uses full-fat cream cheese, sweetened condensed milk, and whipped topping, and those ingredients provide the texture described throughout this recipe.
For any variation, keep the original timing and texture cues in mind. The filling should be smooth before the whipped topping is folded in, the topping should be incorporated gently, and the assembled pie should be chilled until firm enough to slice. If a variation is softer, additional freezing time may help it cut more cleanly, followed by the same short rest before serving.
Storage
Refrigerated leftovers
Leftover no-bake key lime pie keeps in the refrigerator for 3 to 4 days. Cover the pie plate tightly with plastic wrap, or transfer individual slices to an airtight container. Refrigerate the pie promptly and do not leave it at room temperature for more than 2 hours.
When covering the whole pie, keep the plastic wrap from pressing directly onto the filling if you can. A loose cover is useful while the pie is setting, and a tight cover is useful for leftovers once the surface is firm. Add whipped cream and fresh lime zest close to serving rather than storing the garnish under the wrap for the entire holding time.
Make-ahead timing
This pie can be assembled through the filling step and refrigerated for up to 48 hours before serving. Cover it loosely with plastic wrap and avoid pressing the wrap directly onto the top. Add the whipped cream garnish and lime zest right before serving, not the night before.
Making the pie ahead gives the filling time to set more firmly. The lime flavor also becomes more pronounced as the pie chills. If clean slices matter, an overnight rest is especially useful. Keep the pie refrigerated until the meal is ready, then garnish, cut, and serve.
Freezing the pie
To freeze the whole pie or individual slices, wrap them in plastic wrap and then add a layer of foil. The pie can be frozen for up to 1 month. Thaw it overnight in the refrigerator. The texture will be slightly softer after freezing, although some people prefer the pie slightly frozen. For a firm slice straight from the freezer, allow it to rest for about 10 minutes before eating.
Freezing can also be useful when you are working with a softer variation. The plant-based version described above sets less firmly but was reported to set well after freezing. For the classic version, freezing is optional rather than required: the refrigerator’s 4-hour minimum or overnight chill is the normal setting method.
Serving Suggestions
Garnish each slice with a pipe or dollop of whipped cream, a little lime zest, and a lime slice if desired. The clean, sharp knife technique is part of the presentation. Wipe the knife after every cut to keep the crust and creamy filling distinct on the plate.
This is a natural dessert for a summer spread because it can be made ahead and served cold. Pair it with a pitcher of big-batch margaritas or a glass of Brazilian lemonade for a lime-forward table. Sugared prosecco grapes are another no-bake addition when you want the dessert course to stay cool and low effort.
If the pie has been frozen for 1 to 2 hours before serving, let the cut slices sit for about 10 minutes. That brief rest softens the texture slightly while keeping the edges clean. If the pie has only had its refrigerator chill, it can be sliced and garnished as soon as the filling is firm enough to cut.
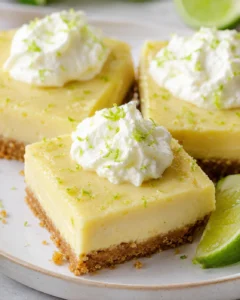
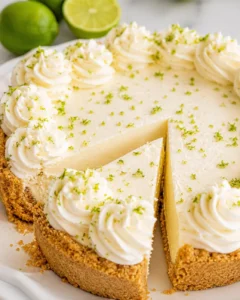
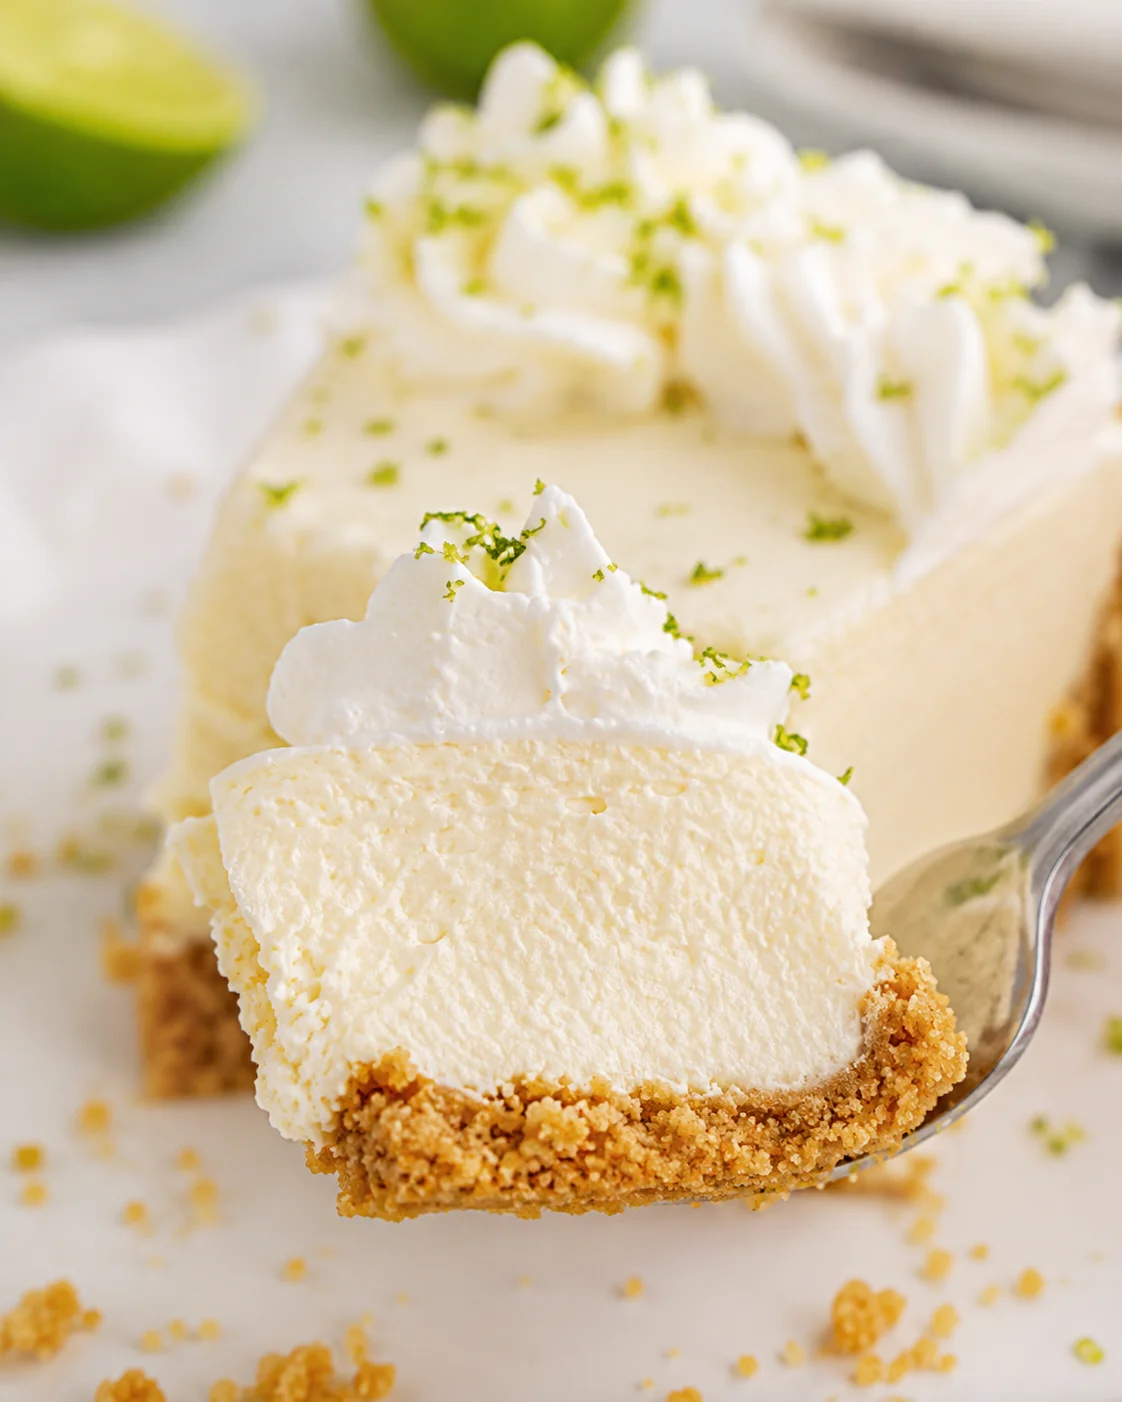
The finished pie has a firm graham cracker crust, a smooth and airy filling, and a balanced sweet-tart lime flavor. The surface garnish adds a fresh visual finish without changing the main texture. Serve the slices after the garnish is added so the whipped cream and zest remain distinct from the chilled filling.
FAQ
Why is my cream cheese filling lumpy?
Cold cream cheese is usually the reason. It does not beat smooth easily, even if the mixer runs for a long time. Let it sit at room temperature for at least 30 minutes, or cut it into small pieces and let it sit for about 20 minutes. Beat the cream cheese alone until smooth before adding the condensed milk, lime juice, or zest.
How long does key lime pie need to chill?
Refrigerate the covered pie for at least 4 hours. The filling needs that time to set firmly enough to slice. Overnight is the better choice when you want especially clean slices and a deeper lime flavor.
Can I freeze the finished pie before serving?
Yes. Freeze the finished pie for 1 to 2 hours when you want cleaner slices, then let the slices sit for about 10 minutes before serving. For longer storage, wrap the whole pie or individual slices in plastic wrap, add foil, and freeze for up to 1 month. Thaw overnight in the refrigerator.
How do I keep the crust from falling apart?
Make sure the crumbs are fine and even, then mix them with melted butter until they look like wet sand and hold together when pressed. Compact the mixture firmly into the bottom and sides of the pie plate. Freeze the pressed crust for at least 10 minutes before filling. If you prefer the optional baked method, bake it at 350°F for 7 to 10 minutes and cool it completely before adding filling.
Can I use regular limes instead of key limes?
Yes. Key limes have a slightly more floral flavor, while regular Persian limes have clean tartness and are easier to find. Both make a good pie, so regular limes are a practical substitute when key limes are unavailable.
Can I use bottled lime juice?
Bottled key lime juice works in place of fresh juice, although its flavor is slightly flatter. Nellie and Joe’s Famous Key West Lime Juice is the named option for this swap. Fresh juice and fresh zest provide the brightest flavor, but bottled juice can keep the recipe accessible.
Can I use reduced-fat cream cheese?
It is not the best choice for this pie. Reduced-fat cream cheese produces a softer filling and does not set as firmly as full-fat cream cheese. Use full-fat cream cheese when you want the intended texture and clean slices.
Can I replace Cool Whip with homemade whipped cream?
Yes. Whip 1 cup of heavy cream to stiff peaks with 2 tablespoons of powdered sugar, then fold it into the filling gently. The pie will be a little less stable for slicing, so chill it overnight rather than relying on only the 4-hour minimum.
Can I make a different cookie crust?
Yes. Golden Oreos, Nilla Wafers, gingersnaps, and shortbread cookies can replace the graham crackers. A gingersnap crust adds spice, while a store-bought graham cracker crust removes a preparation step. Whichever crust you choose, press it firmly and chill it before filling.
Can I make this pie vegan?
A plant-based version has been reported to work, but it is less firm than the dairy version and sets well after freezing. Since the variation is softer, it should be treated as a less predictable alternative rather than an identical result. The classic recipe uses full-fat dairy ingredients for its firm, sliceable filling.
Can I prepare the pie ahead of time?
Yes. Assemble the pie completely through the filling step, cover it loosely without pressing wrap onto the surface, and refrigerate it for up to 48 hours. Add whipped cream and lime zest immediately before serving. The pie is often easier to slice after an overnight chill.
How long do leftovers last?
Leftover pie keeps for 3 to 4 days in the refrigerator. Cover the pie plate tightly or store slices in an airtight container. Refrigerate promptly and do not leave the pie at room temperature for more than 2 hours.
Why should I wipe the knife between slices?
The filling and crumbs cling to the blade as you cut. Wiping the knife removes that buildup so the next cut passes through the chilled layers cleanly. A sharp knife and a wipe between cuts give the neatest edges.
Recipe Notes and Nutrition
The recipe makes 10 slices. Preparation is about 15 minutes, with no cooking time and a total time of about 4 hours and 15 minutes because of the chill. The optional baked-crust route uses a 350°F oven for 7 to 10 minutes, followed by complete cooling, but the standard method uses the freezer and refrigerator instead.
Per slice, the supplied nutrition information is 496 calories, 35 grams of carbohydrates, 8 grams of protein, and 37 grams of fat. It lists 22 grams of saturated fat, 2 grams of polyunsaturated fat, 10 grams of monounsaturated fat, and 0.4 grams of trans fat. It also lists 110 milligrams of cholesterol, 341 milligrams of sodium, 287 milligrams of potassium, 0.2 grams of fiber, and 31 grams of sugar.
The same nutrition information lists 1,352 IU of vitamin A, 7 milligrams of vitamin C, 209 milligrams of calcium, and 0.2 milligrams of iron per slice. Nutrition values can vary with the particular brands and toppings used, especially when homemade whipped cream, bottled juice, an alternative crust, or a plant-based variation is chosen.
For the most dependable classic result, start with fully softened full-fat cream cheese, fine graham cracker crumbs, a firmly pressed crust, and the full chill. Those choices support the pie’s defining qualities: a cleanly sliceable crust, a smooth and airy lime filling, and a cool dessert that can be prepared well before serving.
PrintA creamy and tangy no-bake key lime pie with a buttery graham cracker crust and a light, airy cream cheese and whipped topping filling. Chilled to set firm for clean slices with a bright lime flavor.
- Prep Time: 15 minutes
- Cook Time: 0 minutes
- Total Time: 4 hours 15 minutes
- Yield: 10 slices 1x
- Category: Dessert
Ingredients
- Crust:
- 1 3/4 cups graham cracker crumbs (from about 2 sleeves of crackers)
- 1/2 cup unsalted butter, melted
- 2 teaspoons sugar
- 1/4 teaspoon salt (optional)
- Filling:
- 24 ounces full-fat cream cheese, softened to room temperature
- 14 ounces sweetened condensed milk
- 3/4 cup fresh lime juice (key lime or regular Persian lime)
- 1 teaspoon lime zest (green outer layer only)
- 8 ounces Cool Whip, thawed (or homemade whipped topping)
- Topping:
- Whipped cream, as needed for garnish
- Lime zest, as needed for garnish
- Lime slices, optional for garnish
Instructions
- Lightly coat a 10-inch pie plate with cooking spray and set aside.
- Pulse graham crackers in a food processor until fine and even crumbs form; measure 1 3/4 cups.
- In a mixing bowl, combine graham cracker crumbs, sugar, and optional salt. Add melted butter and mix until the mixture resembles wet sand and holds together when pressed; add a small drizzle more butter if too dry.
- Press the crumb mixture firmly and evenly into the bottom and up the sides of the prepared pie plate. Place the crust in the freezer for at least 10 minutes to firm up.
- In a large mixing bowl, beat the fully softened cream cheese on medium-high speed until smooth and creamy, about 2 minutes. Scrape the bowl as needed and ensure no lumps remain.
- Add the sweetened condensed milk, fresh lime juice, and lime zest to the cream cheese. Beat on medium speed until fully combined and smooth; mixture will be thick but pourable.
- Gently fold in the thawed Cool Whip or homemade whipped topping using a rubber spatula, turning from bottom to top until no streaks remain. Avoid stirring vigorously to keep the filling light.
- Remove the crust from the freezer. Pour the filling into the crust, spreading gently from center to edges with an offset spatula or spoon to smooth surface; press lightly to remove air pockets without disturbing the crust.
- Cover the pie loosely and refrigerate for at least 4 hours or preferably overnight to allow filling to firm and flavor to develop.
- Before serving, garnish the pie with piped or dolloped whipped cream, lime zest, and optional lime slices.
- Slice the pie using a clean, sharp knife, wiping the blade between cuts for clean slices.
Notes
Use full-fat cream cheese for the best firm texture; reduced-fat cream cheese yields a softer filling., For a firmer crust, you can optionally bake the pressed crust at 350°F (177°C) for 7 to 10 minutes, then cool completely before filling., If the crust mixture is too loose, add a small additional drizzle of melted butter and mix until pressable., Homemade whipped topping can replace Cool Whip by whipping 1 cup heavy cream with 2 tablespoons powdered sugar to stiff peaks; chill overnight for best slicing., The pie can be refrigerated assembled (without topping) up to 48 hours before serving; add garnish just before serving., Leftovers keep 3 to 4 days refrigerated in an airtight container., The whole pie or individual slices can be frozen wrapped in plastic and foil for up to 1 month; thaw overnight in the refrigerator before serving., A short freeze (1-2 hours) before serving makes cleaner slices; let slices sit 10 minutes at room temperature after slicing., Alternative cookie crusts (Golden Oreos, Nilla wafers, gingersnaps, shortbread) can be used, pressed firmly and chilled before filling., Plant-based variations set less firmly and benefit from freezing; texture will be softer than classic dairy version.
Nutrition
- Serving Size: 1 slice
- Calories: 496 kcal per slice
- Fat: 37 grams per slice
- Carbohydrates: 35 grams per slice
- Protein: 8 grams per slice