Elderberry Syrup Recipe with Fresh, Frozen, or Dried Berries
This elderberry syrup recipe makes a dark, sweet, warmly spiced syrup from dried, frozen, or fresh elderberries. The method is simple, but the details matter: start with the right berry variety, simmer gently until the liquid is reduced by about half, strain while the mixture is still warm, and stir in the honey without heating it directly. The finished syrup is concentrated, fragrant, and easy to pour into small glass bottles or jars.
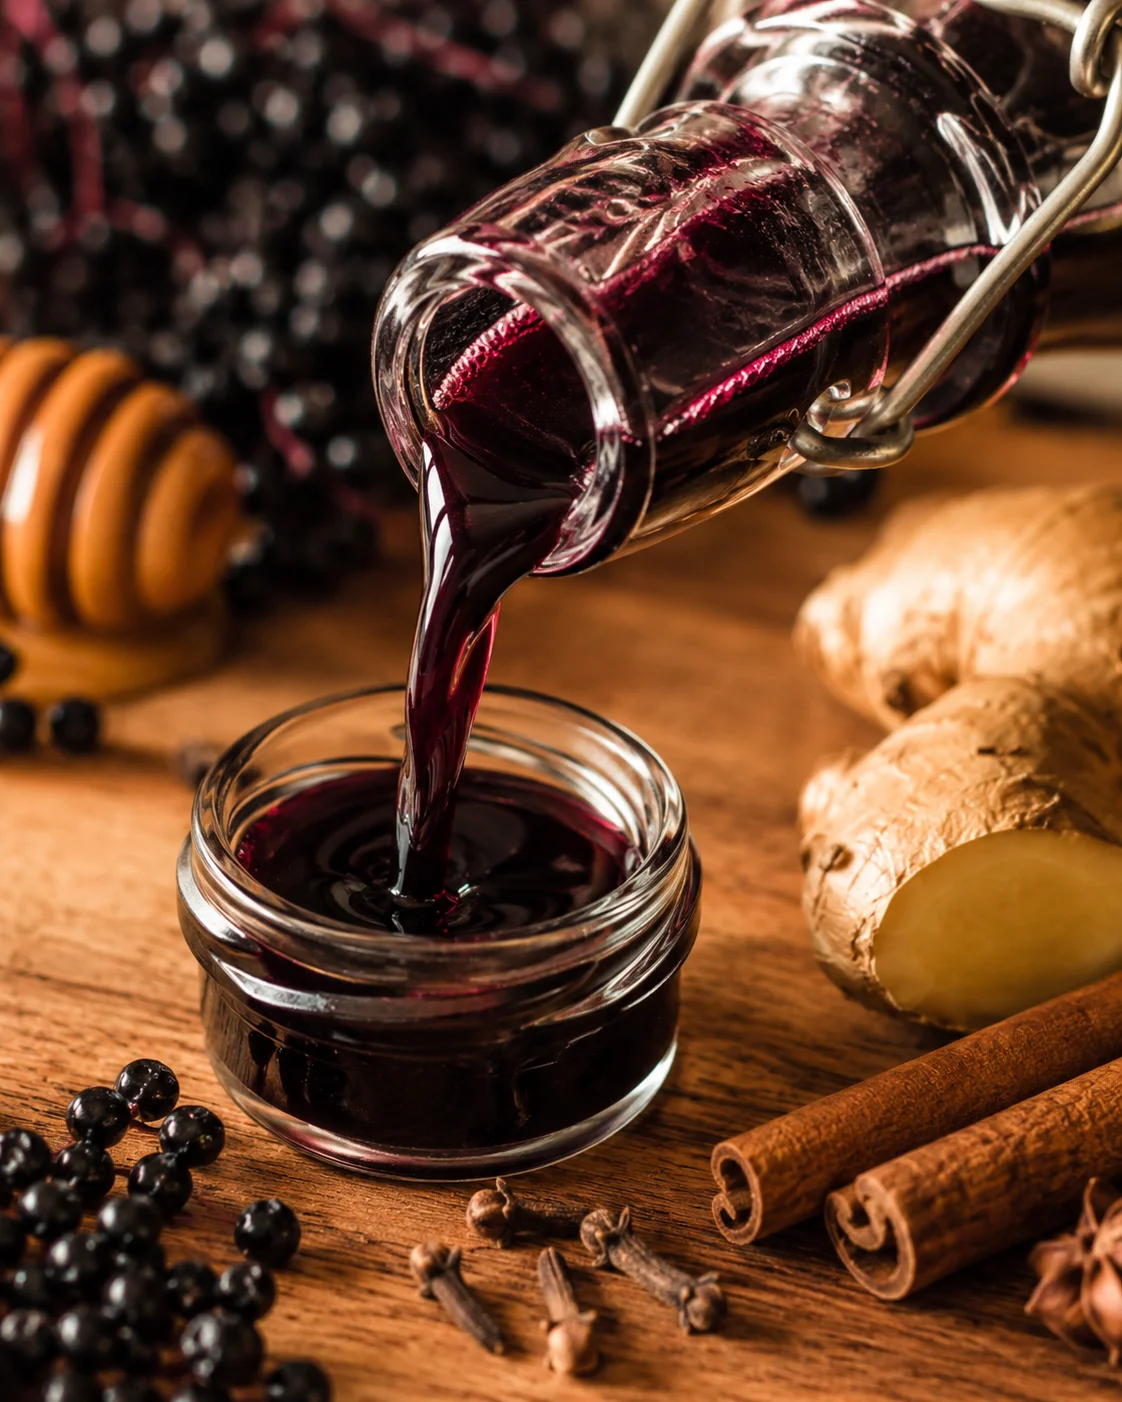
The recipe yields approximately 40 ounces. It is useful as a seasonal pantry preparation, a thoughtful homemade gift, or a base for other treats such as elderberry gummies. Dried berries are convenient and predictable to keep on hand, while fresh and frozen berries work too with a different amount of water. Read through the safety notes before you begin, especially if you are working with fresh berries.
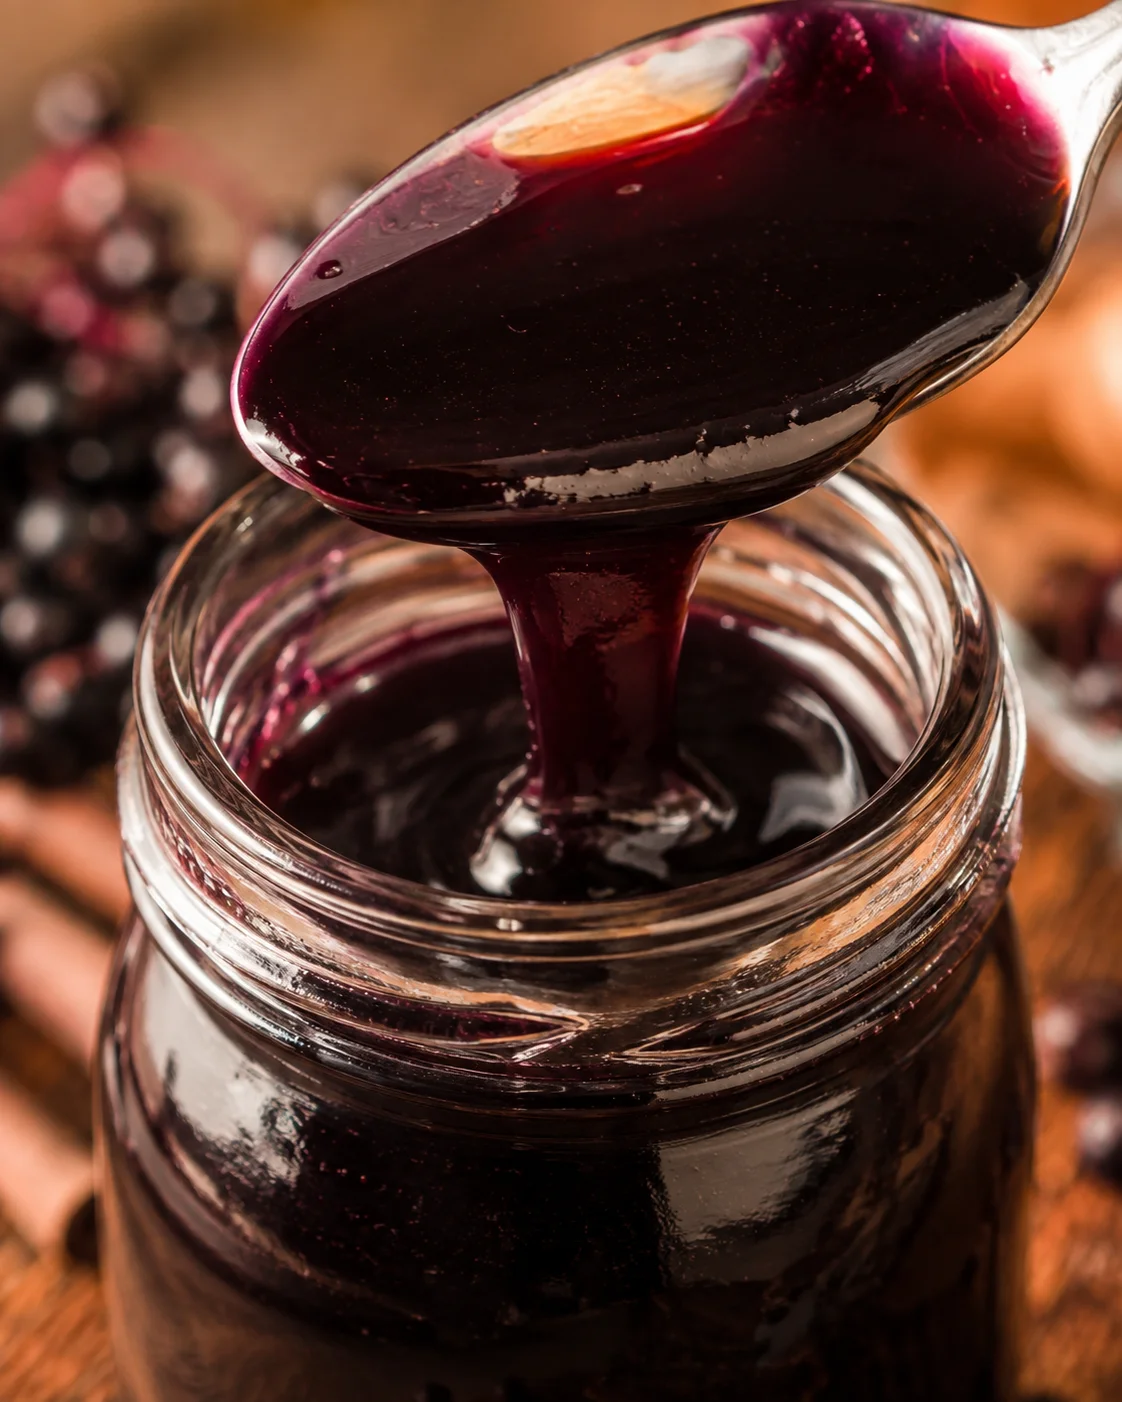
The most important visual cue is not a rigid clock time. The berry mixture should soften, release its deep purple juice, and reduce to roughly half its starting volume. That reduction concentrates the liquid before the honey is added. A little patience at the stove, a sturdy strainer, and a willingness to get purple juice on the kitchen gear are all part of the process.
Why You Will Love This
There are several reasons to keep this elderberry syrup recipe in your seasonal cooking rotation. First, it accommodates three convenient forms of elderberries. Dried berries can be stored until needed, frozen berries do not have to be thawed before cooking, and fresh berries can go straight into the pot after they are washed and thoroughly stripped of their stems. You do not need a different recipe for each form; you simply adjust the water and follow the reduction cues.
Second, the flavor is more inviting than a plain berry concentrate. Ginger adds a lively, peppery warmth. Cinnamon gives the syrup a rounded spice note, while cloves bring a deeper aromatic flavor. Star anise is optional, so you can leave it out when you want the elderberry, ginger, and cinnamon to be the main flavors. Honey adds sweetness and body, turning the cooked berry juice into a pourable syrup rather than a thin drink.
The texture also changes in a useful way as the mixture cooks. At the beginning, the berries float in a generous amount of water. As the uncovered pot simmers, the berries soften and the liquid becomes darker and more concentrated. Pressing the berries against the side of the pot helps release juice before straining. Later, pressing the softened berries in the lined strainer extracts more of that concentrated liquid and leaves a fairly dry pulp behind.
This is a flexible preparation without being vague. The best checkpoints are easy to see: note the liquid level at the start, reduce it by about one-half, let the mixture cool slightly, measure the strained juice, and add honey in relation to that measured amount. Those checkpoints help the recipe work even when the starting berries release different amounts of juice or the simmer moves at a different pace.
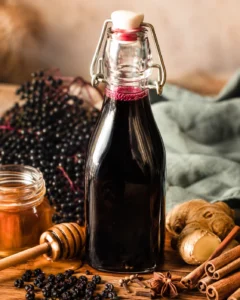
The syrup is also practical to portion. Airtight glass containers, such as mason jars, 8-ounce swing-top bottles, 16-ounce glass bottles, or swing-top flasks, make it easy to refrigerate the finished batch. Small bottles can be shared as a homemade holiday gift. If you are planning to give it away, label the container with the ingredients and the date it was made, and remind the recipient that it belongs in the refrigerator.
Elderberries and honey are traditionally valued in seasonal preparations. Elderberries are associated with antiviral and antimicrobial properties, and the syrup is often used when people want a comforting, sweet berry preparation during cold and flu season. Honey is thick and soothing for a sore throat and is commonly used to calm a cough. These traditional uses do not replace medical care, and the safety guidance below is important before anyone consumes the syrup.
Ingredients
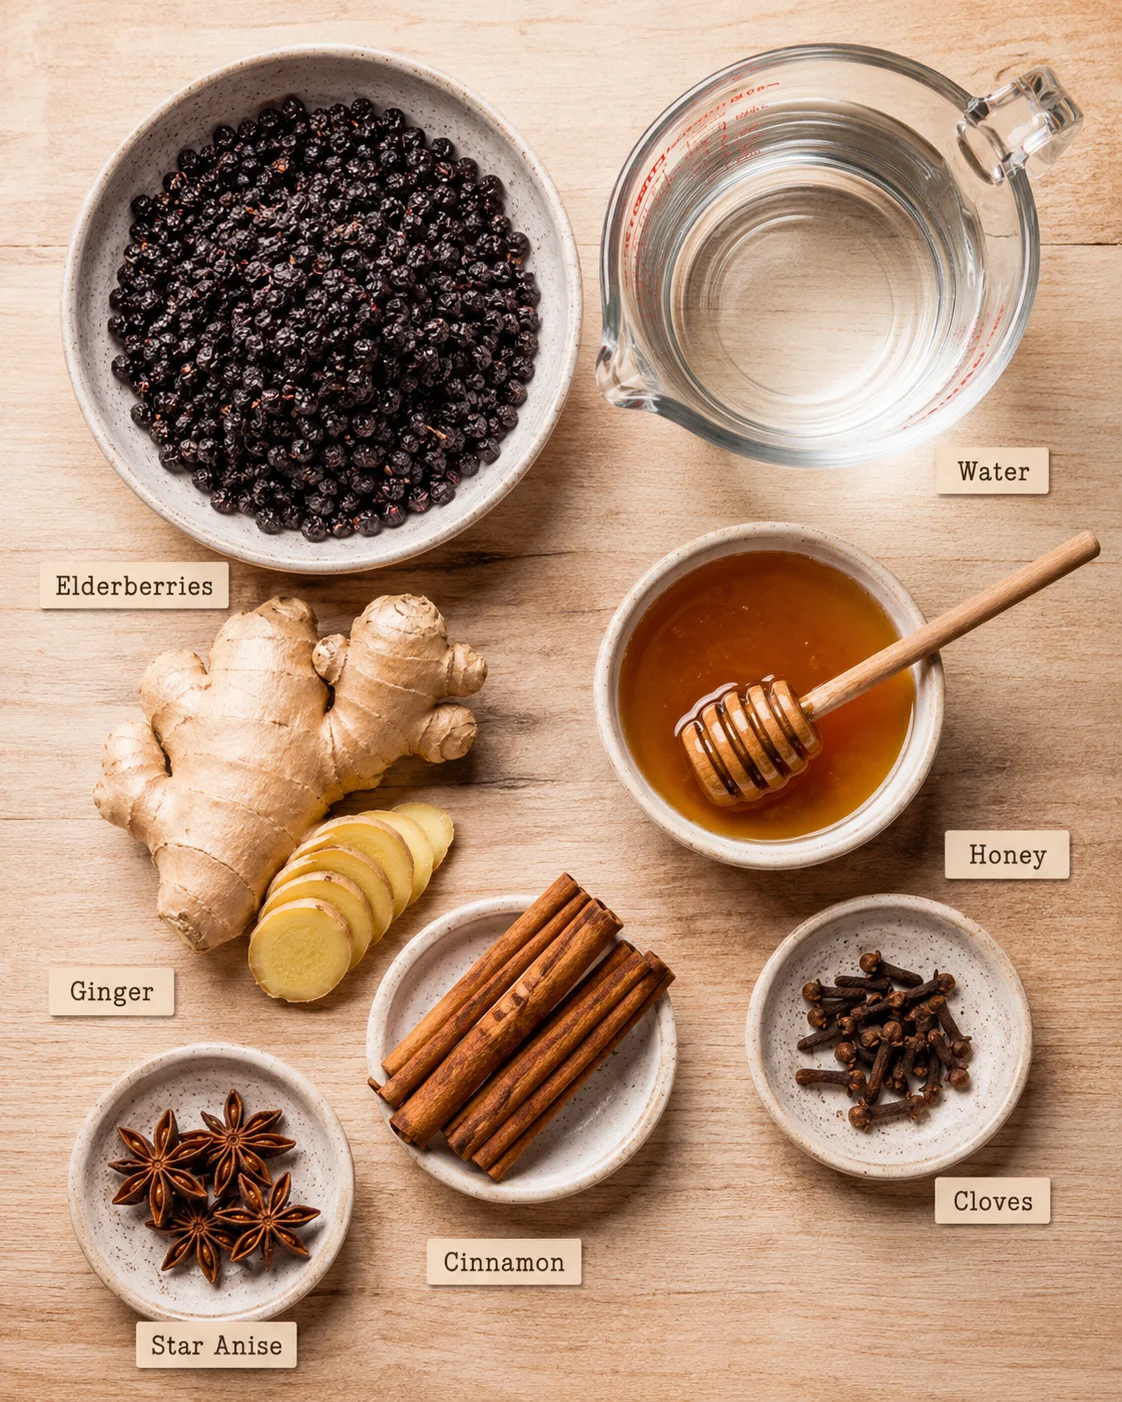
This batch makes approximately 40 ounces of elderberry syrup. Gather a large pot or saucepan, a spoon for stirring and pressing, a measuring cup, a fine-mesh strainer, a glass mixing bowl, cheesecloth or a nut milk bag, a whisk, and airtight glass storage containers. A potato masher is optional but useful for pressing the berries during the simmer.
- Elderberries: Use 4 cups dried organic elderberries, or 8 cups fresh, ripe organic elderberries. Frozen elderberries can be used in the fresh-berry method. One bag of dried elderberries is enough for this batch.
- Water: Use 8 cups with dried elderberries. Use 1 cup with fresh or frozen berries, because the fresh berries release natural juice as they cook.
- Honey: Use 16 to 24 ounces. The equal-volume approach is to add approximately the same amount of honey as the concentrated elderberry juice; for example, 3 cups of juice with 3 cups of honey. The recipe also gives a lower-honey option of 16 ounces of honey for 24 ounces of juice.
- Fresh ginger: Use 2 tablespoons of grated raw fresh ginger, or 1 teaspoon ground ginger. The cooking directions use 2 heaping tablespoons of freshly grated ginger when that form is selected.
- Cinnamon: Use 1 teaspoon cinnamon powder or 2 whole cinnamon sticks.
- Cloves: Use 1/2 teaspoon, either whole or ground. The directions also describe 1/2 teaspoon of ground cloves as an alternative to whole cloves.
- Star anise: Add 2 to 3 whole star anise if desired. It is optional and can be left out.
- Alcohol: Add an optional splash of whiskey, vodka, brandy, or another liquor to help extend shelf life. For this batch size, the recipe gives one-third to one-half cup as an amount that can be used for that purpose.
- For straining: Use a fine-mesh stainless steel strainer lined with cheesecloth or a nut milk bag. An unbleached cotton cheesecloth is one option, but any suitable cheesecloth or nut milk bag listed for straining will do.
- For storage: Choose airtight glass containers, such as mason jars, 8-ounce swing-top bottles, 16-ounce glass bottles, or glass swing-top flasks.
Ingredient Notes
Dried and fresh elderberries are not interchangeable by volume in the first step. Dried berries need 8 cups of water for 4 cups of berries. Fresh or frozen berries use 8 cups of berries and only 1 cup of water. The natural juice from fresh berries supplies much of the liquid. Frozen berries can be added without defrosting, which keeps this version convenient when the berries are stored in the freezer.
Use ripe blue-black elderberries identified as Sambucus nigra for this preparation. Do not substitute red elderberries, identified as Sambucus racemosa; the red-berried varieties should be avoided. Whether the berries are fresh or frozen, remove every stem before cooking. Stems and leaves are not ingredients for this syrup.
Honey is both the sweetener and an important part of the finished syrup’s body. The full honey-to-juice ratio is the standard choice described here. Agave or maple syrup can be used instead when a vegan version is desired, but the recipe does not provide a precise replacement ratio or the same storage guarantee for those sweeteners. Treat that as an adaptation rather than an exact one-for-one promise.
For the spices, choose whichever form is easiest to use. Powdered cinnamon disperses into the liquid, while cinnamon sticks are easy to remove with the strained solids. Freshly grated ginger gives a vivid ginger flavor; ground ginger is the listed alternative. Whole cloves and ground cloves both work. Star anise adds another layer of spice but is not required for the syrup.
Instructions
Set out the straining equipment and storage containers before you turn on the stove. The syrup is easiest to handle when the bowl, strainer, cheesecloth or nut milk bag, measuring cup, whisk, and jars are ready. The process has seven main stages: combine, spice, simmer and reduce, strain, measure, sweeten, and bottle.
-
Combine the elderberries and water. For dried berries, place 4 cups of dried elderberries and 8 cups of water in a large pot or saucepan. Before heating, note the height of the liquid in the pan. You can mark the level mentally, use the edge of a spoon as a visual reference, or simply pay close attention to how full the pot is. This starting point makes it easier to judge the later reduction.
For fresh berries, use 8 cups of washed, ripe berries and 1 cup of water. Remove all stems before the berries go into the pan. For frozen berries, use the same 8-cup berry and 1-cup water arrangement, and add the berries while they are still frozen; there is no need to thaw them first.
-
Add the spices. Set the stove to medium-low, bringing the mixture to a simmer rather than a boil. Once the liquid has begun to heat, stir in 1 teaspoon of cinnamon powder or 2 whole cinnamon sticks, 1/2 teaspoon of whole cloves or 1/2 teaspoon of ground cloves, and 2 heaping tablespoons of freshly grated raw ginger. If using ground ginger instead of fresh, use 1 teaspoon. Add 2 to 3 whole star anise if desired.
Medium-low heat gives the berries time to soften and release their juice without turning the pot into a hard boil. Stir after the spices are added so powdered spices disperse and the berries are coated with the fragrant liquid.
-
Simmer and reduce. Keep the pot uncovered so steam can escape. Stir occasionally as the berries soften and the water reduces. For dried berries, continue until the liquid is about half its original volume. Depending on how vigorous the simmer is, that reduction may take about 30 minutes or as long as one to two hours. Let the visual reduction guide you rather than forcing the process to fit a single clock time.
A slow-and-steady simmer is a useful approach. The berries should become soft, and the liquid should deepen in color and become more concentrated. Use a large, flat wooden spoon to press the berries against the side of the pot as you stir. A potato masher can do the same job. Pressing breaks down the softened berries and helps squeeze more juice into the cooking liquid.
For fresh berries, simmer the berries and 1 cup of water for at least 30 minutes, until the berries are soft and have released their juices. Stir and press them from time to time. Strain out the skins and pulp after this initial simmer, return the elderberry juice to the pan, and continue simmering until the original amount has been reduced by about one-half. The fresh-berry method therefore includes an early strain before the final reduction.
-
Strain the mixture. When the liquid has reduced to about half of its starting volume, let the mixture cool slightly. It should not be piping hot when you handle it, but it should remain warm enough to help the honey dissolve later. If you are using fresh berries and already strained the skins and pulp during the first simmer, this is the time to complete the final squeeze and strain of the reduced juice.
Set a fine-mesh stainless steel strainer over a glass mixing bowl and line it with cheesecloth or a nut milk bag. Pour a small amount of the berry mixture into the lined strainer. Add the mixture gradually instead of filling the strainer to the brim. Press the berries down with a wooden spoon as you work, allowing the juice to collect in the bowl below.
Continue adding, pressing, and mashing until the entire mixture has passed through the strainer and the solids left behind are fairly dry berry pulp. Close the sides of the cheesecloth around the pulp to make a small bundle, then squeeze it carefully to extract more liquid. Elderberry juice can stain hands purple for a day or two, so wear gloves if you want to avoid stained fingers. Take care when lifting the warm bundle and keep the bowl steady.
-
Measure the concentrated juice. Pour the strained juice into a liquid measuring cup and note the volume. Three cups is one example, but the amount can vary with the berries and the reduction. Return the measured juice to the pot, and do not turn the heat back on.
Measuring at this stage makes the honey addition flexible and keeps the finished syrup consistent with the amount of juice you actually produced. It also prevents adding honey to a hot, actively simmering liquid.
-
Whisk in the honey. Add honey in an amount that matches the concentrated juice for the full honey-to-juice ratio. For example, use 3 cups of honey for 3 cups of juice. The ingredient list allows 16 to 24 ounces of honey, and the recipe also describes using 16 ounces of honey with 24 ounces of elderberry juice as a lower-honey option. Whisk until the honey is thoroughly incorporated.
Avoid heating the honey directly. The juice should still be warm enough to help it dissolve without returning the pot to the stove. If the honey is very cold, keep its sealed jar in a bowl of warm water so it softens gently, then whisk it into the warm juice. Do not microwave or boil the honey.
If you are adding alcohol, stir in a splash of vodka, whiskey, brandy, or another liquor after the honey is incorporated. One-third to one-half cup is the amount described for this batch when alcohol is used as an extra preservative. Keep the addition optional; it changes the flavor and means the finished syrup is not alcohol-free.
-
Bottle and refrigerate. Pour the finished elderberry syrup into clean, airtight glass containers. Mason jars, glass swing-top bottles, 16-ounce glass bottles, and swing-top flasks are all listed storage options. Leave enough room to close each container without spilling, secure the lids, and transfer the bottles or jars to the refrigerator.
Let the containers cool in a controlled way rather than sealing steaming-hot syrup into a crowded refrigerator. Once chilled, keep the syrup refrigerated and use a clean spoon whenever you portion it. A label with the preparation date, ingredients, and whether alcohol was added makes the jars easier to manage.
How to Judge the Reduction
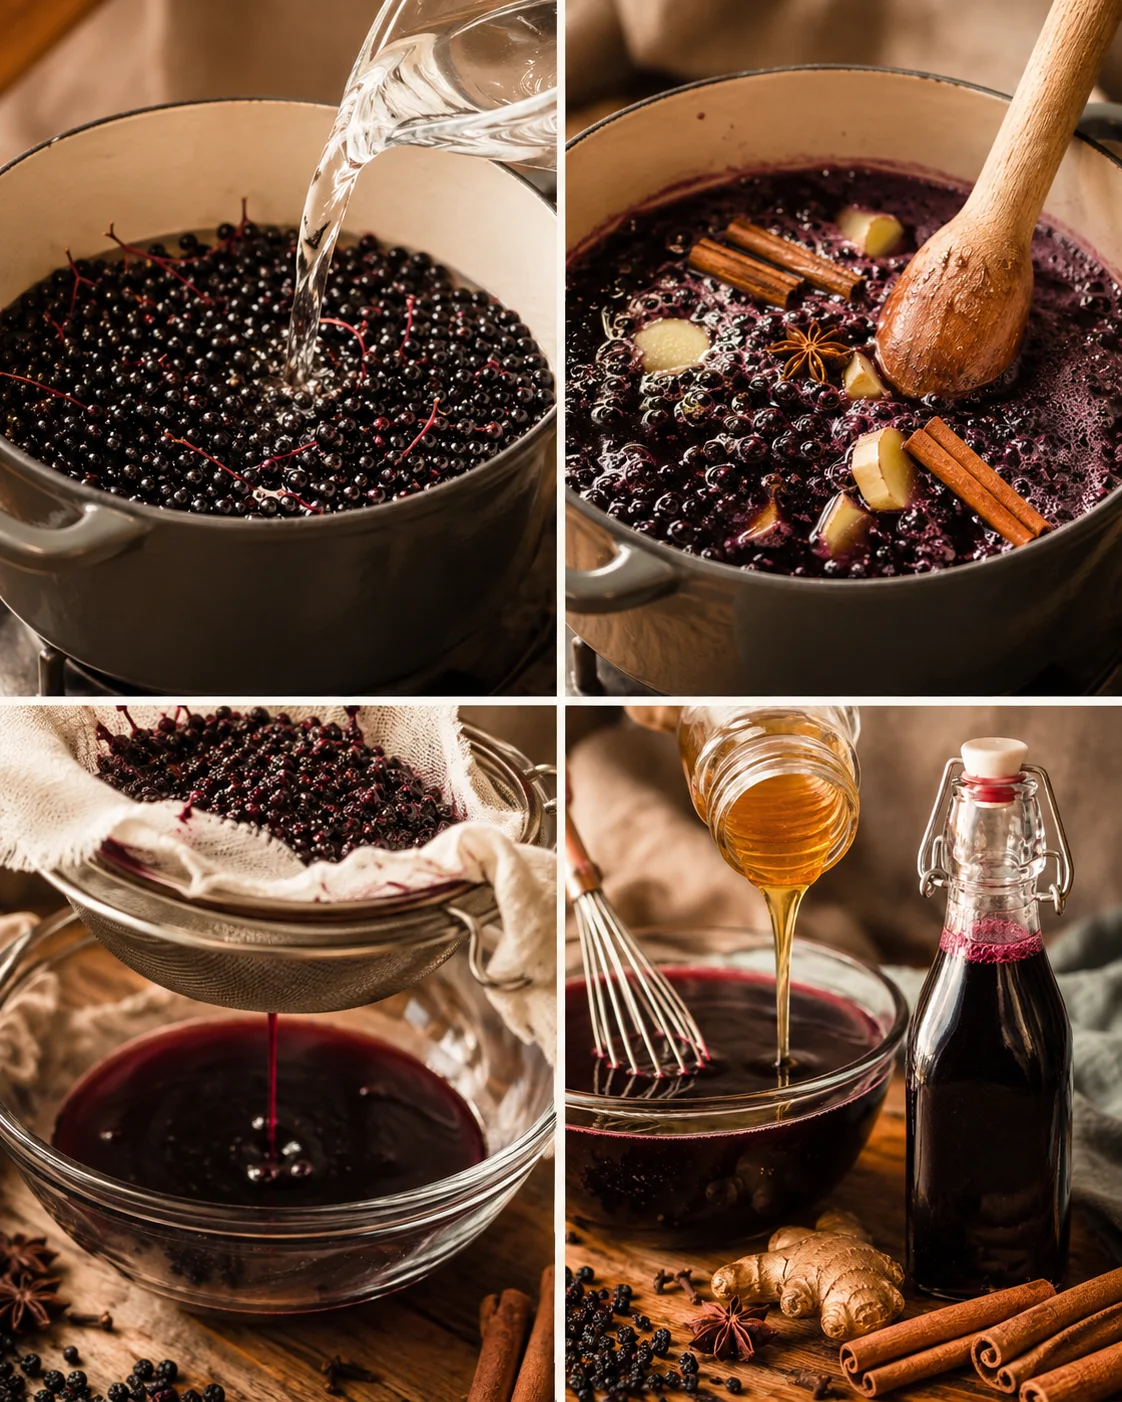
The reduction is the point that gives this recipe its concentrated character. Before the pot heats, note the starting liquid level. During cooking, the berries soften, the color becomes deep purple, and steam leaves the uncovered pan. When the liquid reaches approximately half of the initial level, the juice is ready for the next stage. The exact amount of time depends on the heat level and the width of the pan, so a visual check is more useful than assuming the reduction will always take one hour.
Fresh berries require a slightly different sequence because they begin with much less added water. Cook them until soft and juicy, strain away the skins and pulp, and then return the juice to the pan for the half-volume reduction. With dried berries, the skins and pulp remain in the pot during the reduction and are removed afterward. In both versions, pressing the berries helps collect more juice.
Tips
Choose the berries carefully. Use blue-black elderberries for this recipe, not red elderberries. Fresh berries should be ripe. Dried berries are suitable as written, and frozen berries can be used without thawing. If gathering fresh berries, remove all stems before the berries enter the pot. Do not assume that cooking will make stems, leaves, unripe berries, or the wrong variety appropriate for the syrup.
Keep the pot uncovered. The reduction depends on evaporation. A lid traps steam and slows the process, while an uncovered pot lets the liquid move toward the desired half-volume cue. Stir from time to time so the berries do not sit undisturbed on the bottom and so the spices remain distributed.
Use medium-low heat. The goal is a simmer, not a boil. A hard boil can make the mixture foam and move unpredictably, while a gentle simmer gives the berries time to soften. If the liquid is barely moving, the reduction will take longer. If it is boiling vigorously, lower the heat and continue with the uncovered pot.
Press the berries twice. During the simmer, press them against the side of the pot with a broad wooden spoon or potato masher. During straining, press the softened berries in small batches. The first pressing helps release juice into the cooking liquid; the second extracts the juice that remains in the pulp. Adding the mixture to the strainer a little at a time gives you better control and reduces the chance of overflowing the bowl.
Protect your hands from stains. Elderberry juice is deeply colored and may dye skin purple for a day or two. Gloves are optional but helpful when squeezing the cheesecloth bundle. Set the strainer on a stable glass bowl and lift the warm cloth carefully. Keeping the work area uncluttered makes the straining stage safer and less messy.
Do not add honey over direct heat. Once the juice is strained, return it to the pot with the burner off. The residual warmth should help the honey blend in. If the honey is too cold to whisk easily, warm the sealed honey jar in a bowl of warm water. Do not microwave or boil the honey, and do not turn the stove back on just to dissolve it.
Measure the juice before sweetening. The honey amount relates to the concentrated juice, not necessarily to the initial amount of water. The recipe gives equal amounts as the usual full ratio, such as 3 cups of juice and 3 cups of honey, while also allowing 16 to 24 ounces of honey. Measuring first lets you make that decision with the actual yield in front of you.
Think about the final flavor. Cinnamon sticks, whole cloves, and star anise can be removed with the solids during straining. Ground spices may remain dispersed in the syrup. Star anise is optional, so omit it if you prefer a simpler berry-and-ginger profile. Fresh ginger has a bright, assertive flavor, while ground ginger is a convenient alternative.
Do not rush the cooling step. The mixture should cool slightly before straining so it can be handled without burns, but it should not become completely cold. Warm juice helps the honey dissolve later. This balance is especially useful when the strainer and cheesecloth need to be handled by hand.
Keep storage realistic. Refrigeration is part of the recipe, not an optional finishing touch. Use airtight glass containers and store the bottles or jars in the refrigerator. The full honey-to-juice ratio is associated with at least three months of refrigerated storage in the recipe, while alcohol may prolong shelf life. The lower-honey version should be used faster than that recommendation. Inspect the syrup and discard it if it develops mold, off flavors, or off odors.
Safety Notes for Fresh Elderberries
Correct identification and preparation are essential. Blue-black elderberries used for this recipe are associated with Sambucus nigra. Red elderberries associated with Sambucus racemosa are toxic and should be avoided. Never use a mixed batch when you cannot distinguish the berries.
Only cooked, ripe fresh elderberries or dried elderberries belong in this preparation. Raw, uncooked, or unripe berries may cause an upset stomach and uncomfortable side effects. Stems and leaves contain cyanide and must be thoroughly removed from fresh berries. Other parts of the elderberry plant are not ingredients in this syrup. Dried berries are treated as cooked in the recipe and do not present the same raw-berry concern.
Pregnancy also deserves caution. There is not enough evidence to establish that elderberry is safe during pregnancy, so consult qualified healthcare personnel before using it. Elderberry syrup is not a substitute for diagnosis or treatment, and anyone with a medical condition, medication question, or concern about an herbal preparation should ask a healthcare professional.
Variations
Dried elderberry syrup: Use 4 cups of dried organic elderberries and 8 cups of water. Simmer with the spices, leaving the pot uncovered, and reduce the liquid to about half its starting volume. This is the most convenient version when berries are stored in the pantry.
Fresh elderberry syrup: Use 8 cups of washed, ripe, stem-free fresh elderberries and 1 cup of water. Simmer for at least 30 minutes, until the berries are soft and have released their juice. Strain away the skins and pulp, return the juice to the pan, and continue reducing until the original amount is about half.
Frozen elderberry syrup: Use frozen berries in the same proportion as fresh berries: 8 cups of berries and 1 cup of water. Add them while frozen; thawing is not required. Continue with the simmer, pressing, straining, measuring, and sweetening stages.
Spice choices: Use powdered cinnamon or cinnamon sticks, whole or ground cloves, and fresh grated ginger or ground ginger. Star anise is optional at 2 to 3 whole pieces. The alternatives change the texture and appearance slightly, but they keep the same general flavor direction.
Vegan sweetener option: Agave or maple syrup can replace honey for a vegan elderberry syrup. The recipe does not give a tested conversion or the same storage guidance for these sweeteners, so add them as an adaptation and keep the finished syrup refrigerated. Do not assume that a vegan sweetener preserves the syrup in exactly the same way as the full honey-to-juice ratio.
Lower-honey version: The recipe describes using 16 ounces of honey with 24 ounces of elderberry juice instead of an equal amount of honey and juice. This produces a less sweet syrup, but it should be used faster than the full-ratio version. Keep it refrigerated and pay attention to changes in appearance, flavor, and smell.
Alcohol-added version: Add one-third to one-half cup of vodka, whiskey, brandy, or another liquor to this batch as an extra preservative. This option may extend shelf life, but it changes the flavor and is not appropriate when an alcohol-free preparation is needed. Label the bottles clearly if the syrup is being shared.
Agave or maple with the spices: If honey is not part of your diet, the berry and spice base can still be made with ginger, cinnamon, cloves, and optional star anise. Because the recipe does not specify a replacement amount, make the sweetener adjustment gradually and keep the emphasis on a pourable syrup rather than trying to force an exact honey-equivalent texture.
Storage
Pour the finished syrup into airtight glass jars or bottles and refrigerate it. Mason jars, swing-top bottles, glass bottles, and swing-top flasks are all suitable container styles listed for the recipe. Refrigeration begins after the syrup has been bottled; do not treat this preparation as a shelf-stable canned product.
When made with the full honey-to-juice ratio, the syrup should stay good for at least three months in the refrigerator according to the recipe. Adding alcohol may prolong the shelf life further. A version made with less honey should be used faster than the full-ratio recommendation. Keep all versions cold and use clean utensils when serving.
Before using an older jar, look and smell carefully. Mold, off flavors, or off odors are signs to discard the syrup. The recipe notes that a full-ratio syrup may remain usable beyond three months when those spoilage signs are absent, but storage conditions vary, so do not ignore any change in the syrup.
What to Do with the Leftover Pulp
The berry pulp left in the cheesecloth does not have to go straight into the compost. It can be composted, or it can be steeped in water to make a dilute elderberry tea. A food dehydrator can also be used to dry the leftover berries for future loose-leaf tea or for use in fire cider. The pulp is slightly spent after straining, but it may still contain some of the berry’s flavor and material.
To save it, spread the leftover pulp in a dehydrator and dry it on a low setting until it is completely crunchy and dry. Store the dried pieces in an airtight container. Keep this reuse separate from the syrup-making workflow, and do not use wet pulp for long-term storage.
Serving Suggestions
Elderberry syrup can be taken by the teaspoon or used as a sweet component in another preparation. The directions describe taking up to 1 teaspoon up to three times per day, with 1 teaspoon per day used as a seasonal preventative measure and an increase to two or three times per day when cold symptoms are beginning or illness is present. Because this is an herbal preparation, use personal judgment and consult a healthcare professional with questions about whether it is appropriate for you.
The syrup is especially associated with cold and flu season and with the first appearance of symptoms or after being around someone who is sick. Those traditional uses should not be treated as a promise to prevent or cure illness. Seek medical care for serious, persistent, or worsening symptoms.
For a simple presentation, pour the syrup into small glass bottles and keep them chilled. The bottles can make a sweet homemade holiday gift when labeled with the ingredients, date, refrigeration instructions, and whether alcohol was added. The dark color and warm spice make the syrup feel special without requiring elaborate packaging.
Another use is homemade elderberry gummies. The syrup can serve as the berry base for gummies, giving the finished treat a concentrated color and flavor. Follow a separate gummy recipe for the setting ingredients and method rather than guessing how to turn the syrup into a set candy.
Frequently Asked Questions (FAQ)
Can I use fresh, frozen, and dried elderberries in the same way?
You can use all three forms, but the water amount changes. Use 4 cups dried elderberries with 8 cups water. Use 8 cups fresh or frozen elderberries with 1 cup water. Frozen berries do not need to be defrosted first. Fresh berries must be washed, ripe, and completely free of stems before cooking.
How do I know when the elderberry mixture is ready to strain?
Use the starting liquid level as your guide. For dried berries, simmer uncovered until the liquid is reduced to about half its original volume. For fresh berries, simmer at least 30 minutes until the berries are soft and juicy, strain the skins and pulp, then return the juice to the pan and reduce it by about half. The mixture should be concentrated and deeply colored, with softened berries that release juice when pressed.
Why should the honey be added off the heat?
The recipe keeps the honey from direct heat. After straining, return the juice to the pot without turning the burner back on. The remaining warmth should help dissolve the honey when you whisk it in. If the honey is very cold, warm the sealed honey jar in a bowl of warm water. Do not microwave or boil the honey.
Can I use maple syrup or agave instead of honey?
Yes, maple syrup or agave can be used as a vegan alternative, but the recipe does not provide an exact replacement ratio or the same storage guarantee for either sweetener. Treat the change as an adaptation, keep the syrup refrigerated, and do not assume the result will preserve exactly like a full honey-to-juice batch.
How much honey should I add?
The full-ratio method uses approximately an equal amount of honey and concentrated elderberry juice, such as 3 cups of honey for 3 cups of juice. The ingredient list allows 16 to 24 ounces of honey. A lower-honey option described for this batch uses 16 ounces of honey with 24 ounces of elderberry juice; that version should be used faster than the full-ratio syrup.
How long does elderberry syrup keep?
Store it in airtight glass containers in the refrigerator. With the full honey-to-juice ratio, the recipe says it should last at least three months, and alcohol may extend the shelf life further. Use the lower-honey version sooner. Discard any syrup that develops mold, off odors, or off flavors, and do not leave the bottles at room temperature as if they were shelf-stable preserves.
What should I do with the leftover berry pulp?
Compost it, steep it in water for a dilute tea, or dry it in a food dehydrator for future loose-leaf tea or fire cider. Dry the pulp on a low setting until it is completely crunchy and then store it in an airtight container. It will be slightly spent after the juice is pressed out, but it can still have useful flavor.
Are all elderberries safe for this recipe?
No. Use the blue-black varieties associated with Sambucus nigra, and avoid red elderberries associated with Sambucus racemosa. Only cooked, ripe fresh berries or dried berries should be used. Remove every stem and do not use leaves or other plant parts. Raw, uncooked, or unripe berries can cause an upset stomach and uncomfortable side effects.
Can I make this syrup without alcohol?
Yes. Alcohol is optional. The syrup can be made with the berries, water, spices, honey, and the straining equipment, then stored in the refrigerator. If alcohol is used, the listed amount is one-third to one-half cup of vodka, whiskey, brandy, or another liquor for this batch. It may extend shelf life, but it changes the flavor and should be labeled clearly.
Once the bottles are chilled, the syrup is ready to use. Keep the process simple: identify the berries carefully, watch the reduction, strain patiently, measure the juice, whisk in the honey off the heat, and refrigerate the finished elderberry syrup.
PrintA dark, sweet, warmly spiced elderberry syrup made from dried, frozen, or fresh elderberries, flavored with ginger, cinnamon, cloves, and optional star anise. Sweetened with honey, producing a concentrated syrup for seasonal use, gifts, or as a base for other treats.
- Prep Time: 15 minutes
- Cook Time: 30 minutes to 2 hours (simmer and reduce depending on berry type and heat)
- Total Time: Approximately 45 minutes to 2 hours 15 minutes
- Yield: Approximately 40 ounces 1x
- Category: Syrup
Ingredients
- 4 cups dried organic elderberries or 8 cups fresh, ripe, organic elderberries (frozen can be used like fresh)
- 8 cups water (when using dried berries)
- 1 cup water (when using fresh or frozen berries)
- 16 to 24 ounces honey (adjust to juice volume; equal volume recommended; 16 ounces honey for 24 ounces juice is a lower-honey option)
- 2 tablespoons freshly grated raw ginger or 1 teaspoon ground ginger
- 1 teaspoon cinnamon powder or 2 whole cinnamon sticks
- 1/2 teaspoon whole cloves or ground cloves
- 2 to 3 whole star anise (optional)
- Optional splash (1/3 to 1/2 cup) of vodka, whiskey, brandy, or other liquor for preservation (alcohol is optional)
Instructions
- Prepare your straining equipment, storage containers, and measuring tools before starting.
- Combine elderberries and water: Use 4 cups dried berries with 8 cups water, or 8 cups fresh/frozen berries with 1 cup water. Remove all stems from fresh berries.
- Set stove to medium-low heat; add spices: cinnamon (powder or sticks), cloves (whole or ground), fresh grated or ground ginger, and optional star anise. Stir gently once spices are added.
- Simmer uncovered, stirring occasionally and gently pressing berries against pot sides to release juice. For dried berries, simmer until liquid reduces by half (30 minutes to 2 hours). For fresh/frozen berries, simmer at least 30 minutes until soft and juicy, strain out skins and pulp, return juice to pot, and reduce liquid by half.
- Allow mixture to cool slightly; strain through fine-mesh strainer lined with cheesecloth or nut milk bag into a glass bowl. Press berries to extract juice; squeeze cheesecloth bundle to remove additional liquid. Wear gloves to avoid staining hands if desired.
- Measure the concentrated juice; return it to the pot but do not heat.
- Whisk in honey corresponding to juice volume (equal volumes for full sweetness or less honey for a lighter version). Warm honey gently in a warm water bath if needed; do not microwave or boil. Add optional alcohol after honey incorporation and stir.
- Pour syrup into clean airtight glass containers, leaving space for lids. Seal and refrigerate once cooled. Use clean utensils when serving and label containers with date, ingredients, and alcohol presence (if used).
Notes
Use ripe blue-black elderberries (Sambucus nigra). Do not use red elderberries (Sambucus racemosa)., Remove all stems and leaves from fresh berries; unsafe parts can cause stomach upset., Do not add honey directly over heat to preserve beneficial properties., Store syrup refrigerated; with full honey-to-juice ratio, syrup should last at least three months; alcohol addition may extend shelf life., Lower-honey version should be used more quickly and refrigerated carefully., Do not treat this syrup as shelf-stable canned product; inspect for spoilage before use., Leftover pulp can be composted, steeped for tea, or dehydrated for later use., Vegan sweeteners such as agave or maple syrup can substitute honey but may affect preservation and flavor; adjust slowly and refrigerate., Honey is both sweetener and thickening agent to produce pourable syrup consistency., Alcohol addition is optional and changes flavor; label bottles clearly if added.
Nutrition
- Serving Size: 1 teaspoon per dose
- Calories: Approximately 40-50 calories per teaspoon (varies with honey amount)
- Fat: Negligible per serving
- Carbohydrates: Approximately 13 grams per teaspoon (mainly from honey)
- Protein: Negligible per serving