Easy Pumpkin Sourdough Bread
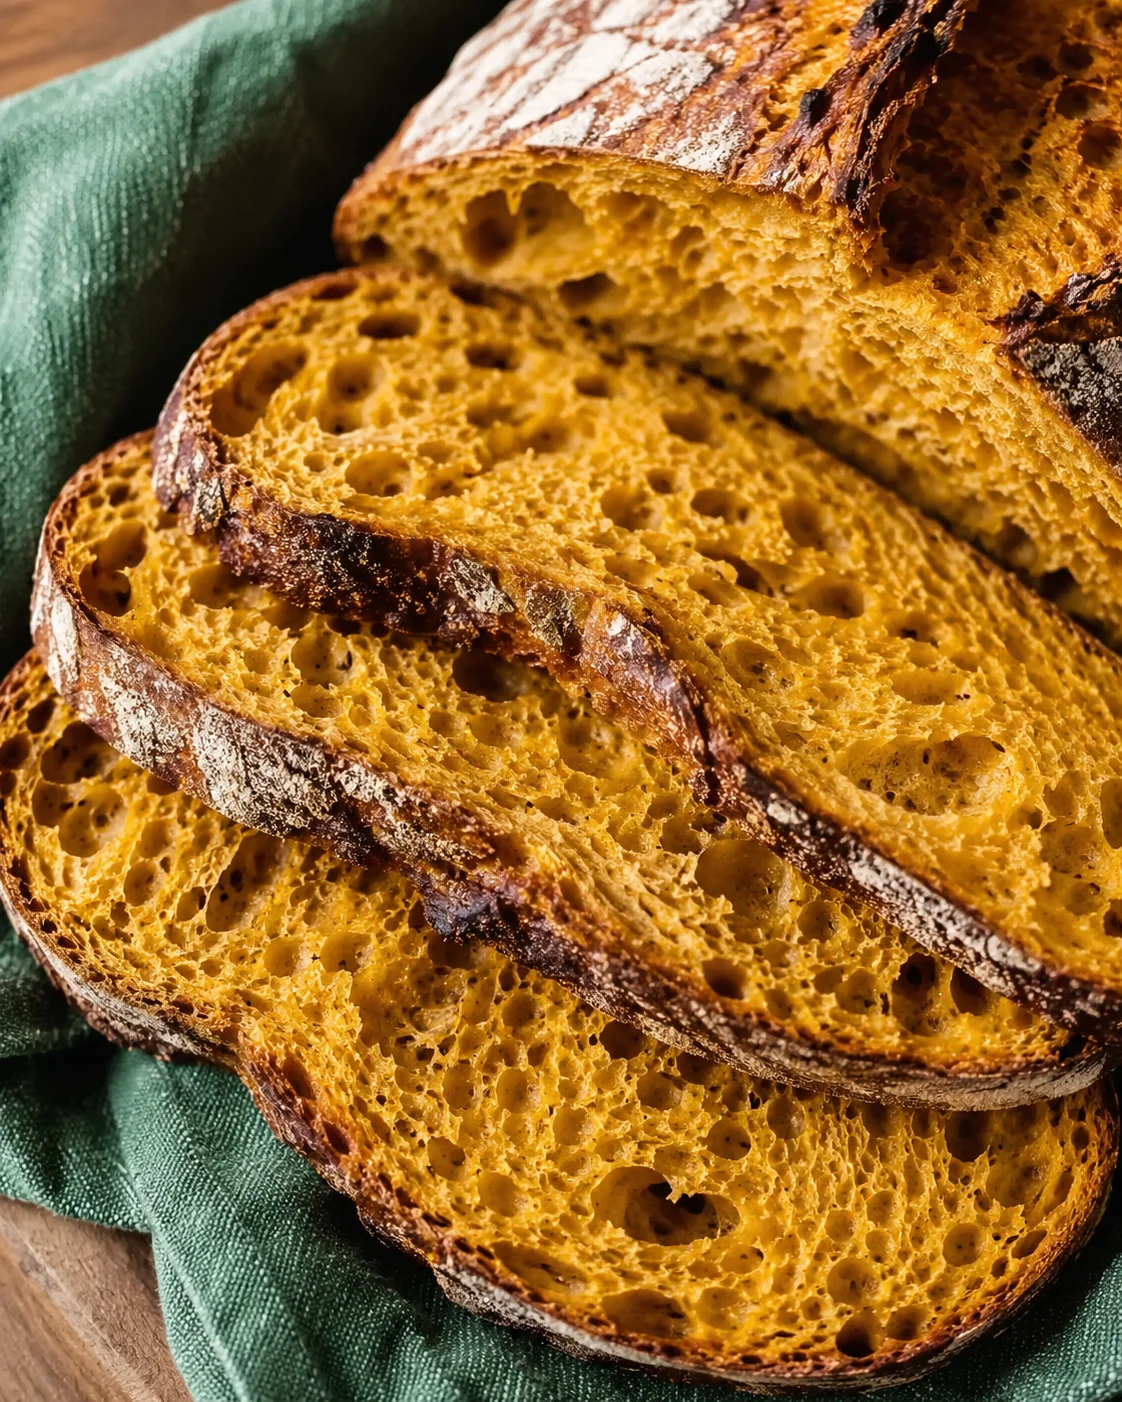
Pumpkin sourdough bread – hands down one of the most delicious pumpkin breads you’ll ever have the joy of baking and tasting!
The dough feels amazing to work with — soft, elastic, and inviting.
This pumpkin sourdough bread would shine as your Thanksgiving centerpiece or simply as a cozy, seasonal treat to warm up your autumn afternoons.
You can make this sourdough pumpkin bread with either canned pumpkin puree or your own fresh homemade pumpkin puree.
For that unbeatable oven spring and crust, I highly recommend baking it in a Dutch oven. It makes all the difference!
What exactly is pumpkin sourdough bread? Simply put, it’s a sourdough loaf beautifully flavored with pumpkin puree. Whether you use store-bought or homemade pumpkin puree, this bread packs a tender crumb and that perfectly crisp crust that sourdough lovers crave.
The pumpkin and honey add a special richness to this dough, creating a softness that you just don’t get with regular sourdough bread.
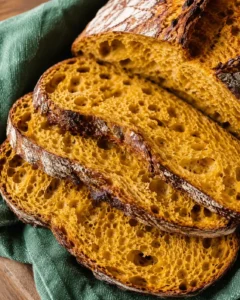
And wow, the color — that gorgeous warm pumpkin hue is enough to make your kitchen smell and look like fall in a loaf!
Because pumpkin puree adds liquid, this bread is a bit higher hydration than your everyday sourdough, but don’t let that scare you off — the dough behaves nicely thanks to the pumpkin and honey.
Welcome! You’re about to create a stunning pumpkin sourdough loaf that tastes just as good as it looks. Expect the cozy warmth of pumpkin flavor paired with a golden-orange color, and a crumb that’s silky and tender thanks to that luscious pumpkin puree and honey. When baked in a heated Dutch oven, you’ll get that oh-so-crackly crust we all love.
This recipe is flexible; you can use canned pumpkin or whip up your own puree at home (more on that in the Practical Tips below). It relies on an active sourdough starter, a simple autolyse, gentle stretch-and-folds to build strength, and a slow cold ferment that brings out deeper flavor and helps shape a gorgeous crust. Because pumpkin puree adds moisture, the dough has a higher hydration than your typical lean sourdough, but the pumpkin and honey make it surprisingly easy to handle when you follow along.
In terms of timing, you’re looking at about 4 hours of hands-on work — mixing, shaping, and those crucial folds — plus 8 hours of fermentation time, including the cold ferment stage. Baking takes around 45 minutes, so from start to finish, plan on roughly 12 to 13 hours, mostly hands-off while the dough does its magic.
Scroll down for the full ingredient list and detailed step-by-step directions, plus handy troubleshooting tips, storage advice, and fun ideas to customize your loaf with seeds, herbs, or cozy warming spices. Take a peek through the notes before you dive in so you’ll feel confident handling this slightly wetter dough — then enjoy the relaxing baking journey and the wonderful scent of pumpkin bread filling your home.
Flavor, Texture, and Versatility
Why bake this pumpkin sourdough bread? Because it brings together fall’s deep pumpkin flavor and rich color with the classic tang and chewy structure of sourdough. The pumpkin and honey enrich the dough, creating a crumb that’s silky soft, yet with a crust that’s delicately crisp and beautifully blistered.
This bread is wonderfully versatile—it works just as well for sweet spreads and jams as it does for savory toppings like cheese or eggs. For a savory-sweet pairing, try it with bacon jam. It’s perfect for a festive Thanksgiving table or a comforting fall breakfast.
Even though it has a higher hydration, the dough feels forgiving — the pumpkin helps to keep it manageable and yields a fantastic oven spring, especially when baked in your trusty Dutch oven.
- Vibrant, beautiful pumpkin color with warm flavor that’s never too sweet.
- Soft, tender crumb thanks to pumpkin puree and a touch of honey.
- Perfect for using either canned or homemade pumpkin puree (and any leftover puree is great in Pumpkin Zucchini Muffins).
- Outstanding oven spring and crust when baked in a preheated Dutch oven.
- Customizable—add oats, seeds, herbs, or warming spices to make it your own.
What You’ll Need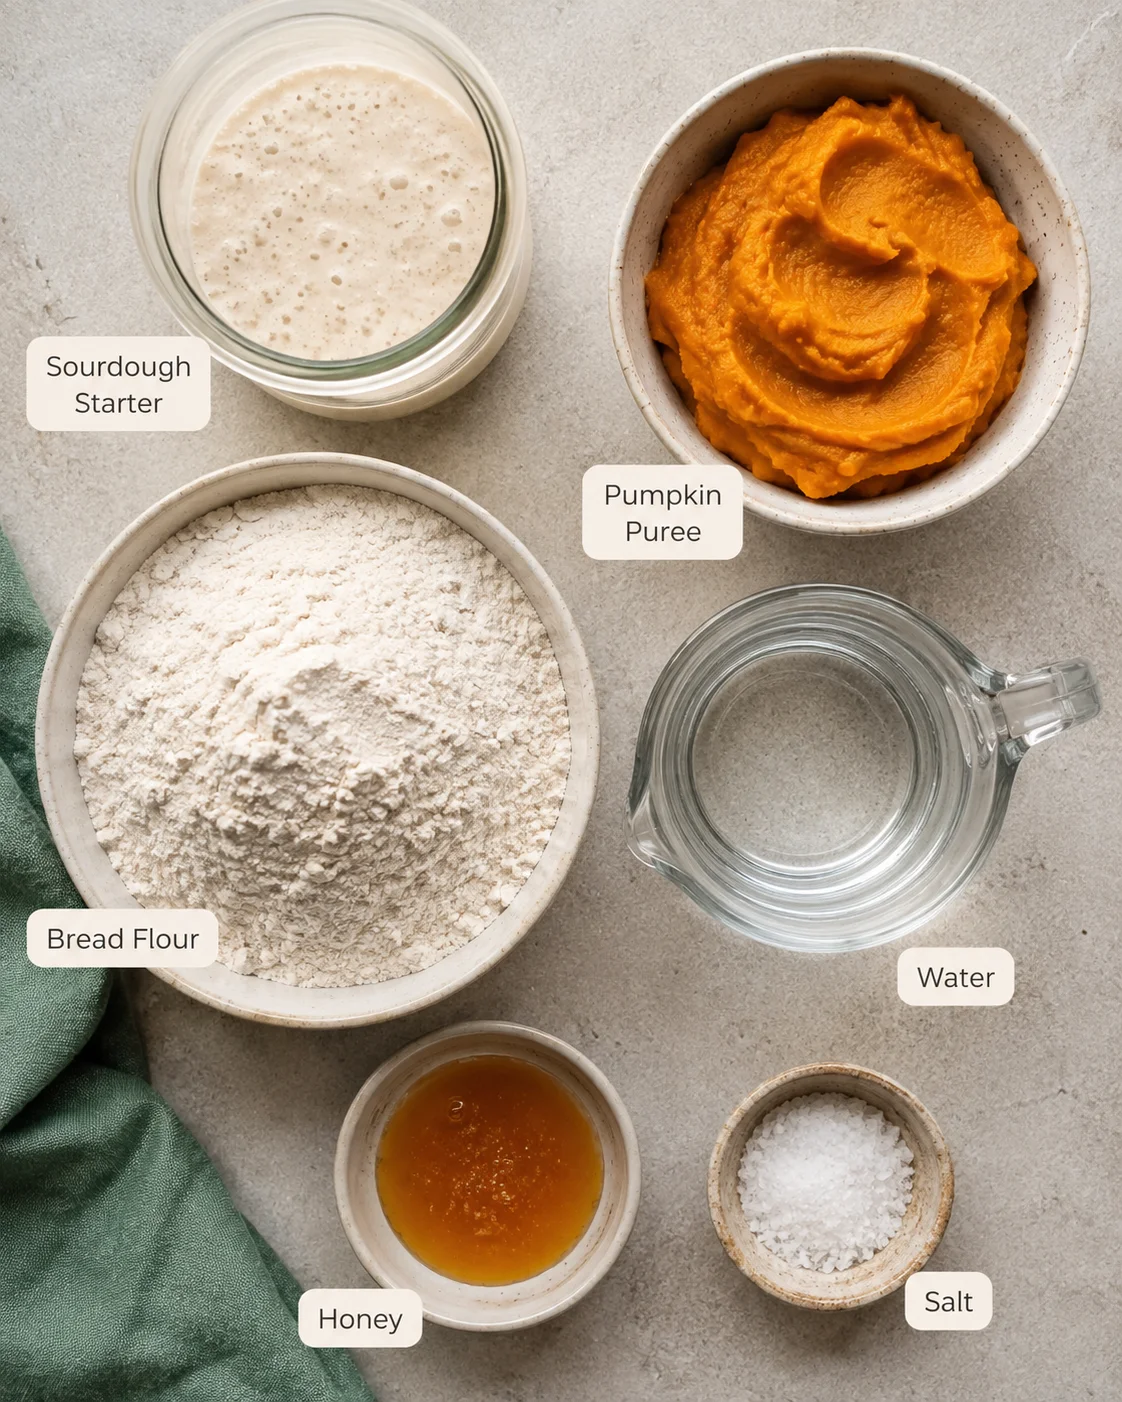
- 100 g active sourdough starter (fed and bubbly)
- 200 g pumpkin puree (canned or homemade)
- 500 g bread flour
- 280 g water (plus a little extra on hand just in case)
- 20 g raw, unprocessed honey
- 10 g salt
How to Make the Loaf
- Measure 100 g active sourdough starter, 280 g water, and 20 g honey into a mixing bowl and stir until the honey blends.
- Add 200 g pumpkin puree, 500 g bread flour, and 10 g salt; mix gently with the end of a spoon until a shaggy dough forms.
- Cover the bowl and autolyse (rest) the dough for about 1 hour.
- Reach around the bowl and stretch the dough up and fold it over itself repeatedly to form a smooth ball (about 20–25 folds); cover and rest 30 minutes.
- Perform four sets of stretch-and-folds, waiting 15–30 minutes between each set to build strength.
- When doing stretch-and-folds on the work surface, mist the bench lightly with water instead of flour to keep the dough manageable.
-
Cover and bulk ferment the dough until it roughly doubles in size and looks bubbly and jiggly (timing depends on room temperature).
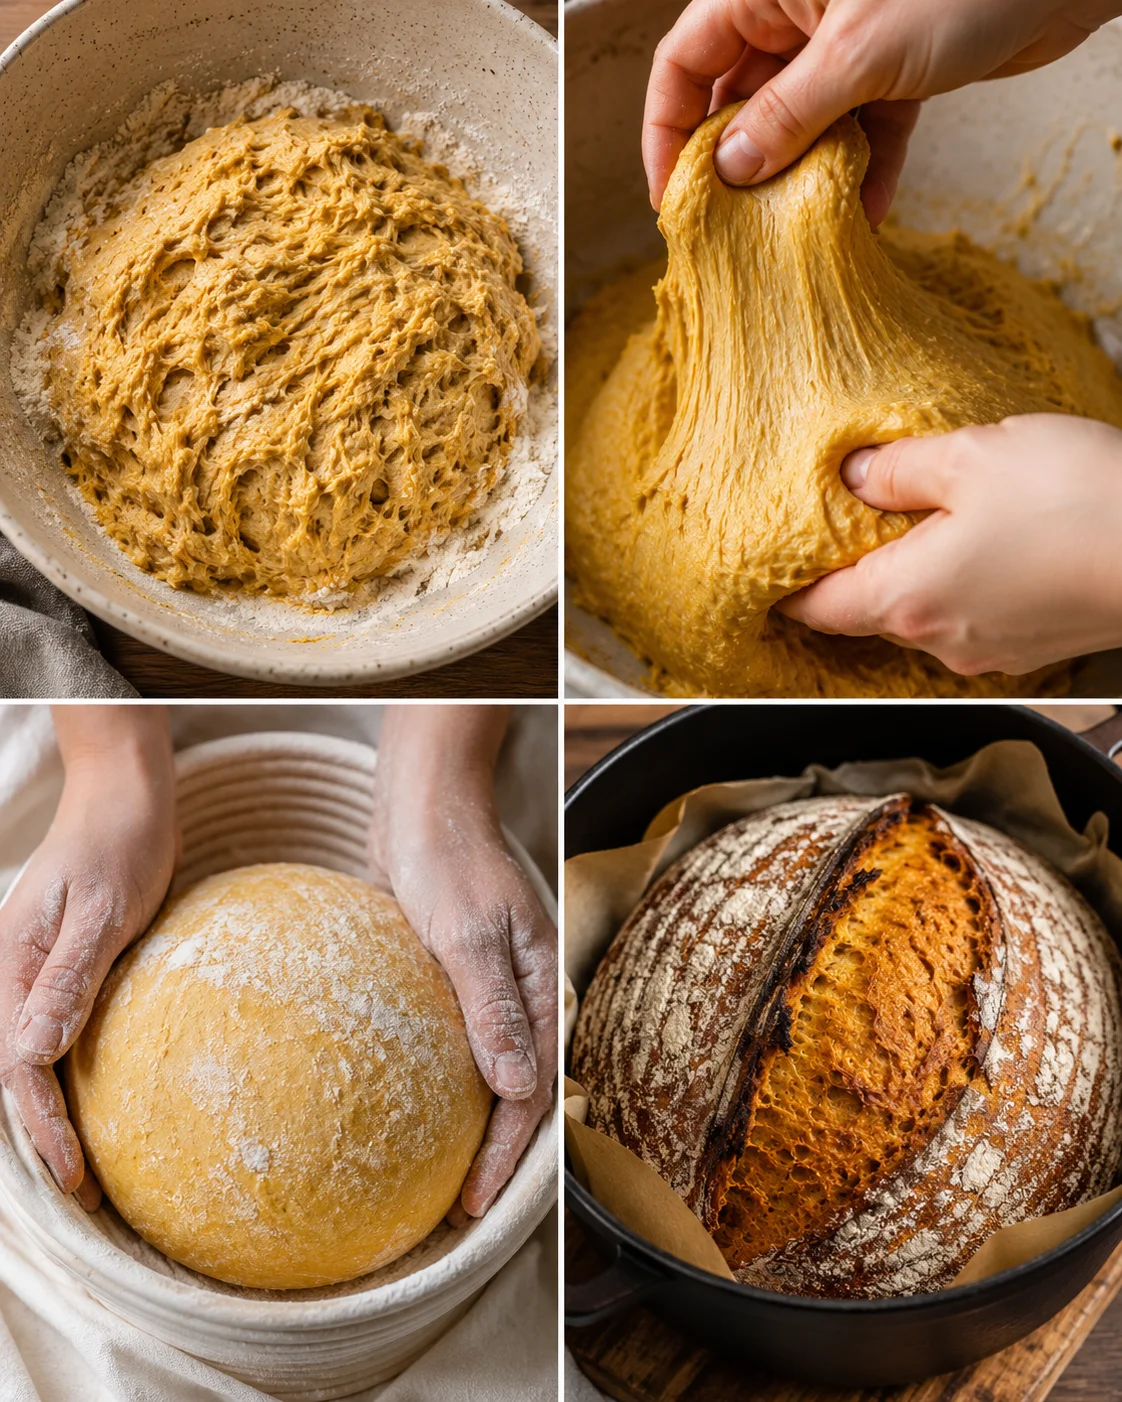
- Shape the dough to create good surface tension (batard or preferred shape), sprinkle the banneton generously with flour, and place the dough seam-side up into the banneton (add oats/seeds to the banneton beforehand if using).
- Cover the shaped dough loosely and cold ferment in the refrigerator for 5 to 36 hours.
- Preheat the oven to 230°C (450°F) with the Dutch oven inside for about 1 hour; keep the dough cold until baking.
- Transfer the chilled dough onto a piece of parchment, score the top with a lame or sharp knife, and optionally spritz the dough with water.
- Carefully remove the hot Dutch oven, place the dough (on the parchment) into the pot, cover with the lid, and bake 30 minutes at 230°C (450°F).
- Remove the lid, reduce oven temperature to 210°C (410°F), and bake another 10–15 minutes until crust is golden and done (place a baking sheet on the rack below the Dutch oven if you want to protect the bottom).
- Carefully remove the loaf from the Dutch oven and transfer it to a wire rack to cool completely before slicing.
Tips for Perfect Dough
For this recipe, I used homemade pumpkin puree. We grow pumpkins, so it’s a good way to use them up — plus, fresh pumpkin puree is hard to beat for flavor.
If canned pumpkin puree is easier where you live, that’s great too! It’s convenient and tends to have slightly less water than homemade, which can make the dough a bit easier to manage.
Here’s homemade puree made from butternut pumpkin.
If you make your own pumpkin puree, don’t over-blend it into a watery liquid. Roast or cook the pumpkin, drain off excess moisture, and mash it into a thick puree.
Let it cool completely before storing in the fridge to avoid condensation adding extra liquid.
You can roast the pumpkin before pureeing to get a drier, firmer texture, which is helpful for bread dough.
Because pumpkin puree adds a lot of hydration, I reduced the water in this recipe accordingly. Different purees will have different moisture levels, so keep an eye on your dough’s feel.
I recommend adding 280 g water during autolyse, then if it needs it, add up to 20 g more water during mixing. Adding too much water can make the dough too wet and hard to handle.
With around 280 g water plus pumpkin puree, you’re looking at roughly 80% hydration dough — that sounds scary but it’s actually quite manageable because pumpkin and honey give the dough a soft, silky texture.
If you want to be more cautious, drop the initial water to 250 g and increase slowly if needed. If you’d prefer a simpler no-knead option with pumpkin flavor, try this Vegan Pumpkin Applesauce Bread.
Many bakers like to shape this pumpkin sourdough bread like a pumpkin – cute but a bit fiddly! I prefer a simple batard for ease of slicing and toasting, and find we eat more bread when it’s practical.
But if you’re dreaming of a pumpkin-shaped loaf for your fall table, absolutely go for it!
For a festive Thanksgiving look, try using a couronne banneton to shape your dough into a beautiful wreath-style pumpkin bread.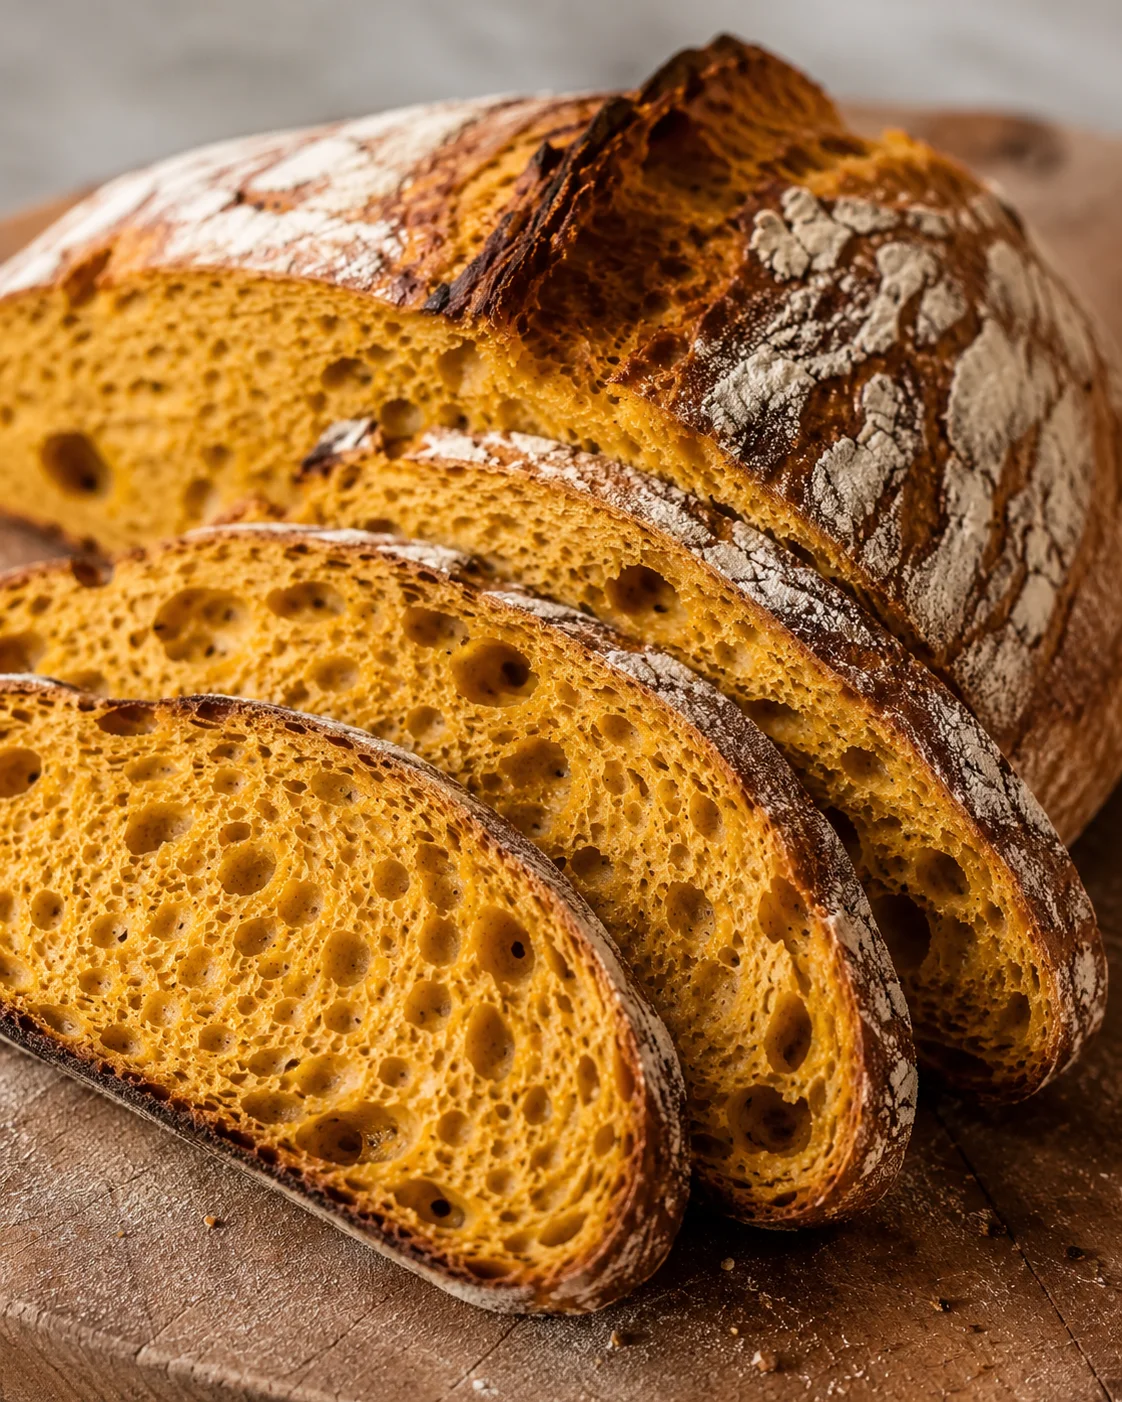
Add-Ins and Substitutions
This pumpkin sourdough bread is delicious on its own, but it’s also a great canvas for creative twists.
- Sprinkle rolled oats into your banneton before placing your dough. The oats stick to the crust for a rustic, chewy texture.
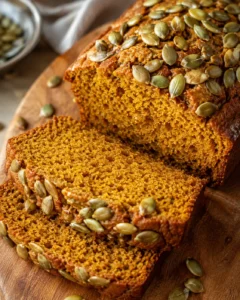
- Add pepitas (pumpkin seeds) to the banneton for a festive pumpkin vibe and extra crunch.
- Fold in fresh or dried thyme leaves to add a savory herbal note that pairs beautifully with pumpkin.
- Make it a pumpkin pie-style bread by folding in warming spices like cinnamon, nutmeg, ginger, and cloves (for a classic balance, take cues from this crustless pumpkin pie). Your kitchen will smell amazing! Just be careful with cinnamon—it can slow down fermentation if used in large amounts.
The honey lends a gentle sweetness, but it’s subtle enough for savory toppings too—try this bread in grilled cheese sandwiches or under poached eggs for breakfast.
Honestly, my favorite way to enjoy this pumpkin sourdough bread is simply buttered alongside a hot cup of tea… best enjoyed in quiet moments after bedtime!
This easy pumpkin sourdough bread would make a stunning Thanksgiving sourdough bread to wow your guests. It’s a perfect loaf for all fall and autumn occasions, too—especially alongside a cozy carrot ginger soup.
Keeping Your Loaf Fresh
Thanks to the pumpkin puree and honey, this loaf stays moist longer than your average lean sourdough, but it will still stale or grow mold if left uncovered.
Store it at room temperature wrapped in a clean tea towel or in a breathable bread bag for 2–3 days. Avoid tight plastic wrap at room temp, since trapped moisture encourages mold.
If you need to keep it longer, refrigerate the bread—it slows mold growth but causes it to stale faster. Expect the texture to firm up after a couple of days. Refrigerate for up to 5 days if you want to prioritize safety.
For longer storage, freeze slices or the whole loaf for up to 3 months. Wrap well in plastic wrap, then place in a freezer bag.
When ready to enjoy, thaw overnight in the fridge or at room temperature, then refresh in a hot oven to revive the crust and crumb.
Reheating tips:
- From room temperature: warm in a 160–180°C (325–350°F) oven for 8–12 minutes for that fresh-baked feel.
- From frozen: thaw in the fridge overnight, then bake for 10–15 minutes at 180°C (350°F). For frozen slices straight from the freezer, toast or bake a few minutes longer.
- Single slices: toast in a toaster or microwave briefly (cover with a damp paper towel for 10–20 seconds). Microwave softens but can make the crumb slightly chewier.
Make-ahead tip: the dough works wonderfully for cold fermentation, letting you fit your baking into busy schedules. While it rests, put any extra starter to work in Pumpkin Spice Sourdough Granola. Ferment in the fridge anywhere from 5 up to 36 hours, as the recipe describes.
Common Questions Answered
-
Can I use canned pumpkin puree?
Yes! Canned pumpkin puree is convenient and works great. It often has slightly less water than homemade, which can make the dough easier to work with.
-
Can I use pumpkin pie filling instead of pumpkin puree?
No, pumpkin pie filling usually has added sugars and spices that will mess with the fermentation and change the flavor. Stick to plain pumpkin puree.
-
My dough feels very sticky — is that normal?
Absolutely. Pumpkin puree makes the dough stickier due to higher hydration. Use the water amounts in the recipe and do the stretch-and-folds. Mist your bench with water instead of flour to keep the dough manageable.
-
What if my dough is too wet to shape?
If it feels unworkable, reduce initial water to about 250 g, adding small amounts later if needed. Trust the stretch-and-folds and resting time to build dough strength.
-
Can I add spices (like cinnamon or nutmeg) or seeds?
Of course! Seeds, oats, herbs, and warming spices are all delicious additions. Just be cautious with lots of ground cinnamon as it can slow fermentation. Add spices sparingly or fold them in during shaping.
-
How do I know when bulk fermentation is done?
Your dough should roughly double in size, feel bubbly and soft, and have large air bubbles under the surface. Don’t overproof — stop when it’s just doubled.
-
How can I get better oven spring?
Preheat your Dutch oven for about an hour to get it really hot. Keep your dough cold until baking, score it well, place it in the hot pot, and bake with the lid on for the first 30 minutes to trap steam.
-
How long can I cold-ferment the dough?
This recipe suggests a minimum of 5 hours and up to 36 hours in the fridge. Longer cold fermentation creates richer flavor and lovely crust blisters.
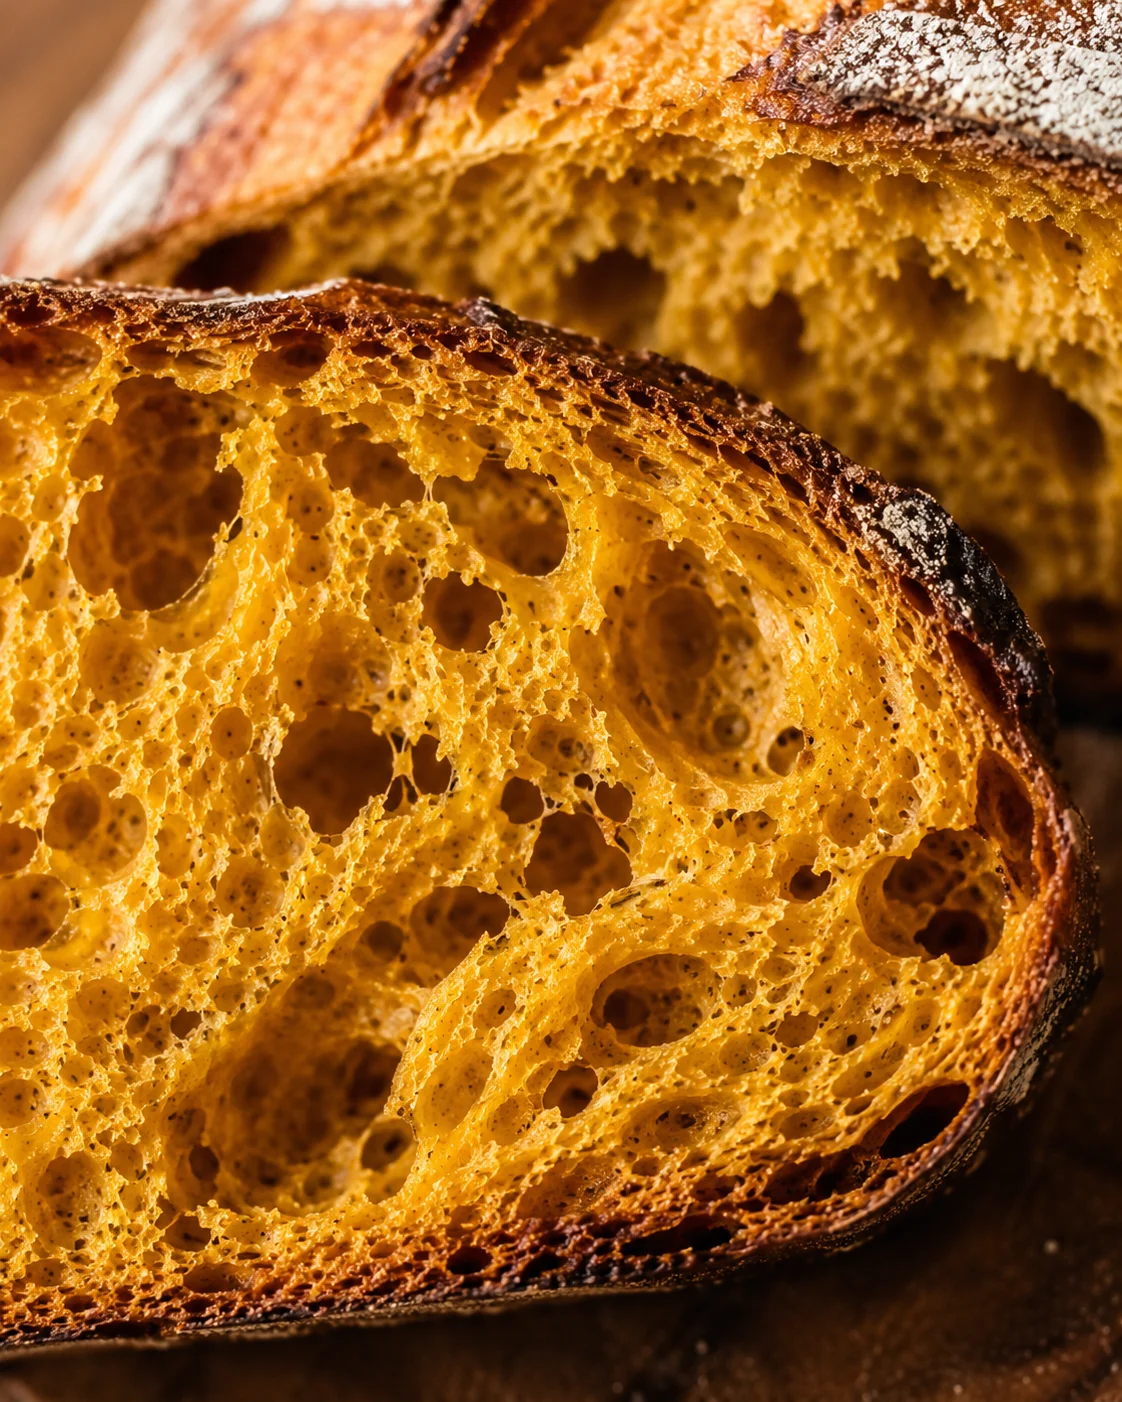
A tender, richly flavored sourdough bread with pumpkin puree and honey, boasting a vibrant pumpkin color, soft crumb, and crisp crust, perfect for fall and Thanksgiving.
- Prep Time: 4 hours (hands-on including mixing, shaping, and folds)
- Cook Time: 45 minutes
- Total Time: 12 to 13 hours (including fermentation and baking)
- Yield: 1 loaf 1x
- Category: Bread
Ingredients
- 100 g active sourdough starter (fed and bubbly)
- 200 g pumpkin puree (canned or homemade)
- 500 g bread flour
- 280 g water (plus a little extra on hand if needed)
- 20 g raw, unprocessed honey
- 10 g salt
Instructions
- Measure 100 g active sourdough starter, 280 g water, and 20 g honey into a mixing bowl and stir until the honey blends.
- Add 200 g pumpkin puree, 500 g bread flour, and 10 g salt; mix gently with the spoon until a shaggy dough forms.
- Cover the bowl and autolyse (rest) the dough for about 1 hour.
- Stretch the dough up and fold it over itself repeatedly around the bowl to form a smooth ball (about 20–25 folds); cover and rest 30 minutes.
- Perform four sets of stretch-and-folds, waiting 15–30 minutes between each set to build dough strength.
- When doing stretch-and-folds on the work surface, mist the bench lightly with water instead of flour to keep dough manageable.
- Cover and bulk ferment the dough until it roughly doubles in size and looks bubbly and jiggly (timing depends on room temperature).
- Shape the dough to create good surface tension (batard or preferred shape), sprinkle the banneton generously with flour, and place dough seam-side up into the banneton (add oats/seeds if desired).
- Cover loosely and cold ferment in the refrigerator for 5 to 36 hours.
- Preheat oven to 230°C (450°F) with the Dutch oven inside for about 1 hour; keep dough cold until baking.
- Transfer chilled dough onto parchment paper, score top with lame or sharp knife, and optionally spritz with water.
- Carefully remove hot Dutch oven, place dough with parchment inside, cover with lid, and bake 30 minutes at 230°C (450°F).
- Remove lid, reduce oven temperature to 210°C (410°F), and bake an additional 10–15 minutes until crust is golden and done (optional: place baking sheet below Dutch oven to protect bottom).
- Remove loaf from Dutch oven and transfer to wire rack to cool completely before slicing.
Notes
Use either canned pumpkin puree or homemade puree; homemade puree should be thick and well-drained for best dough texture., If dough is too sticky or wet, reduce initial water to 250 g and add extra gradually if needed., You can add rolled oats, pepitas, fresh or dried thyme, or warming spices like cinnamon, nutmeg, ginger, and cloves for flavor variation; use spices sparingly to avoid slowing fermentation., Store bread wrapped in a clean tea towel or breathable bag at room temperature for 2–3 days, refrigerate up to 5 days, or freeze up to 3 months., Reheat bread by warming in oven or toasting slices; avoid plastic wrap at room temperature to prevent molding., Cold ferment dough between 5 to 36 hours in the fridge to develop flavor and crust texture.
Nutrition
- Serving Size: 1 slice (approximate)
- Calories: Approximately 180-220 calories per slice (estimate depends on slice size)
- Fat: Approximately 2-3 g per slice (estimate)
- Carbohydrates: Approximately 30-35 g per slice (estimate)
- Protein: Approximately 6-8 g per slice (estimate)