Buttermilk Scones Recipe

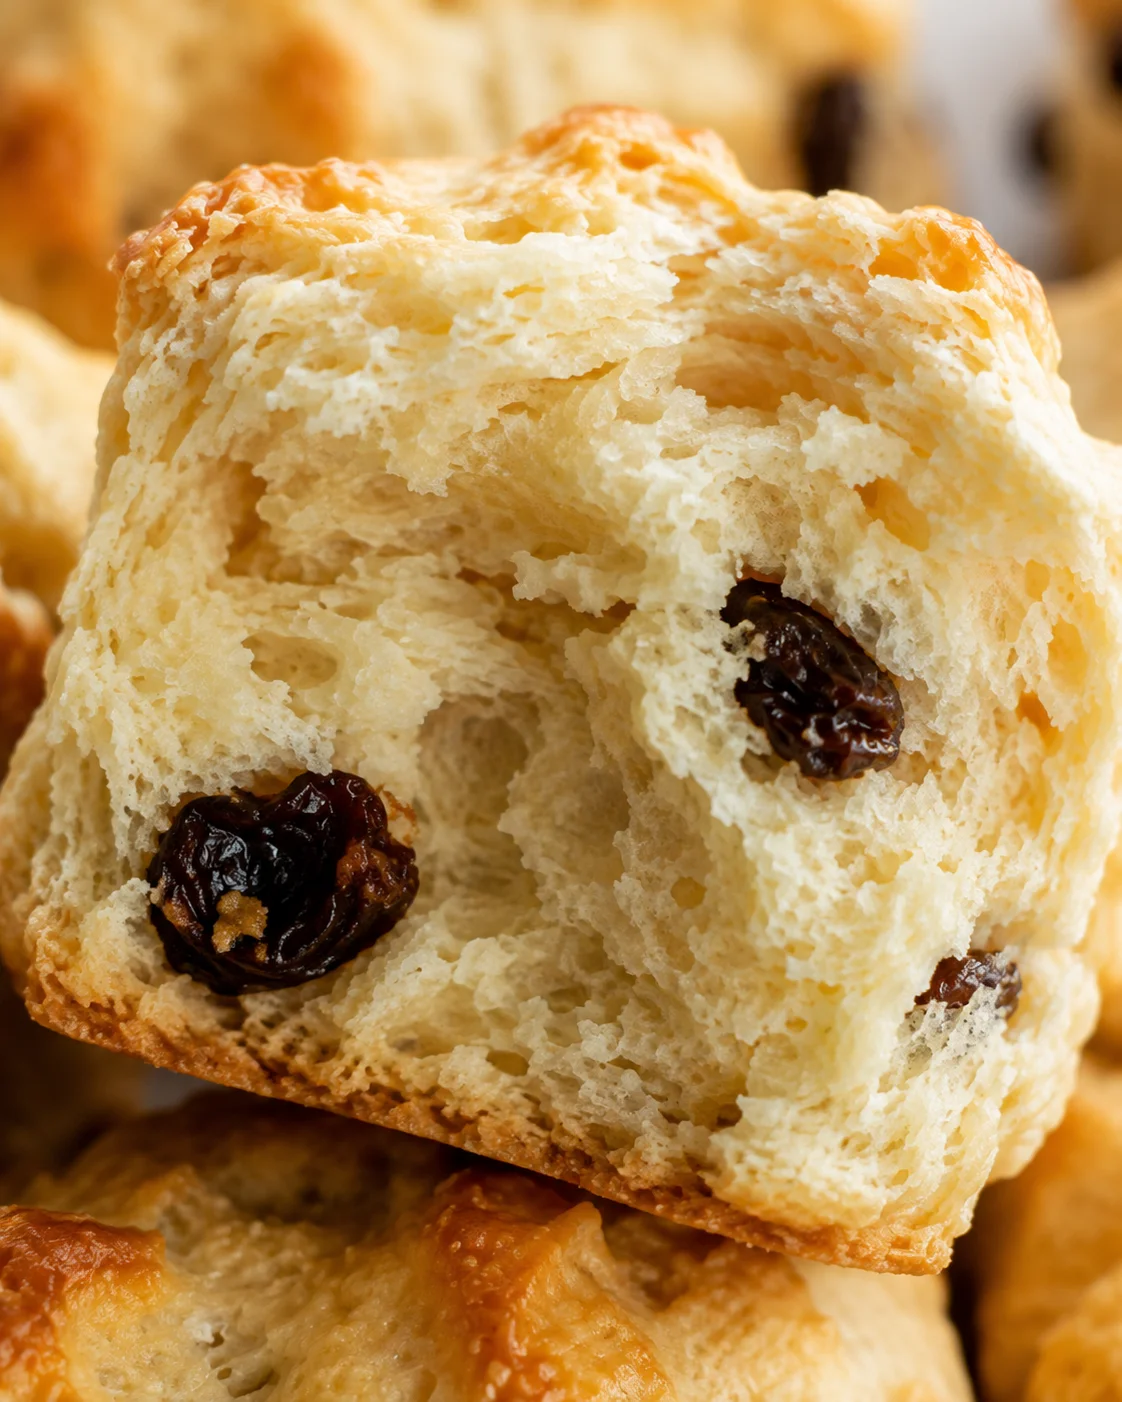
These buttermilk scones bring a tender crumb, buttery flavor, and lightly golden finish to the breakfast table. The dough comes together with everyday baking ingredients, and a short bake turns two simple rounds into warm triangular pastries.
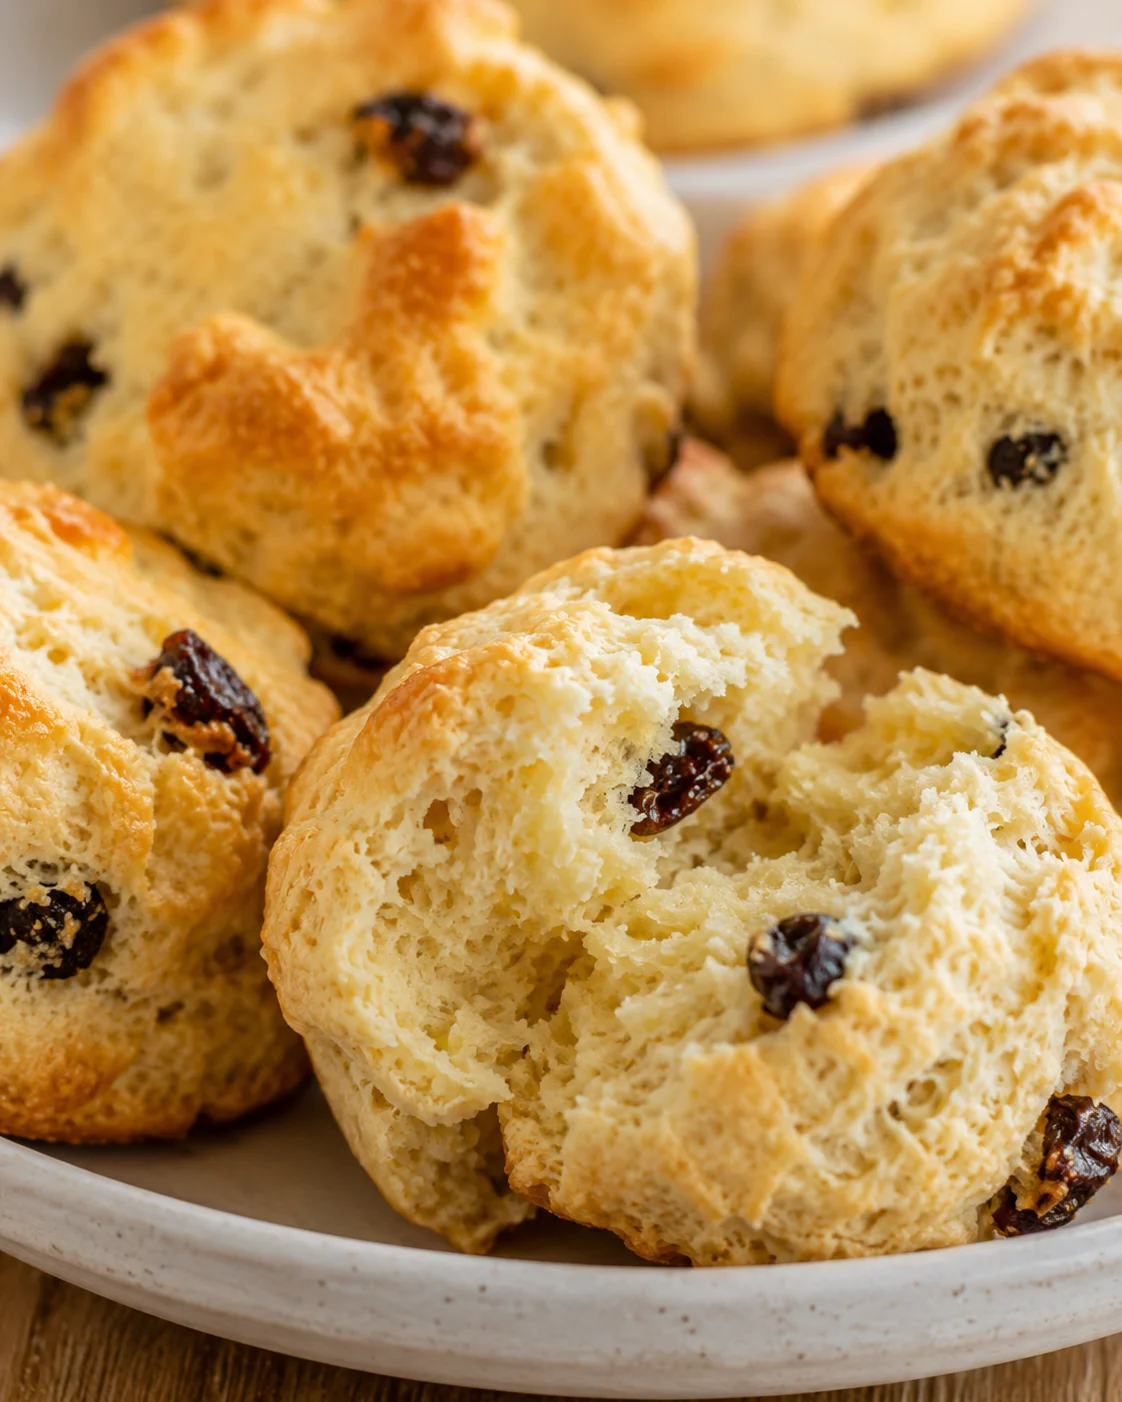
Buttermilk adds a gentle tang while the butter creates a rich, crumbly texture. You can fold in currants for little bursts of sweetness, or leave them out for a classic plain scone. A little heavy cream brushed over the tops helps them bake with a glossy golden surface.
Plan on about 20 minutes of preparation and 15 minutes of baking, with the full bake sometimes taking 15 to 18 minutes depending on the color of the scones. Serve them warm with softened butter, jam, marmalade, or clotted cream for a breakfast, snack, dessert, or teatime plate.
Why You Will Love This
This buttermilk scones recipe is a useful starting point for both new and experienced bakers because the method teaches a few foundational pastry skills without requiring complicated equipment. You will practice cutting butter into flour, bringing a soft dough together with a light touch, shaping rounds, and checking a baked pastry by its color.
- Quick, cozy baking: With 20 minutes of preparation and a short bake, these scones fit a relaxed morning or a spontaneous tea break.
- Tender texture: Cold, cubed butter worked into the dry ingredients gives the mixture a coarse, sandy texture before the buttermilk is added. Minimal stirring helps keep the finished scones light and crumbly instead of dense.
- Simple flavor flexibility: Currants are optional, so you can keep the dough plain or add dried fruit. Citrus zest and other dried fruits are also useful ways to personalize the batch.
- A polished finish: Brushing the tops with heavy cream gives the wedges a lustrous surface and supports the light golden-brown color that signals they are ready.
- Easy serving: Warm scones work with softened butter, your favorite jam, marmalade, or clotted cream, so the same batch can suit breakfast, snack time, or a traditional tea-style spread.
Ingredients
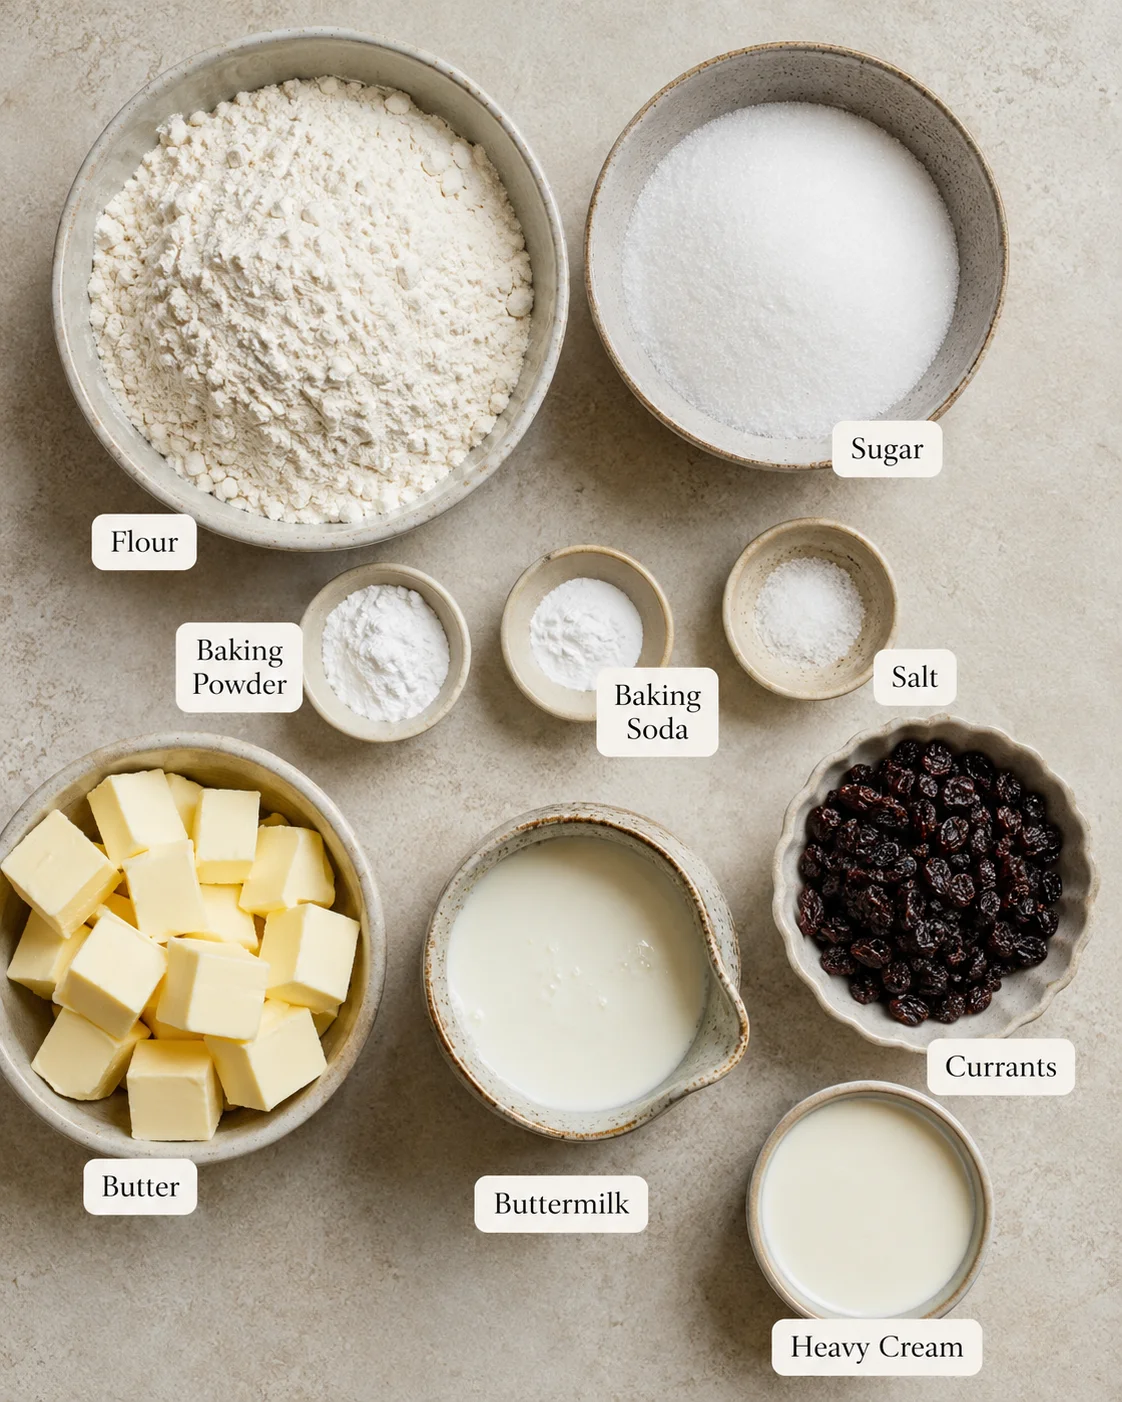
Keep the ingredients measured before you begin. The recipe separates them into dry, fat and liquid, and optional finishing ingredients, which makes the mixing sequence easy to follow.
Dry Ingredients
- 3 cups (360 grams) all-purpose flour: This provides the structure for the scones. Spoon it into the measuring cups and sweep the top level with a knife for a consistent measure.
- ⅓ cup (67 grams) granulated sugar: Adds subtle sweetness and supports browning.
- 2½ teaspoons (12.5 grams) baking powder: Works with the rest of the leavening to help the dough rise.
- ½ teaspoon (2.5 grams) baking soda: Adds additional lift in the buttermilk-based dough.
- 1 teaspoon (6 grams) salt: Balances and sharpens the flavor of the pastry.
Fat and Liquid Ingredients
- ¾ cup (170 grams) unsalted butter (1½ sticks): Dice it into small, uniform cubes before adding it to the flour mixture. Cold butter is important for a flaky, tender texture; the recipe also notes that freezing the butter chunks before mixing can encourage especially flaky layers.
- 1 cup (240 milliliters) buttermilk: Brings tanginess and helps create a tender crumb. Add it gradually to the well in the center of the dry ingredients.
Optional and Finishing Ingredients
- ½ cup (75 grams) currants: Fold them in if you want bursts of sweetness and extra texture. Other dried fruits can be used for a variation.
- 1 tablespoon (15 milliliters) heavy cream, for brushing: Brush it over the shaped wedges before baking for a glossy, golden top.
Instructions
Work gently once the buttermilk goes in. The dough only needs enough mixing to come together, and overworking it can make the scones tough or dense.
- Heat the oven. Set the oven to 400°F (200°C). Position the rack in the center so the baking sheet receives even heat.
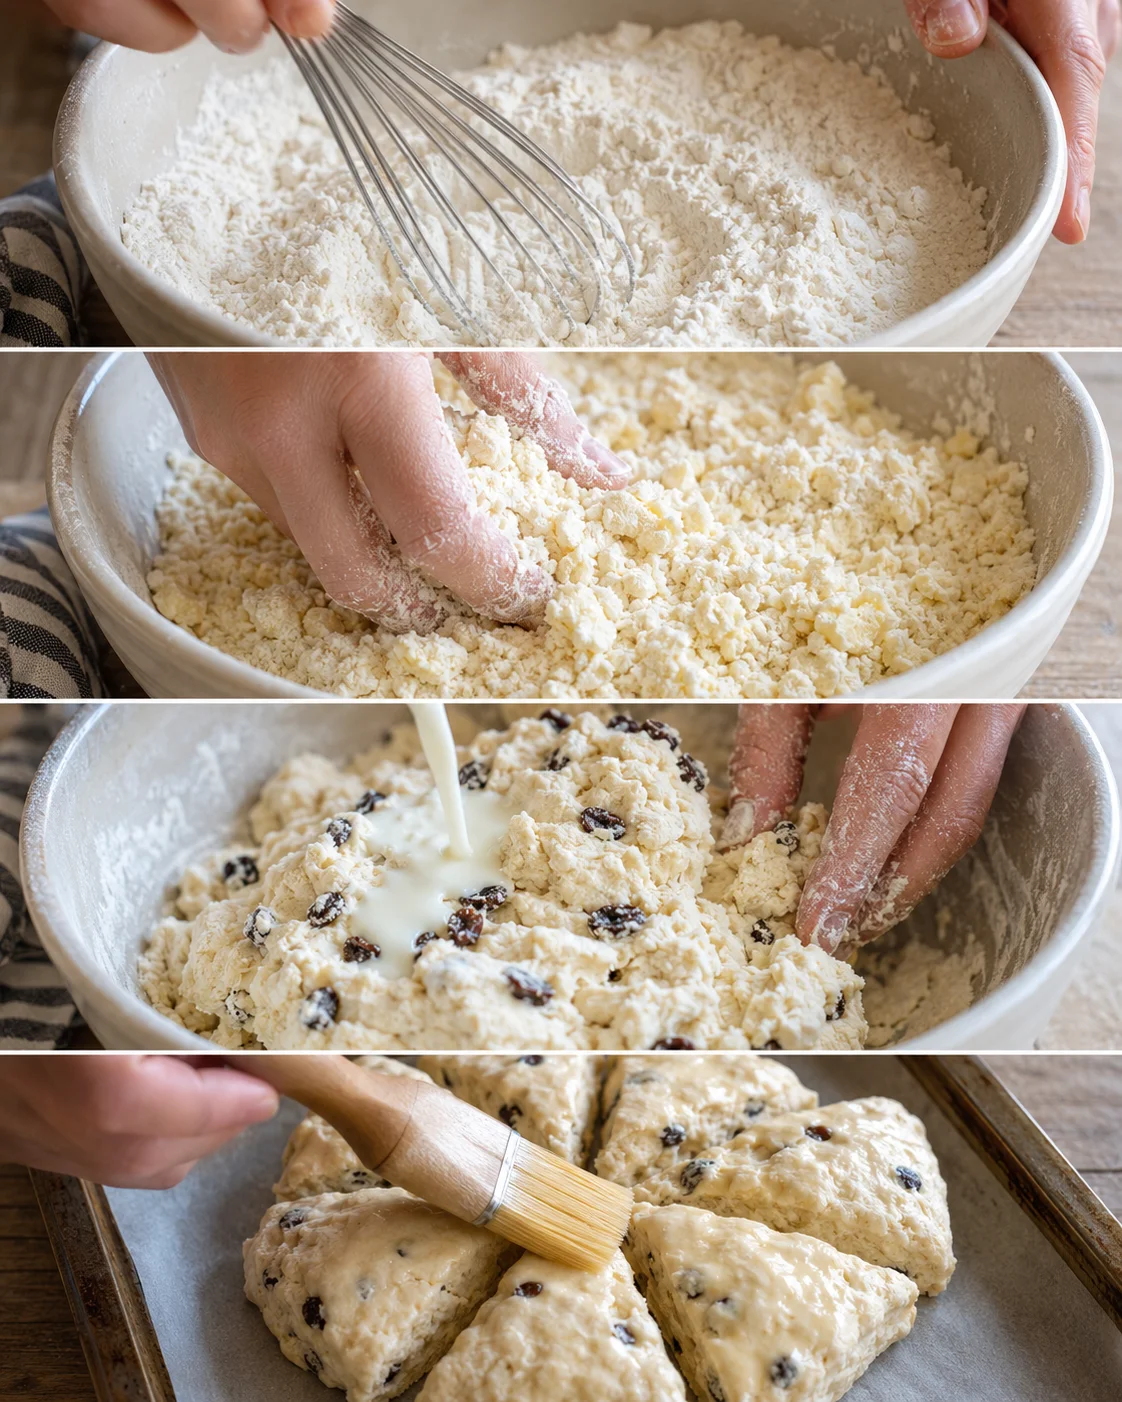
- Combine the dry ingredients. Sift or whisk the flour, granulated sugar, salt, baking powder, and baking soda together in a spacious mixing bowl. Make sure the leaveners and salt are distributed evenly.
- Work in the butter. Dice the unsalted butter into small, even cubes and add them to the dry mixture. Use your fingertips to gently rub the butter into the flour until the mixture resembles coarse sand, coarse crumbs, or breadcrumbs. Stop when the texture is crumbly rather than continuing until it becomes smooth.
- Add the buttermilk. Make a well in the center of the flour mixture and pour in the buttermilk slowly. Fold the ingredients together with minimal stirring, just until a soft dough forms. If using currants, fold them in gently so they are distributed without compressing the dough.
- Divide and shape. Turn the dough onto a lightly floured surface. Divide it into two equal portions. Gently shape each portion into a round disk about ¾ inch thick. Avoid pressing or kneading more than necessary.
- Cut the wedges. Use a sharp knife to cut each round into eight triangular wedges. Clean cuts help the pieces keep a defined shape as they bake.
- Arrange the dough. Place the wedges on a lightly greased baking sheet, leaving a little space between each piece so the edges can brown evenly.
- Brush the tops. Brush each wedge with the heavy cream. The cream gives the tops a shiny finish and helps them develop their golden color in the oven.
- Bake. Bake for 15 to 18 minutes, watching for a light golden-brown color. The recipe also lists a 15-minute cook time, so begin checking at that point and continue only as needed for the stated color cue.
- Cool briefly and serve. Transfer the baked scones to a wire rack and let them cool slightly. Serve them warm with softened butter, your favorite jam, or marmalade. Clotted cream also pairs naturally with the tender, buttery pastry.
Tips
The most important technique is gentle handling. Scones do not need a long mixing session: once the butter has become coarse crumbs and the buttermilk has just brought the dough together, move on to shaping.
- Measure the flour carefully. Spoon flour into a measuring cup and level it with a knife. A consistent amount helps keep the dough balanced and prevents adding more flour than the recipe calls for.
- Keep the butter cold. Small butter cubes are easier to distribute through the dry ingredients. For an especially flaky result, the recipe suggests freezing the butter chunks before mixing.
- Do not overmix. Fold the buttermilk in only until no large dry areas remain and the dough can be shaped. A light, crumbly texture depends on avoiding unnecessary handling.
- Use the visual cues. The butter-flour mixture should look sandy or like coarse crumbs. The baked wedges should be light golden brown rather than deeply darkened.
- Give the wedges room. Slight separation on the greased baking sheet helps the pieces brown evenly instead of crowding one another.
- Consider a short rest. One source tip recommends letting the shaped scones rest at room temperature for 15 minutes before baking to support a good rise and texture. Keep this as an optional step after shaping and before brushing with cream.
- Freeze before baking when convenient. Freezing prepared scones before baking is also suggested as a way to help preserve flakiness and encourage a well-risen shape. Keep the instructions otherwise unchanged and bake until the tops are lightly golden.
If the finished scones are dense, the usual place to look is the handling: too much stirring, kneading, or pressing can compact the dough. If the tops need more color, rely on the cream-brushed surface and the recipe’s light golden-brown cue rather than baking far beyond the stated range.
Variations
Currants are the recipe’s optional mix-in, but the flavor can be changed in several source-supported directions. Make one variation at a time so the dough remains easy to handle.
- Dried-fruit scones: Replace the currants with another dried fruit to add a different kind of sweetness and chew.
- Citrus-scented scones: Add grated citrus zest to the dough for a brighter flavor. The recipe presents zest as a way to personalize the classic pastry.
- Berry version: Use a mixture of fresh blueberries, raspberries, and chopped strawberries in place of the currants for a colorful fruit variation.
- Chocolate chip version: Swap the currants for semisweet chocolate chips and sprinkle a little raw sugar over the tops before baking for added crunch.
- Savory herb version: Omit the sugar and add chopped fresh rosemary, thyme, and grated Parmesan cheese for a savory breakfast or brunch scone.
- Nutty version: Fold in chopped toasted almonds or pecans and add a touch of ground cinnamon for a warm, textured variation.
For any mix-in variation, add the alternative gradually so the dough remains soft and shapeable rather than packed with additions.
Storage
For short-term storage, place the cooled scones in a sealed or airtight container at room temperature. The storage guidance recommends enjoying them within 1 to 2 days for the best flavor and texture; another recipe note allows up to 3 days at room temperature. If they begin to dry out, a loose cover can help, while an airtight container helps maintain freshness.
For refrigeration, keep the scones in an airtight container lined with a paper towel. The towel absorbs excess moisture and helps prevent sogginess. The recipe gives up to 5 days in the refrigerator for maximum freshness.
To freeze baked scones, wrap them individually in plastic wrap and place them in a freezer-safe bag. Seal the bag well to reduce freezer burn and preserve the pastries for up to 3 months. Freezing the prepared scones before baking is another option mentioned in the recipe; it is intended to help preserve flaky layers and a good rise.
Serving Suggestions
Serve the scones warm after their brief cooling period. Softened butter and your favorite jam or marmalade are the simplest pairings, while clotted cream gives the plate a classic tea-time feel. The pastries suit breakfast, snacks, desserts, and a relaxed morning gathering.
Plain scones highlight the buttery crumb and tangy buttermilk. Currant-filled scones add bursts of sweetness, while citrus zest, dried fruit, chocolate chips, herbs, cheese, or nuts can steer the same basic dough toward a different breakfast or brunch mood. For the best contrast, offer a creamy spread alongside a fruit preserve.
FAQ
How many scones does this recipe make?
The dough is divided into two rounds, and each round is cut into eight triangular wedges. The recipe’s nutrition panel lists a serving size of 8, so plan servings according to the size of the finished wedges and how you intend to serve them.
Can I leave out the currants?
Yes. Currants are listed as optional, so the scones can be made without them. You can also replace them with another dried fruit or use one of the listed variations, such as citrus zest, semisweet chocolate chips, berries, herbs and Parmesan, or toasted nuts.
What keeps buttermilk scones tender?
Use the measured butter and buttermilk, work the butter into coarse crumbs, and stir as little as possible after adding the liquid. The dough should just come together before it is divided and shaped. Excess mixing or handling can lead to a tough, dense result.
How do I know when the scones are done?
Check the wedges beginning at 15 minutes. They should have a light golden-brown color, especially on the cream-brushed tops and edges. The stated baking range is 15 to 18 minutes; remove them when that color cue is reached, then cool them briefly on a wire rack.
Can I prepare the scones ahead?
The recipe notes that prepared scones can be frozen before baking to help retain flaky layers and a good rise. It also provides storage options for baked scones: room temperature for short-term enjoyment, refrigeration for up to 5 days, or individual wrapping and freezer storage for up to 3 months.
Nutrition
The supplied nutrition information lists a serving size of 8 and 240 calories. Each serving contains 5 grams of sugar, 150 milligrams of sodium, 12 grams of fat, 7 grams of saturated fat, 4 grams of unsaturated fat, 0 grams of trans fat, 32 grams of carbohydrates, 1 gram of fiber, 3 grams of protein, and 30 milligrams of cholesterol.
PrintTender, buttery scones with a lightly golden finish, offering a gentle tang from buttermilk and a rich crumbly texture from butter. Optional currants add bursts of sweetness.
- Prep Time: 20 minutes
- Cook Time: 15 to 18 minutes
- Total Time: 35 to 38 minutes
- Yield: 16 scones 1x
- Category: Breakfast
Ingredients
- 3 cups (360 grams) all-purpose flour
- ⅓ cup (67 grams) granulated sugar
- 2½ teaspoons (12.5 grams) baking powder
- ½ teaspoon (2.5 grams) baking soda
- 1 teaspoon (6 grams) salt
- ¾ cup (170 grams) unsalted butter (1½ sticks), diced into small, uniform cubes
- 1 cup (240 milliliters) buttermilk
- ½ cup (75 grams) currants (optional)
- 1 tablespoon (15 milliliters) heavy cream, for brushing
Instructions
- Preheat oven to 400°F (200°C) and position rack in the center.
- Sift or whisk together flour, sugar, baking powder, baking soda, and salt in a large mixing bowl.
- Add cold, diced butter to the dry ingredients and rub with fingertips until mixture resembles coarse sand or coarse crumbs.
- Make a well in the center and slowly pour in the buttermilk; fold gently just until a soft dough forms.
- If using, fold in currants carefully to distribute without compressing dough.
- Turn dough onto a lightly floured surface and divide into two equal portions.
- Shape each portion into a ¾ inch thick round disk without overworking.
- Cut each round into eight triangular wedges using a sharp knife.
- Arrange wedges spaced apart on a lightly greased baking sheet.
- Brush tops of wedges with heavy cream for a glossy, golden finish.
- Bake for 15 to 18 minutes or until tops are light golden brown, checking at 15 minutes.
- Transfer scones to a wire rack and cool briefly before serving warm.
Notes
Handle dough gently to prevent toughness—minimal stirring after adding buttermilk is crucial., For flakier scones, freeze the diced butter before mixing and optionally freeze shaped scones prior to baking., Allowing scones to rest at room temperature for 15 minutes before baking is optional and can improve rise and texture., Variations include substituting currants with dried fruits, citrus zest, berries, chocolate chips, herbs and cheese, or nuts., Store baked scones at room temperature up to 3 days, refrigerated up to 5 days, or frozen for up to 3 months., Serve warm with softened butter, jam, marmalade, or clotted cream for breakfast, snack, dessert, or teatime.
Nutrition
- Serving Size: 1 scone (1/16 of recipe)
- Calories: 240 calories per serving
- Fat: 12 grams per serving
- Carbohydrates: 32 grams per serving
- Protein: 3 grams per serving