Orange Scones Recipe with Fresh Orange Glaze
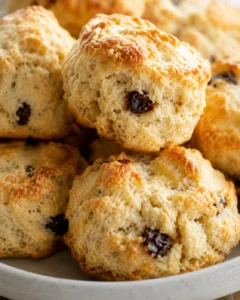
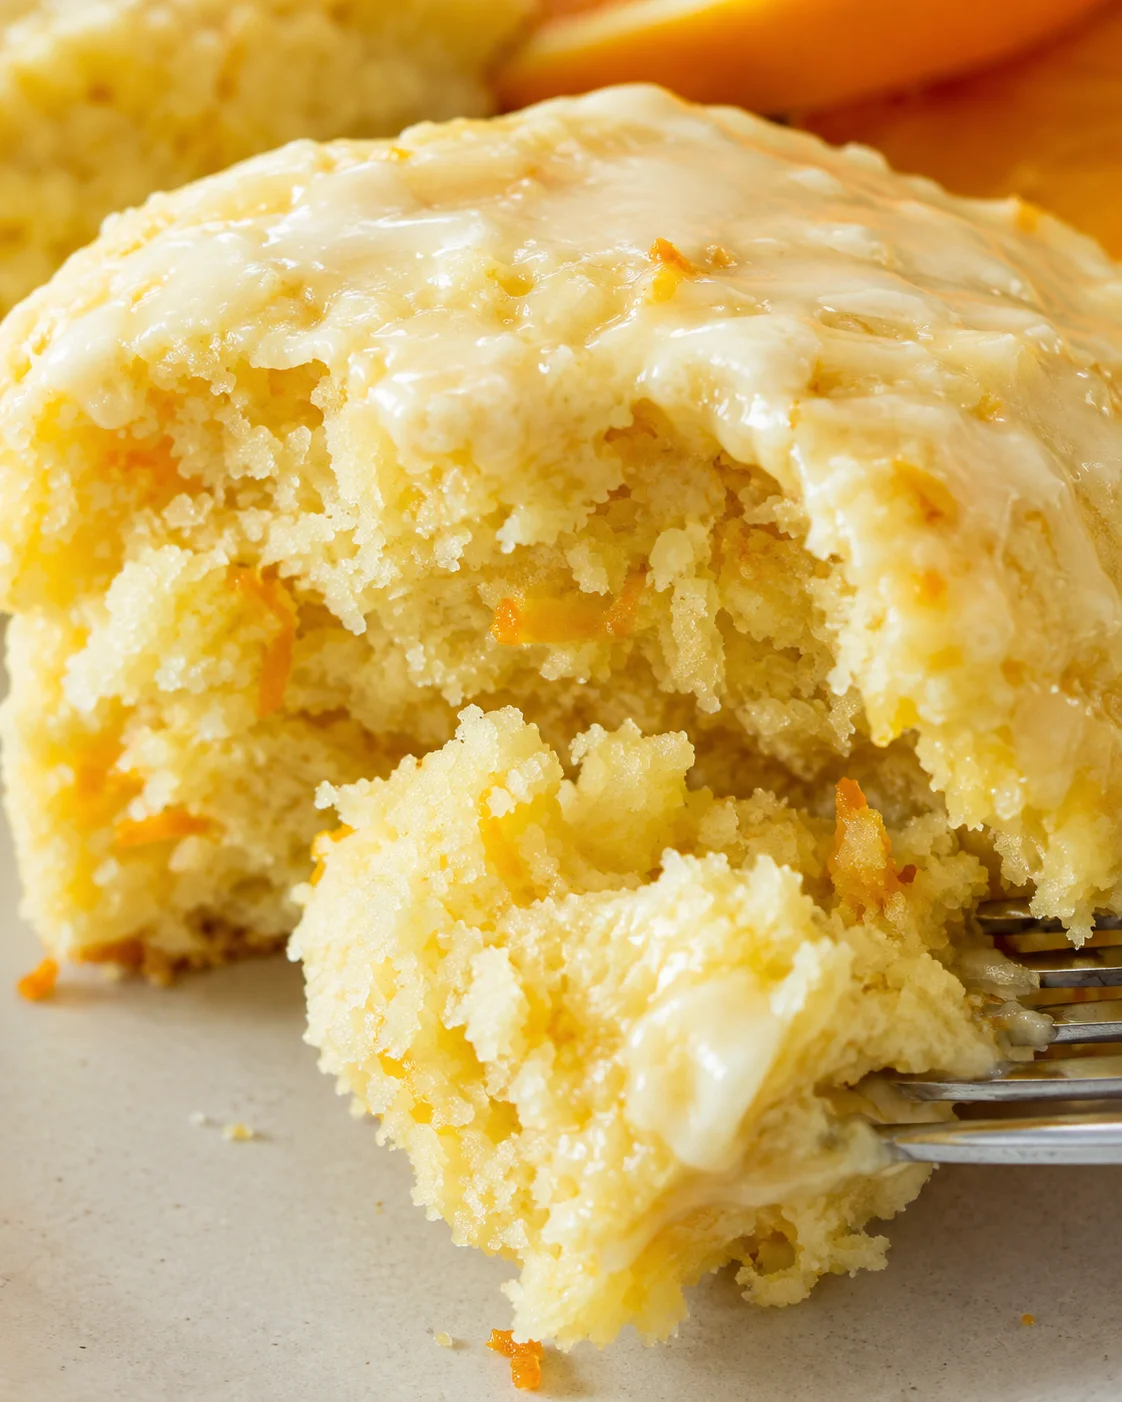
This orange scones recipe makes soft, tender pastries with crisp, lightly golden bottoms, a delicate crumb, and fresh orange flavor in every bite. A simple orange-vanilla butter glaze adds a sweet citrus finish without hiding the buttery scone underneath.

The recipe was inspired by the bakery-style orange scones that a family favorite once offered. They are a lovely choice for brunch, a tea party, a luncheon, a shower, Easter, Mother’s Day, or a quiet weekend breakfast. The dough is simple enough for a first batch of scones, but the method also includes the cold-butter and gentle-mixing details that help experienced bakers keep the texture tender.
Fresh orange zest does most of the aromatic work, while a small amount of juice brightens both the dough and the glaze. You can make eight generous wedges, shape petite mini scones, or freeze the unbaked wedges for a later bake. Keep the finished scones plain for a lightly sweet treat, or dip their cooled tops into the glossy orange glaze.
Why You Will Love This
These orange scones balance the qualities that make a good cream scone so appealing: a tender interior, a lightly crisp edge, visible orange zest, and enough sweetness to make the pastry feel special without turning it into cake. Heavy cream supplies richness and helps the dough rise, while cold butter creates small pockets that contribute to the flaky texture.
The method is forgiving about appearance. You can keep the wedges close together for a more evenly raised scone, or separate them farther apart for a more rustic shape. The dough should look shaggy before it is formed, and that is exactly what you want. A few dry crumbs are preferable to kneading the dough until it is smooth, because overworking can make scones tough and keep them from rising as well.
There is also flexibility in the finish. The glaze is optional, although its orange, vanilla, and butter flavors make a particularly good complement to the scones. Dip each top for a full coating, or drizzle the glaze from a small bag for a lighter, decorative finish. If you like a sweeter pastry, the sugar can be increased within the amounts given below.
Nearly 40,000 saves and enthusiastic reader responses have helped make this a popular orange scone recipe. The flavor is bright enough for spring gatherings but familiar enough for an everyday bake. For another direction, the same general dough can be adapted into cranberry-orange or blueberry scones using the variations below.
Ingredients
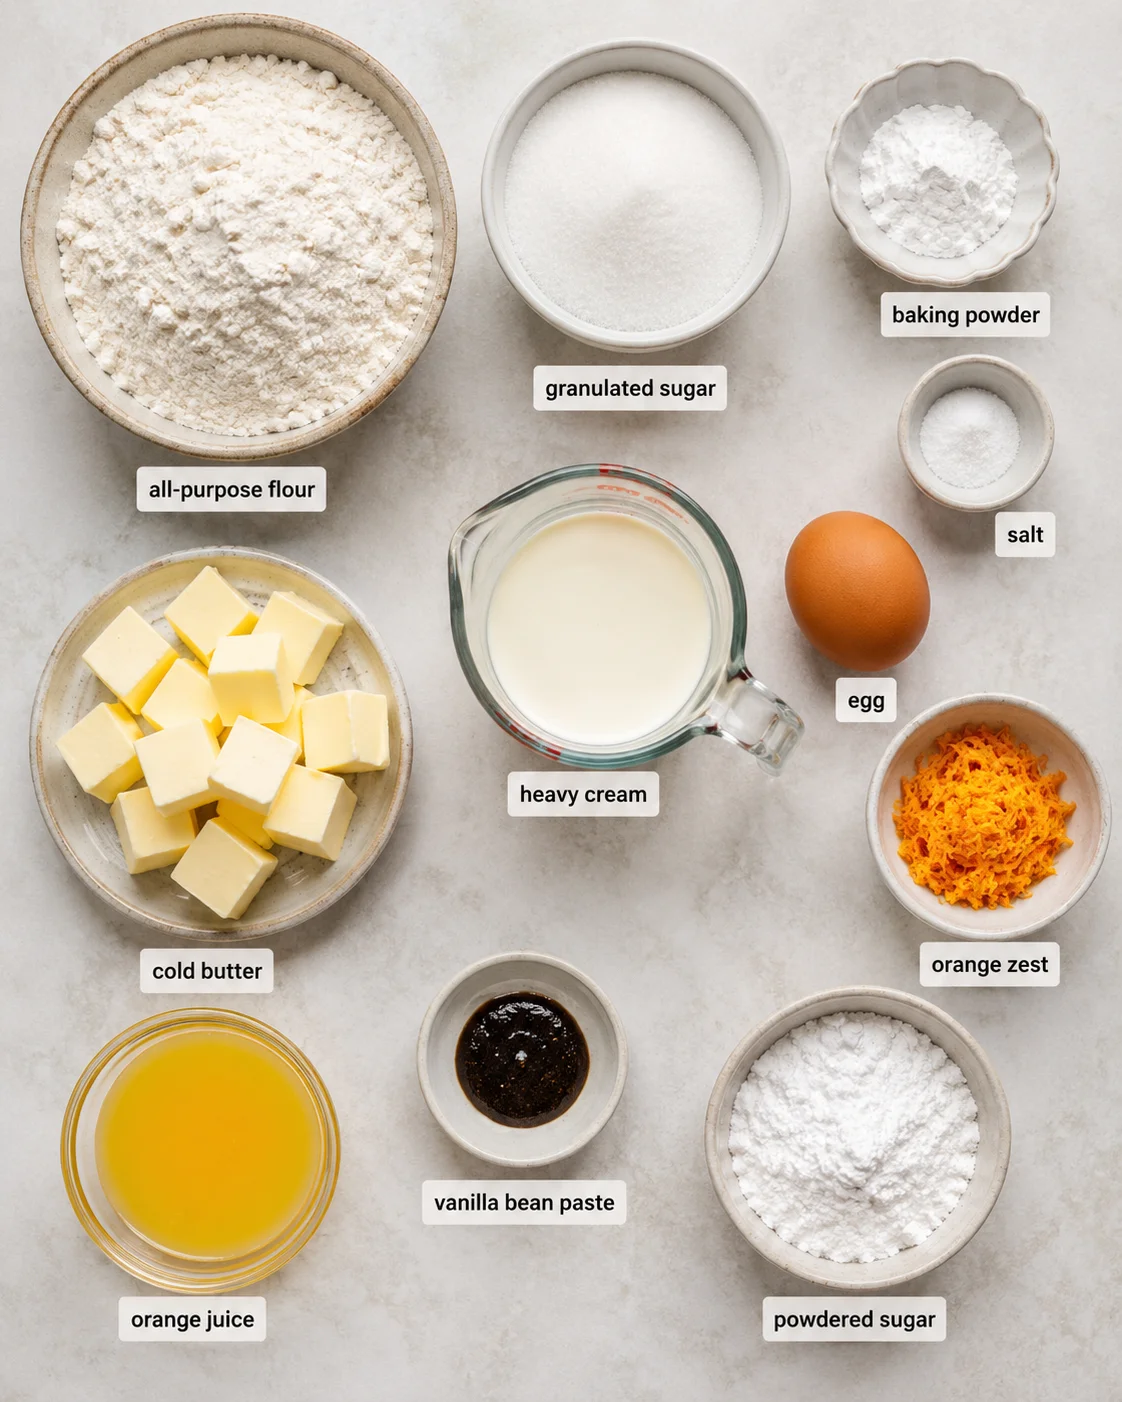
Gather the ingredients before beginning. Keeping the butter and cream cold is one of the most useful details in this recipe, and measuring the orange zest and juice first makes the mixing move quickly.
For the Orange Scones
- 1 ¾ cups all-purpose flour: Organic, unbleached all-purpose flour works well, though regular all-purpose flour may also be used.
- ¼ cup granulated sugar: Cane sugar is one option. For a sweeter scone, use up to ½ cup total sugar.
- 2 teaspoons baking powder: Use 1 ½ teaspoons when making the high-altitude adjustment described later.
- ¼ teaspoon kosher salt: Salt keeps the sweet dough from tasting flat.
- 4 tablespoons salted butter: Use real, pure cream butter rather than a butter blend. Grate it while cold and freeze it, or cut it into small cubes and keep it chilled.
- ½ cup heavy cream: Keep the cream in the refrigerator until it is time to mix the wet ingredients. At high altitude, an extra tablespoon or two may be needed.
- 1 teaspoon vanilla bean paste: Vanilla extract is an acceptable replacement. Vanilla bean paste adds tiny flecks and a subtle aroma.
- 1 large egg: Room-temperature egg is best. If you forget to set it out, place it in warm, not hot, water for 5–7 minutes.
- 1 tablespoon orange zest: This is grated from about one orange. Large navel oranges are suitable.
- 1–2 tablespoons fresh orange juice: Use the juice from the zested orange and add it gradually.
For the Orange Vanilla Butter Glaze
- 1 cup powdered sugar
- ½ teaspoon vanilla bean paste or vanilla extract
- 1 tablespoon butter, melted
- Zest from 1 orange
- Juice of ½ orange, or as much as needed: Add the juice slowly until the glaze is smooth and pourable.
Equipment
A parchment-lined half-sheet pan, a large mixing bowl, a small bowl or measuring cup, a pastry cutter, a box grater, a bench scraper or large knife, and a wire rack are useful here. A Microplane-style zester makes quick work of the orange peel. A cooling rack set over the parchment-lined pan gives the glaze a place to drip while keeping cleanup manageable. An oven thermometer is also useful because ovens can run 25–50 degrees hotter or cooler than their setting.
Instructions
Work efficiently once the butter comes out of the freezer. The dough does not need to be perfectly smooth, and the less it is handled, the more tender the baked scones will be.
- Prepare the pan and dry ingredients. Line a baking sheet with parchment paper. In a large bowl, whisk together 1 ¾ cups all-purpose flour, ¼ cup granulated sugar, 2 teaspoons baking powder, and ¼ teaspoon kosher salt. You can preheat the oven to 400°F (204°C); the method also gives you the option to preheat while the shaped scones chill.
- Chill the butter. Grate the 4 tablespoons of butter with a box grater and place the shreds in the freezer until they are ready to use. Alternatively, cut the butter into small chunks and keep them in the freezer or refrigerator. Cold pieces are easier to distribute without warming the dough.
- Prepare the orange. Zest the orange and squeeze the juice. Measure 1 tablespoon of zest for the dough and set aside 1–2 tablespoons of juice. The rest of the orange zest and juice can be used in the glaze.
- Cut the butter into the flour. Toss the frozen grated butter into the flour mixture. Use a pastry cutter or your fingertips to work it in quickly, stopping when the mixture resembles coarse crumbs. If you use your hands, move quickly so the butter does not soften excessively. A few visible bits are useful; the mixture does not need to look uniform.
- Whisk the wet ingredients. In a small bowl or measuring cup, whisk together ½ cup cold heavy cream, 1 teaspoon vanilla bean paste or vanilla extract, 1 large egg, 1 tablespoon orange zest, and 1–2 tablespoons orange juice. A room-temperature egg is fine, but keep the cream cold.
- Bring the dough together. Make a small well in the center of the flour and butter mixture. Pour in the egg mixture, then gently stir with a fork until the dry ingredients are moistened and a shaggy dough forms. Stop as soon as the dough holds together. If it is genuinely dry and will not come together, add a small splash of orange juice or heavy cream, just a few dribbles at a time, and work it in quickly.
- Shape the dough. Turn the dough onto the parchment-lined baking sheet or a lightly floured surface. Use the parchment to press and gather it into one disc about 8 inches across and ½–¾ inch thick. You can also divide it into two smaller discs if you want petite scones. Parchment or wax paper can be folded up around the dough to help smooth the disc while keeping your hands from warming the butter.
- Cut the wedges. With a bench scraper or large knife, cut the large disc in half, then into quarters, and then cut each quarter in half to make 8 large wedges. Separate the wedges only slightly for a more evenly raised result, or move them farther apart for a more rustic appearance. For mini scones, use two smaller discs and cut 8 wedges from each disc.
- Chill the shaped scones. Place the pan in the freezer or refrigerator for 10–30 minutes. This firms the butter again before baking. If you have not preheated the oven yet, set it to 400°F (204°C) while the scones chill.
- Bake. Bake until the scones are lightly golden on the bottoms, about 13–15 minutes. Around 13 minutes, they will be softer and more tender; closer to 15 minutes, they will be firmer and drier. Mini scones use the same oven temperature but should be checked on the earlier side, at about 12 minutes. Move the baked scones to a wire rack and let them cool completely.
- Make the glaze. In a wide bowl large enough to dip a scone, whisk together 1 cup powdered sugar, the zest of 1 orange, 1 tablespoon melted butter, and ½ teaspoon vanilla bean paste or vanilla extract. Add the juice of ½ orange a little at a time, whisking until the glaze is smooth, thick, and pourable. Do not add all the juice automatically; the amount needed depends on how thick you want the finish.
- Glaze the cooled scones. Pick up each completely cooled scone and dip the top into the orange glaze. Return it to the wire rack so the glaze can set. For a different look, pour the glaze into a small freezer bag, snip just a little from one corner, and swirl it over the tops. If you have extra glaze, drizzle it over the scones with a spoon.

Orange scones are ready to serve once the glaze has set. The bottom should be lightly golden, the center should no longer look wet, and the crumb should remain tender rather than dry. The longer baking time gives a firmer pastry, so use the appearance and the preferred texture together when choosing when to remove the pan.
Tips
Keep the butter and cream cold
Grating cold butter creates small pieces that distribute quickly through the flour. Freezing the shreds while preparing the rest of the ingredients gives them an extra chance to stay firm. Cold heavy cream also helps keep the dough from becoming warm and loose. Unlike some cakes and breads, scones do not require every ingredient to be at room temperature; the cream should remain chilled until mixing.
Use real butter
Choose pure cream butter rather than a spread or blend. Whether you use salted or unsalted butter, the important distinction here is that the butter is real and cold. Higher-butterfat butter, including European-style butter, can be a good choice. Butter blends and butters with more water can change the dough’s texture, so use the ingredient listed in the formula rather than a soft spread.
Do not overwork the dough
Scones need only enough mixing to bring the ingredients together. A shaggy dough with a few dry-looking spots is more useful than a smooth dough that has been kneaded. Stir gently with a fork, press the dough together with parchment, and stop once it can be shaped. Overworking can make the finished scones tough and can interfere with a good rise.
Add liquid slowly
The measured orange juice belongs in the wet mixture, but a dry dough may need a small extra splash of juice or cream. Add only a few dribbles at a time. The goal is a dough that barely holds together, not a wet dough that spreads across the pan. If the mixture feels soft, pause before adding more liquid; a short chill can make the butter easier to handle.
Shape with parchment and chill again
Pressing the dough into a disc with parchment keeps the flour contained and reduces the amount of handling. After cutting, chill the whole pan for 10–30 minutes. That second chill firms the butter so it is ready for the hot oven rather than melting too soon on the baking sheet.
Choose the spacing for the result you want
Wedges kept close together tend to rise more evenly. Wedges separated farther apart spread the visual space around each pastry and give the batch a more rustic appearance. Neither arrangement changes the formula; the spacing is simply a choice about the shape and presentation.
Watch the glaze consistency
Whisk in orange juice a few tablespoons at a time, or even more slowly, until the glaze is thick but pourable. If it slips from a warm scone, let the pastry cool fully before glazing. If the glaze is too thin, whisk in powdered sugar one tablespoon at a time until it coats the top. Set a wire rack over the parchment-lined pan to catch drips, and use a spoon to finish the scones with any glaze left in the bowl.
Check the oven
Oven temperatures can be inaccurate, sometimes by 25–50 degrees. An inexpensive oven thermometer can show whether the oven runs hot or cold so the temperature can be adjusted. Begin checking near the lower end of the baking range if your oven tends to brown baked goods quickly.
Gluten-free baking notes
For a gluten-free version, replace the regular flour with 1 ¼ cups cup-for-cup gluten-free flour, ¼ cup almond flour, and ¼ cup oat flour. Gluten-free flour can absorb more liquid, so add extra liquid a teaspoon or two at a time only if the dough needs it. Check the scones 2–3 minutes before the lower end of the suggested baking time. They are ready when puffed and no longer glossy; a slightly underbaked gluten-free scone is preferable to one that has become dry from overbaking.
Variations
Food processor orange scones
Add the flour, sugar, baking powder, and salt to a food processor and pulse to combine. Add grated or cubed cold butter and pulse just until the mixture resembles coarse meal. Pour in the combined wet ingredients and pulse only a few times, just enough to moisten the dry ingredients. Turn the dough onto a lightly floured surface, shape it, cut the wedges, chill, and bake as directed.
Make-ahead unbaked scones
Shape and cut the scones, then wrap the dough disc tightly in plastic wrap and place it in a freezer bag. Freeze for up to 3 months. When ready to bake, separate the wedges slightly and place them on a lightly greased or parchment-lined baking sheet. Bake from frozen as directed, allowing a little additional time at the end if needed and checking the visual cues.
Blueberry scones
Omit the orange juice and orange zest from the dough and use a little lemon zest instead. Stir 1 cup fresh or frozen blueberries into the mixture at the same time the wet ingredients are added. Fold carefully so the berries stay as intact as possible, then shape, chill, and bake using the same general method.
Sweeter orange scones
If you prefer a sweeter scone, increase the sugar by up to an additional ¼ cup, for up to ½ cup total. This is a flavor adjustment, so keep the flour, butter, cream, egg, orange, and leavening quantities unchanged.
Cranberry-orange scones
For a tart fruit variation, use the cranberry-orange direction based on this orange scone recipe. The bright citrus flavor pairs naturally with cranberries. Follow the dedicated cranberry-orange version when you want the complete cranberry formula and directions.
Mini orange scones
Divide the dough into two even portions, placing each portion on its own sheet of parchment. Shape each into a smaller disc and cut it into 8 wedges, giving you 16 petite scones. Keep the oven at 400°F (204°C), but begin checking the mini scones at about 12 minutes.
High-altitude adjustment
At high altitude, decrease the baking powder to 1 ½ teaspoons. Above 5,000 feet, add an additional 1–2 tablespoons of flour. The dough may need more liquid, but add it cautiously; the shaped scones should barely hold together. Bake as directed and start checking 2–3 minutes early.
More Details for Tender Orange Scones
The order of the method matters because each stage protects the texture of the finished pastry. Whisking the dry ingredients first spreads the baking powder and salt through the flour before the butter is added. Grating or cubing the butter while it is cold makes it possible to distribute the fat without kneading. Mixing the cream, egg, vanilla, zest, and juice separately keeps the dough from being stirred more than necessary once the liquid is added.
What the shaggy dough should look like
When the wet mixture first meets the flour, the bowl will not contain a smooth ball. Instead, the mixture will look uneven, with small clumps and a few floury areas. Use a fork to turn and gather it, then check whether it can be pressed together. If it holds when gently squeezed, it is ready to turn out. If it refuses to hold, add only a few drops or a small splash of orange juice or cream, mix briefly, and check again.
It is easy to mistake loose crumbs for a problem and respond by adding a large amount of liquid. That can make the dough sticky and encourage extra mixing. A little patience and gentle pressing usually do more than another pour of cream. Once the dough is on the parchment, the paper can help gather the loose edges into the disc without compacting the center.
Why the disc thickness matters
A disc about ½–¾ inch thick gives the wedges enough height to rise while still baking through in the stated time. A very thin disc will produce flatter, crisper wedges, while a much thicker disc will need closer attention to the center. Keep the thickness reasonably even from the middle to the edge so the smaller outer wedges do not finish long before the center portions.
The first cut through the disc should be decisive. Cutting in half, then quarters, then halving each quarter creates eight similar wedges without repeatedly sawing through the dough. Wipe or flour the knife only if it begins to drag. A bench scraper is especially useful because it cuts cleanly and can also lift or nudge the wedges without warming them.
How spacing changes the shape
Place the cut wedges close together when you want a more even, upright batch. The neighboring pieces provide a little support as the dough rises. If you prefer distinct, rustic sides, separate the wedges farther apart before baking. The more open arrangement changes the appearance more than the flavor, so choose the layout that suits the occasion.
Using the bake time as a texture choice
The 13–15 minute range is intentional. At about 13 minutes, the scones are softer and more tender. Around 15 minutes, they are firmer and drier. Look for lightly golden bottoms rather than waiting for the whole top to become deeply browned. The pastries continue to settle as they cool on the rack, so transfer them once the bottoms have the right color and the centers are no longer glossy.
Mini scones have less dough around the center and should be checked at about 12 minutes. Gluten-free scones should be checked 2–3 minutes before the lowest suggested time because the flour blend can dry out if the pastries stay in the oven too long. At high altitude, begin checking 2–3 minutes early as well, after making the listed baking-powder and flour adjustments.
Making the glaze easy to use
Use a wide bowl if you plan to dip the scone tops. A shallow shape gives you room to coat the surface without pressing the pastry into the glaze. If you prefer a drizzle, a small freezer bag works as a simple piping tool: fill it, press the glaze toward one corner, snip only a tiny opening, and move back and forth over the cooled scones.
Orange juice controls the glaze’s consistency, so it should be added gradually. A glaze that is too thin will run off the top and may not set neatly. A glaze that is too thick can be adjusted with a little more juice. If the glaze has already been thinned too far, powdered sugar restores body. Cooling the scones completely is equally important; warm pastry softens the glaze and encourages it to slide.
Planning the batch around a gathering
For a tea party or shower, the mini version creates smaller portions and gives the platter a delicate look. For a brunch, eight larger wedges are easy to arrange and serve. The unbaked make-ahead option is useful when you want to prepare the shaped dough ahead of time: freeze the wedges in a freezer bag for up to 3 months, then bake them from frozen on a prepared pan.
For the best visual finish, glaze only after the pastries are cool. If the scones are being frozen, leaving them unglazed is the preferred option. The baked scones can also be frozen without glaze and finished later, while already glazed scones can be frozen when necessary if they are wrapped carefully.
Ingredient choices in context
Orange zest supplies concentrated citrus aroma because the fragrant oils are in the peel. Orange juice adds brightness and a small amount of liquid, but it should not be used to make the dough wet. Vanilla bean paste brings vanilla flavor and visible flecks; vanilla extract can be used instead in both the dough and the glaze. Heavy cream makes this a rich cream scone, while the listed alternatives in the variations section offer practical options with the understanding that the height and fluffiness may change.
The basic sugar amount gives a gently sweet scone that can carry a sweet glaze. If you prefer a sweeter pastry without relying entirely on the topping, increase the total sugar to as much as ½ cup. Keep the other ingredients unchanged. For a more fruit-forward batch, blueberry or cranberry variations bring a different balance to the same orange-scented foundation.
Storage
Store baked orange scones in an airtight container on the counter for up to 5 days. For individual portions, wrap the scones separately and keep them in a covered cake stand or another airtight container. The glaze is easiest to preserve when the scones are cooled completely before they are packed.
Baked scones can also be wrapped well and frozen for 3–4 months. For the best glaze appearance, freeze them without the glaze when possible. If freezing glazed scones is the only option, wrap them well and handle them gently as the glaze thaws.
For make-ahead baking, freeze the shaped, unbaked wedges for up to 3 months. Bake them from frozen on a parchment-lined or lightly greased pan, adding a little time at the end if necessary. Already baked scones may be frozen in an airtight container for up to 3 months. Let the pastries cool completely before wrapping either version.
Serving Suggestions
Serve the scones with coffee, tea, or a cold glass of milk. Their orange flavor suits spring gatherings such as Easter, Mother’s Day, bridal showers, baby showers, luncheons, and tea parties, but the small batch also works for a weekend breakfast or an afternoon treat. Petite scones are easy to arrange on a serving plate, while the eight larger wedges make a generous bakery-style presentation.
Use a full dip of glaze for a polished, sweet finish or a thin drizzle when you want more of the golden top to remain visible. Dried edible flowers can be used as a decorative topping for a tea-party presentation. Serve the pastries once the glaze has set so the tops are easier to handle.
FAQ
How can I tell whether my baking powder is fresh?
Most baking powder and baking soda are considered fresh for about 6 months after opening. To check baking powder, place 1 teaspoon in a cup and add ⅓ cup hot tap water. If it bubbles, it is ready to use. If it does not, replace it before making the scones.
Can I use baking soda instead of baking powder?
Yes, but the amount must be reduced because baking soda is more potent than baking powder. Use about ¾ teaspoon of baking soda for this recipe. Orange juice supplies acidity, which helps activate the baking soda. The finished rise may not be exactly the same as when baking powder is used, so follow the reduced amount rather than substituting it measure for measure.
What can I use instead of heavy cream?
Possible alternatives include buttermilk, evaporated milk, reconstituted dry milk, canned coconut milk, another plant-based milk, yogurt, or plain water. These replacements may not produce scones that are as fluffy or high-rising. If using baking soda instead of baking powder, buttermilk provides a useful acidic ingredient. Add any replacement cautiously so the dough remains shaggy and just holds together.
Why did my scones spread or fail to rise?
First check whether the oven is heating accurately with an oven thermometer. Then make sure the dough was not overworked, the butter stayed cold, and the shaped scones were chilled for 10–30 minutes before baking. You can also cut through the wedges and use the bench scraper to pull each one only slightly away from its neighbor rather than separating them completely. That arrangement can provide more structure and rise, although the scones may need a few additional minutes in the oven.
Why is the glaze sliding off?
The scones may still be warm, or the glaze may be too thin. Let the scones cool completely before dipping or drizzling. If the glaze still slides, whisk in powdered sugar a tablespoon at a time until it becomes thick enough to coat the tops while remaining pourable.
How do I keep gluten-free scones from drying out?
Measure the gluten-free flour blend, almond flour, and oat flour listed in the variation, then add extra liquid only a teaspoon or two at a time if the dough is dry. Start checking the scones 2–3 minutes before the lower end of the baking time. Remove them when they are puffed and no longer glossy; overbaking is more likely to make gluten-free scones dry than taking them out slightly early.
PrintSoft and tender orange-flavored scones with a crisp bottom and delicate crumb, finished with an optional orange-vanilla butter glaze for a sweet citrus finish.
- Prep Time: 15 minutes (plus chilling time)
- Cook Time: 13-15 minutes (12 minutes for mini scones)
- Total Time: 30-45 minutes including chilling
- Yield: 8 large scones or 16 mini scones 1x
- Category: Breakfast
- Cuisine: American
Ingredients
- 1 3/4 cups all-purpose flour (organic unbleached preferred)
- 1/4 cup granulated sugar (up to 1/2 cup for sweeter scones)
- 2 teaspoons baking powder (1 1/2 teaspoons for high altitude)
- 1/4 teaspoon kosher salt
- 4 tablespoons salted butter (cold, grated or cubed)
- 1/2 cup cold heavy cream (plus extra 1–2 tablespoons if needed, especially at high altitude)
- 1 teaspoon vanilla bean paste or vanilla extract
- 1 large egg (room temperature)
- 1 tablespoon orange zest (from about one large navel orange)
- 1–2 tablespoons fresh orange juice (from the zested orange)
- For the glaze: 1 cup powdered sugar
- 1/2 teaspoon vanilla bean paste or vanilla extract
- 1 tablespoon melted butter
- Zest from 1 orange
- Juice of 1/2 orange (add gradually to desired consistency)
Instructions
- Preheat oven to 400°F (204°C) or wait to preheat while scones chill.
- Line a baking sheet with parchment paper.
- In a large bowl, whisk together flour, sugar, baking powder, and salt.
- Grate or cube cold butter and place in freezer until ready to use.
- Zest one orange and squeeze juice; reserve 1 tablespoon zest and 1–2 tablespoons juice for dough.
- Add frozen butter to flour mixture and cut in with pastry cutter or fingertips until coarse crumbs form, leaving some visible butter pieces.
- In a small bowl, whisk heavy cream, vanilla paste or extract, egg, 1 tablespoon orange zest, and 1–2 tablespoons orange juice.
- Make a well in the flour mixture and pour in wet ingredients; gently stir with a fork until just combined into a shaggy dough.
- If dough is too dry, add small amounts of orange juice or heavy cream to reach correct consistency.
- Turn dough onto parchment-lined or floured surface and form into an 8-inch disc about 1/2 to 3/4 inch thick.
- Cut disc into 8 wedges using a bench scraper or sharp knife.
- Separate wedges slightly for even rise or farther apart for rustic appearance.
- Chill shaped scones in refrigerator or freezer for 10–30 minutes.
- Bake scones for 13–15 minutes until bottoms are lightly golden and centers are no longer glossy; mini scones require about 12 minutes.
- Remove from oven and transfer to wire rack to cool completely.
- To make glaze, whisk powdered sugar, orange zest, melted butter, and vanilla paste or extract.
- Gradually add orange juice to glaze until smooth, thick, and pourable.
- Once scones are completely cooled, dip tops into glaze or drizzle glaze over scones.
- Allow glaze to set before serving.
Notes
Keep butter and heavy cream cold throughout processing to ensure tender flaky texture., Do not overmix dough; a shaggy, slightly crumbly dough is preferred to avoid tough scones., Adjust sugar in dough up to 1/2 cup total for sweeter scones., Scones can be frozen unbaked for up to 3 months; bake from frozen, adding some extra time., Use an oven thermometer to ensure accurate baking temperature., For mini scones, divide dough into two smaller discs and cut 8 wedges each, adjusting bake time to about 12 minutes., High altitude adjustments include reducing baking powder to 1 1/2 teaspoons, adding 1-2 tablespoons flour, and cautious addition of extra liquid., Gluten-free variation: substitute 1 1/4 cups gluten-free cup-for-cup flour, 1/4 cup almond flour, 1/4 cup oat flour; add liquid cautiously and check bake time earlier (2-3 minutes before).
Nutrition
- Serving Size: 1 scone
- Calories: Approximately 250 calories per scone (without glaze)
- Fat: 12 grams per serving
- Carbohydrates: 30 grams per serving
- Protein: 4 grams per serving