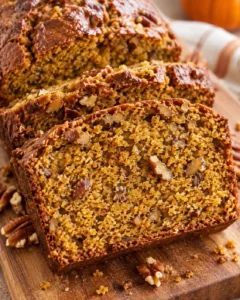
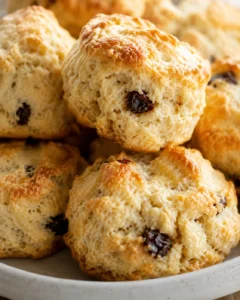
Chocolate Chip Scones Recipe

These chocolate chip scones are soft and buttery in the center, golden at the edges, and filled with a mix of regular and mini semi-sweet chocolate chips. The top gets a light, crisp finish while the inside stays tender enough to pair with coffee, tea, or a glass of milk. Cold European-style butter brings a rich flavor and helps create the flaky, bakery-style texture that makes a warm scone feel special.

This is a practical bake for breakfast, brunch, an afternoon tea tray, or a planned sweet treat. The dough uses familiar pantry ingredients, comes together without a mixer, and is shaped into one 8-inch round before it is divided into eight wedges. A short freeze before baking helps the cut pieces hold their shape and gives the scones a chance to rise in the hot oven.
The recipe includes a few flexible finishing choices. Use vanilla sugar for a crunchy, fragrant topping or use regular granulated sugar instead. Serve the scones warm with butter, clotted cream, or caramel sauce, and keep the optional variations in mind when you want to change the chocolate, make a smaller batch of portions, or prepare the dough ahead.
Plan on 15 minutes of preparation and about 18 to 20 minutes of baking, with an additional 15-minute chill in the freezer. The recipe makes 8 scones. For the cleanest texture, keep the butter cold, work quickly, and stop mixing as soon as the dough comes together.
Why You Will Love This
There is a useful balance in this chocolate chip scones recipe: the ingredient list is straightforward, but a handful of small technique choices make a visible difference. Cold butter, a gentle hand, and a brief freeze are more important than elaborate equipment. You can make the dough with your hands, a fork, or a pastry cutter, then shape it on a lightly floured surface.
- The middle stays tender. Heavy cream adds moisture and richness, while the butter contributes a soft, flaky crumb.
- The edges turn golden. The combination of sugar, cream, and a hot 400°F oven helps the tops and edges brown while the centers remain soft.
- Every wedge has chocolate. Regular semi-sweet chips provide generous pockets of chocolate, and mini chips fill smaller spaces throughout the dough.
- The process is manageable. There is no yeast, proofing, or special shaping. Mix, pat, cut, chill, brush, and bake.
- The recipe is useful for planning. Unbaked scones can be frozen and baked from frozen, and baked scones can also be frozen for later reheating.
- The finish is easy to customize. Vanilla sugar gives a sweet, crunchy top, but ordinary granulated sugar works too.
The dough should look rustic rather than perfectly smooth. Small visible pieces of butter are helpful because they separate layers as the scones bake. The goal is not to knead the dough until it becomes elastic. Instead, bring it together gently and let the oven do the work.
Ingredients
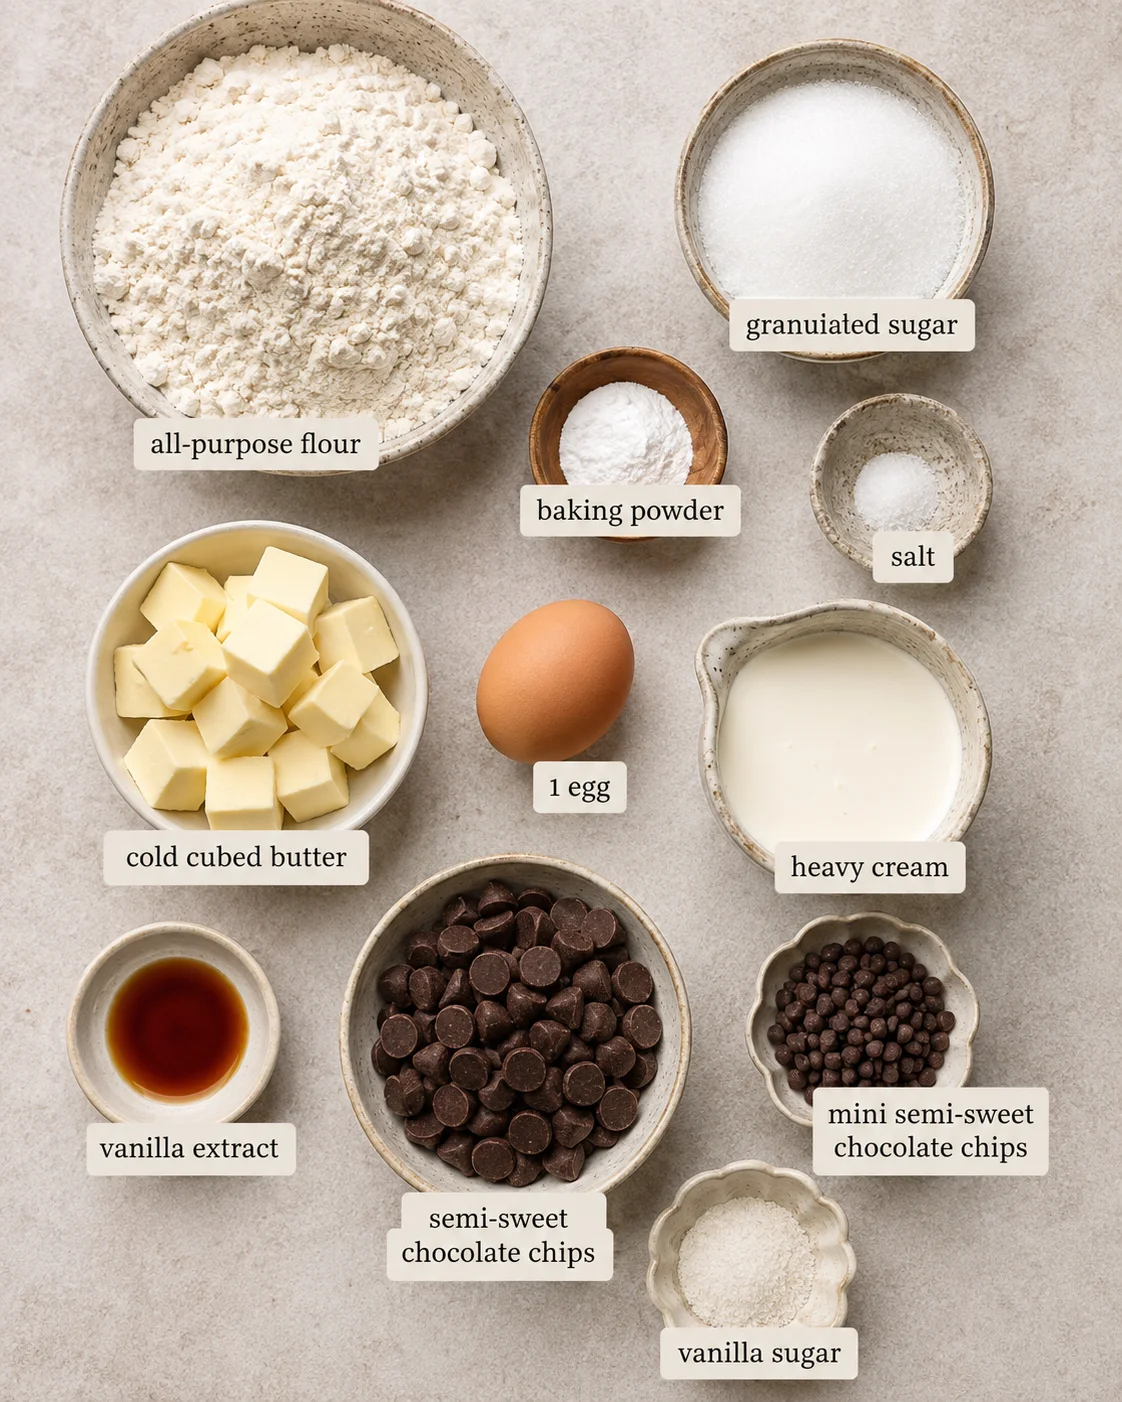
Measure the ingredients before you start, especially the dry ingredients and the two kinds of chocolate chips. Keep the butter cold until it goes into the flour mixture. If the kitchen is warm, place the cubed butter in the freezer for 10 minutes before mixing, as a practical way to keep it firm while you prepare the rest of the dough.
- 1 egg: The egg helps bind the dough and is mixed with the cream and vanilla before it is added to the dry ingredients.
- 2/3 cup heavy cream, plus extra for brushing: Heavy cream supplies moisture and richness. The extra cream is brushed over the shaped scones before the sugar topping is added.
- 1 teaspoon vanilla extract: Vanilla adds a warm flavor that fits naturally with the butter and chocolate.
- 2 cups all-purpose flour: This is the structural base of the scones. Use a light hand when combining it with the wet mixture so the finished crumb stays tender.
- 1/3 cup granulated sugar: Sugar sweetens the dough and supports browning.
- 2 teaspoons baking powder: Baking powder provides lift as the scones bake.
- 1/2 teaspoon salt: Salt balances the sweetness and helps the butter and chocolate flavors stand out.
- 1/2 cup cold butter, cubed: European-style butter with 82% fat is recommended for the richer, flakier texture described for these scones. Keep the cubes cold and work quickly so they do not melt into the flour before baking.
- 1 cup semi-sweet chocolate chips: These are the main chocolate pieces in the dough.
- 1/4 cup mini semi-sweet chocolate chips: Mini chips distribute smaller pockets of chocolate and complement the regular chips.
- Vanilla sugar for sprinkling: Use it for a sweet, crunchy topping. Regular granulated sugar is also an option.
The chocolate can be semi-sweet chips from a brand you enjoy. The source specifically mentions Ghirardelli and Guittard as options that work well, but the important choice is the semi-sweet style and the combination of regular and mini pieces. If you prefer to use only one size, the scones will still have chocolate flavor, but mixing the sizes creates a more varied bite.
European-style butter is not interchangeable with a decorative finishing butter here; it is part of the dough. The higher-fat 82% butter is associated in this recipe with a softer, flakier texture, crisp edges, and richer flavor. Whichever butter you choose, keep it cold and cut it into cubes before you begin.
Instructions
Read through the sequence before mixing. The dough is intentionally mixed only until it comes together, and the butter should remain in small, flour-coated pieces. Have a parchment-lined baking sheet ready, along with a lightly floured work surface and a sharp knife for cutting the wedges.
- Heat the oven and prepare the pan. Preheat the oven to 400°F. Line a baking sheet with parchment paper and set it aside. The parchment makes it easier to move the chilled wedges to the oven and helps prevent the sugary bottoms from sticking.
- Mix the wet ingredients. In a small bowl, whisk together 1 egg, 2/3 cup heavy cream, and 1 teaspoon vanilla extract. Set the mixture aside while you prepare the flour mixture. Keeping the wet ingredients together makes it easier to distribute the cream evenly without stirring the dough more than necessary later.
- Whisk the dry ingredients. In a large bowl, combine 2 cups all-purpose flour, 1/3 cup granulated sugar, 2 teaspoons baking powder, and 1/2 teaspoon salt. Whisk until the mixture is evenly blended and no pockets of baking powder or salt remain.
- Work in the cold butter. Add 1/2 cup cubed cold butter to the flour mixture. Use your hands, a fork, or a pastry cutter to work it in. Move quickly so the butter does not melt. The mixture should look pebbly, with little pieces of butter covered in flour. Those pieces are useful; do not keep mixing until the bowl looks uniformly sandy or smooth.
- Add the cream mixture. Pour the egg, cream, and vanilla mixture over the flour and butter. Stir with a fork or rubber spatula just until the dough begins to come together. A few dry patches can disappear as you fold in the chocolate, but do not overmix.
- Fold in the chocolate. Add 1 cup semi-sweet chocolate chips and 1/4 cup mini semi-sweet chocolate chips. Fold them through the dough with as few strokes as possible. Stop when the chips are distributed and the dough holds together. Overmixing can make the scones less tender.
- Shape the dough. Turn the dough onto a lightly floured surface. It will be a little sticky, so dust the surface as needed to make it manageable. Gently pat and shape the dough into a thick 8-inch round. Avoid pressing out every piece of butter or working the dough like bread dough.
- Cut eight wedges. Use a sharp knife to divide the round into 8 equally sized triangles. Cut straight through the dough and keep the wedges as even as you can so they bake at a similar rate. If the dough sticks to the knife, a light dusting of flour is enough.
- Chill the shaped scones. Transfer the wedges to the parchment-lined baking sheet. Place the sheet in the freezer for 15 minutes. This brief chill firms the butter again and helps the scones rise while they bake.
- Brush and top. Brush the tops with extra heavy cream. Sprinkle with vanilla sugar, or use regular granulated sugar if that is what you have. The cream helps the sugar adhere and gives the tops a lightly polished finish.
- Bake. Bake for 18 to 20 minutes, until the scones are golden and feel slightly firm to the touch. Watch the edges and tops for the visual cue rather than relying only on the clock, since ovens and baking sheets can vary.
- Cool and serve. Let the scones cool down on the baking sheet or a wire rack before serving. They are especially inviting while still warm, when the chocolate is soft and the centers are tender.
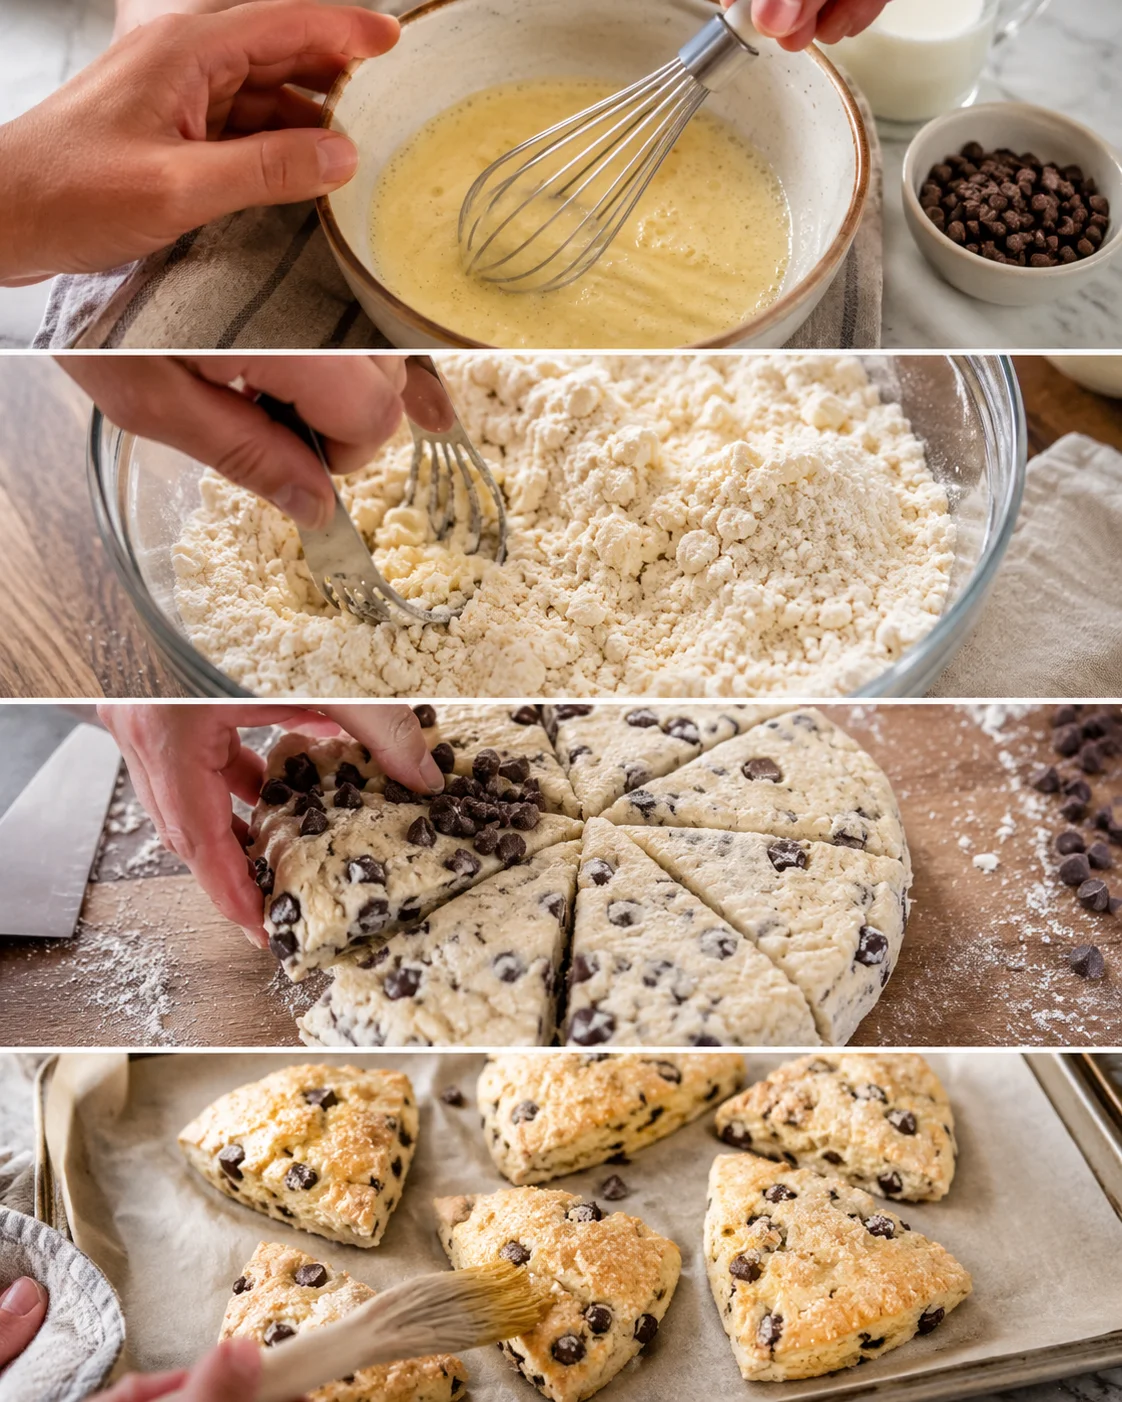
The dough may look uneven during shaping, and that is fine. A rustic round with small butter pieces is preferable to a heavily worked dough. If a few chocolate chips sit near the edge of a wedge, press them gently into the surface before chilling. Keep handling brief so the butter stays cold.
Tips
The most important technique in this recipe is temperature control. Butter that remains cold until baking creates pockets in the dough, while butter that becomes warm can blend too completely into the flour. You do not need to chase a perfect appearance in the mixing bowl. Look for the cues that tell you the dough is ready and then move on.
- Start with cold butter. Cube the butter before adding it. If your kitchen is warm or you are working slowly, chill the cubes in the freezer for 10 minutes before mixing.
- Work quickly when cutting in the butter. Use your hands, a fork, or a pastry cutter, but stop once the mixture looks pebbly and the small butter pieces are coated in flour.
- Do not overmix. Stir only until the flour disappears and the dough begins to hold together. Extra mixing can make the texture heavier.
- Expect a slightly sticky dough. Dust the work surface as needed instead of adding large amounts of flour directly to the dough. The dough should be workable, not dry.
- Chill after shaping. The 15-minute freezer rest is part of the method. It firms the butter immediately before baking and supports a better rise.
- Use a sharp knife. A clean cut helps the eight wedges keep their shape. Press down rather than sawing back and forth.
- Keep the wedges spaced apart. Give the pieces room on the parchment-lined sheet so their edges can brown and they are easier to remove after baking.
- Look for golden color and slight firmness. The tops and edges should be golden, and the scones should feel slightly firm to the touch when they are ready.
- Cool before storing. Let the scones cool fully before placing them in an airtight container. Trapping steam while they are hot can soften the crisp exterior.
- Choose coarse or regular sugar according to the finish you want. The source recommends coarse sugar for extra crunch and sparkle, while the recipe also allows vanilla sugar or regular granulated sugar.
What the butter mixture should look like
After the cold butter is worked into the dry ingredients, the flour should hold small, irregular pieces rather than looking like a smooth paste. Some pieces may be the size of small pebbles, and some may be smaller. The exact size does not need to be uniform. The useful sign is that little pieces of butter are still visible and covered in flour.
How to avoid a tough scone
Most of the texture decisions happen after the wet ingredients are added. Stir with a fork or rubber spatula and use a folding motion when adding the chocolate. Stop as soon as the dough comes together. When you turn it out, pat it into shape instead of kneading it. These steps limit gluten development and keep the scone tender without requiring a complicated technique.
How to handle warm dough
If the dough becomes soft while you shape it, dust the surface lightly and finish shaping without prolonged handling. The planned 15-minute freezer rest will firm the dough before baking. If the kitchen is especially warm, keep the baking sheet and cut wedges chilled while you finish the topping. The goal is simply to return the butter to a firm state before the scones enter the oven.
Variations
The basic formula is designed around heavy cream, cold butter, and semi-sweet chocolate, but the finished scones can be adjusted in a few specific ways. Keep the quantities and method clear when making a change, and remember that an alternative ingredient may change the texture rather than produce an identical result.
Use a different topping sugar
Vanilla sugar gives the tops a sweet, fragrant finish. Regular granulated sugar can be sprinkled over the cream instead. Coarse sugar adds extra crunch and sparkle. Brush the shaped wedges with extra cream first so the sugar adheres to the surface.
Change the chocolate-chip mix
The recipe uses 1 cup regular semi-sweet chocolate chips plus 1/4 cup mini semi-sweet chocolate chips. Keeping both sizes gives the scones a mix of larger chocolate pockets and smaller pieces. You can also choose the semi-sweet chips you prefer; Ghirardelli and Guittard are two examples specifically mentioned for this style of scone.
Make an orange-chili version
For an orange-chili variation, add orange zest to the dough and use orange chili sugar for the topping. This changes the aromatic profile while keeping the basic shaping and baking method intact. Add the zest with the dry ingredients so it can distribute through the flour, then sprinkle the flavored sugar over the cream-brushed wedges.
Use cold milk instead of heavy cream
Cold milk can replace the heavy cream, but the scones will not be as rich or as tender because milk contains less fat. To help compensate, add 1 extra tablespoon of butter. This is a specific adjustment for the cream substitution, not a reason to change the butter amount in the original version.
Try a gluten-free flour blend
Use a 1:1 gluten-free baking blend that includes xanthan gum in place of the all-purpose flour. Avoid using almond flour or coconut flour alone because they absorb moisture differently and can make the dough crumbly. If the dough needs help coming together, add a splash more cream rather than adding a precise extra quantity that the recipe does not specify.
Make mini scones
Divide the dough into smaller portions before baking if you want mini scones for a brunch spread or coffee break. Smaller pieces bake faster, so begin checking them for doneness around 10 to 12 minutes rather than using the full 18- to 20-minute baking time. Look for golden color and slight firmness as the visual and touch cues.
For any variation, keep the dough handling gentle. The cold-butter method still matters, and a brief chill is useful even when the pieces are smaller. If the shape or size changes substantially, use the appearance and firmness of the scones as the final guide rather than assuming the original baking time will be exact.

Storage
Chocolate chip scones are usually at their best on the day they are baked, especially while they are still warm. If you have leftovers, let them cool completely and place them in an airtight container at room temperature for up to 3 days. A short reheat can bring back some of the fresh-baked warmth.
Room-temperature storage
Cool the scones fully before sealing them. Store them in an airtight container at room temperature for up to 3 days. If you stack them, place parchment between layers if the topping or chocolate is still slightly soft. Keeping the container closed helps prevent the scones from drying out, while cooling first helps avoid excess condensation.
Refrigerating leftovers
For a longer storage window, refrigerate the cooled scones in an airtight container for up to 5 days. Refrigeration can make baked goods feel firmer, so reheat them briefly at 350°F to restore warmth and freshness before serving. Start with a brief reheat and check the texture; the goal is to warm the scones, not dry them out.
Freezing unbaked scones
To make the dough ahead, shape and cut the scones, place the unbaked wedges on a sheet tray, and freeze them. Bake the scones straight from frozen, adding 2 to 3 minutes to the baking time. Brush them with extra cream and add the sugar topping before baking. Use the golden color and slightly firm surface as the doneness cues.
Freezing baked scones
Baked scones can also be frozen. Cool them completely before wrapping or placing them in a freezer-safe container. Reheat them right before serving. The baked and unbaked freezing methods serve different planning needs: freezing the shaped dough gives you freshly baked scones later, while freezing baked scones is convenient when you already have a finished batch.
Whether you store them at room temperature, refrigerate them, or freeze them, label the container with the date so the storage window is easy to track. Let frozen baked scones warm gradually enough to avoid a cold center, then use the 350°F reheat guidance for a brief finish.
Serving Suggestions
Serve these scones warm with your morning coffee, afternoon tea, or another favorite drink. Their buttery dough and semi-sweet chocolate make them suitable for a simple breakfast, a brunch tray, or a sweet snack with no elaborate garnish required.
- Butter: Split or serve the warm scones with butter for an even richer finish.
- Clotted cream: Add a spoonful for a traditional tea-time style serving.
- Caramel sauce: Drizzle with caramel sauce when you want a more decadent chocolate-and-caramel combination.
- Afternoon tea: Arrange the wedges on a platter with tea and let the sugar-crusted tops provide a little contrast to the tender centers.
- Brunch: Include mini scones alongside other small portions. Check the smaller pieces around 10 to 12 minutes so they do not stay in the oven for the full-size bake time.
The finished scones should have golden tops and slightly firm edges with a soft, tender center. Warm chocolate chips make the interior feel especially rich, while the sugar topping adds a small crisp note. If serving later in the day, reheat stored scones briefly at 350°F and serve them as soon as they are warm.
FAQ
How should I store leftover chocolate chip scones?
Let the scones cool completely, then place them in an airtight container at room temperature for up to 3 days. For a longer storage window, refrigerate them for up to 5 days. Reheat refrigerated scones briefly at 350°F to restore warmth and freshness before serving.
Can I freeze these chocolate chip scones?
Yes. For unbaked scones, freeze the cut wedges on a sheet tray and bake them straight from frozen, adding 2 to 3 minutes to the baking time. You can also freeze baked scones and reheat them before serving. In either case, cool baked scones completely before storing them.
What happens if I use cold milk instead of heavy cream?
Cold milk can be used, but the scones will be less rich and tender because milk has less fat than heavy cream. Add 1 extra tablespoon of butter to help compensate. The original method uses 2/3 cup heavy cream plus extra cream for brushing, so keep the brushing step separate from the liquid mixed into the dough.
Can I make these scones gluten-free?
Use a 1:1 gluten-free baking blend that includes xanthan gum for structure. Almond flour or coconut flour should not be used alone because they absorb moisture differently and can leave the dough crumbly. If the dough needs more moisture, add a splash more cream and handle it gently.
What type of chocolate chips should I use?
Use semi-sweet chocolate chips. The recipe combines 1 cup regular chips with 1/4 cup mini chips for different-sized pockets of chocolate. Ghirardelli and Guittard are examples of semi-sweet chips that work well here, but you can use another semi-sweet option you enjoy.
Can I make mini scones?
Yes. Divide the dough into smaller portions before baking. Mini scones bake much faster than the full-size wedges, so begin checking them around 10 to 12 minutes. They are useful for brunch spreads and coffee breaks, but rely on golden color and slight firmness rather than the full-size baking time.
Nutrition
The supplied nutrition estimate per serving is 516 calories, 53 grams carbohydrates, 8 grams protein, 30 grams fat, 17 grams saturated fat, 2 grams polyunsaturated fat, 10 grams monounsaturated fat, 1 gram trans fat, and 68 milligrams cholesterol. Nutrition information is an estimate and can vary with ingredient brands, chocolate chips, butter, serving size, and substitutions.
Because this recipe makes 8 scones, dividing the batch evenly helps keep the portions close to the stated estimate. A substitution such as milk for heavy cream, a different butter, or a gluten-free blend can change the nutrition as well as the texture.
Recipe at a Glance
- Yield: 8 scones
- Prep time: 15 minutes
- Cook time: 18 minutes in the recipe timing, with a baking range of 18 to 20 minutes in the method
- Oven temperature: 400°F
- Shape: One 8-inch round cut into 8 triangles
- Chill: 15 minutes in the freezer before baking
- Storage: Airtight at room temperature up to 3 days; refrigerated up to 5 days
- Freezing: Freeze unbaked wedges and bake from frozen with 2 to 3 extra minutes, or freeze baked scones and reheat before serving
Once the dough is mixed, keep the remaining steps simple: shape the sticky dough gently, cut the round into eight triangles, chill the wedges, brush them with cream, add sugar, and bake until golden. That short sequence protects the cold butter and gives you warm, chocolate-filled scones with tender centers and crisp edges.
PrintSoft and buttery scones filled with semi-sweet chocolate chips, golden edges, and a crisp sugary topping. Perfect for breakfast, brunch, or afternoon tea.
- Prep Time: 15 minutes
- Cook Time: 18 minutes
- Total Time: 33 minutes (including 15-minute chilling)
- Yield: 8 scones 1x
- Category: Breakfast
- Cuisine: American
Ingredients
- 1 egg
- 2/3 cup heavy cream, plus extra for brushing
- 1 teaspoon vanilla extract
- 2 cups all-purpose flour
- 1/3 cup granulated sugar
- 2 teaspoons baking powder
- 1/2 teaspoon salt
- 1/2 cup cold European-style butter (82% fat), cubed
- 1 cup semi-sweet chocolate chips
- 1/4 cup mini semi-sweet chocolate chips
- Vanilla sugar or additional granulated sugar for sprinkling
Instructions
- Preheat oven to 400°F (204°C). Line a baking sheet with parchment paper and set aside.
- In a small bowl, whisk together the egg, 2/3 cup heavy cream, and vanilla extract. Set aside.
- In a large bowl, whisk together all-purpose flour, granulated sugar, baking powder, and salt until evenly blended.
- Add cold cubed butter to the flour mixture. Use your hands, fork, or pastry cutter to work the butter in until the mixture looks pebbly with small pieces of butter coated in flour. Do not overmix.
- Pour the egg, cream, and vanilla mixture over the flour and butter. Stir gently with a fork or rubber spatula just until the dough begins to come together, leaving a few dry patches.
- Fold in the semi-sweet chocolate chips and mini chocolate chips with minimal stirring until evenly distributed and dough holds together.
- Turn dough onto a lightly floured surface. Gently pat and shape into an 8-inch round. Avoid overworking the dough.
- Cut the round into 8 equal wedges using a sharp knife. If dough sticks, lightly dust the knife with flour.
- Transfer wedges to the prepared baking sheet, spacing them to allow browning.
- Freeze the shaped wedges on the baking sheet for 15 minutes to firm the butter and improve rise.
- Brush the tops of the chilled wedges with additional heavy cream. Sprinkle with vanilla sugar or granulated sugar.
- Bake for 18 to 20 minutes until scones are golden and slightly firm to the touch. Use visual cues rather than just time alone.
- Remove from oven and cool on the baking sheet or a wire rack before serving. Best served warm.
Notes
Use cold butter and work quickly to maintain small butter pieces, which create a flaky texture., Do not overmix the dough after adding wet ingredients to avoid tough scones., Optionally, replace heavy cream in the dough with cold milk plus 1 additional tablespoon of butter, but scones will be less rich and tender., Vanilla sugar, regular granulated sugar, or coarse sugar can be used for the topping based on desired texture., Scones can be frozen either baked or unbaked. Bake unbaked frozen wedges adding 2 to 3 minutes to baking time., For gluten-free option, substitute all-purpose flour with a 1:1 gluten-free blend containing xanthan gum. Avoid almond or coconut flour alone., Mini scones can be made by dividing dough into smaller portions. Bake mini scones for 10 to 12 minutes, watch for golden color and firmness.
Nutrition
- Serving Size: 1 scone
- Calories: 516 calories per scone
- Fat: 30 grams per serving
- Carbohydrates: 53 grams per serving
- Protein: 8 grams per serving