Vanilla Layer Cake (Moist, Sturdy + Easy to Stack)
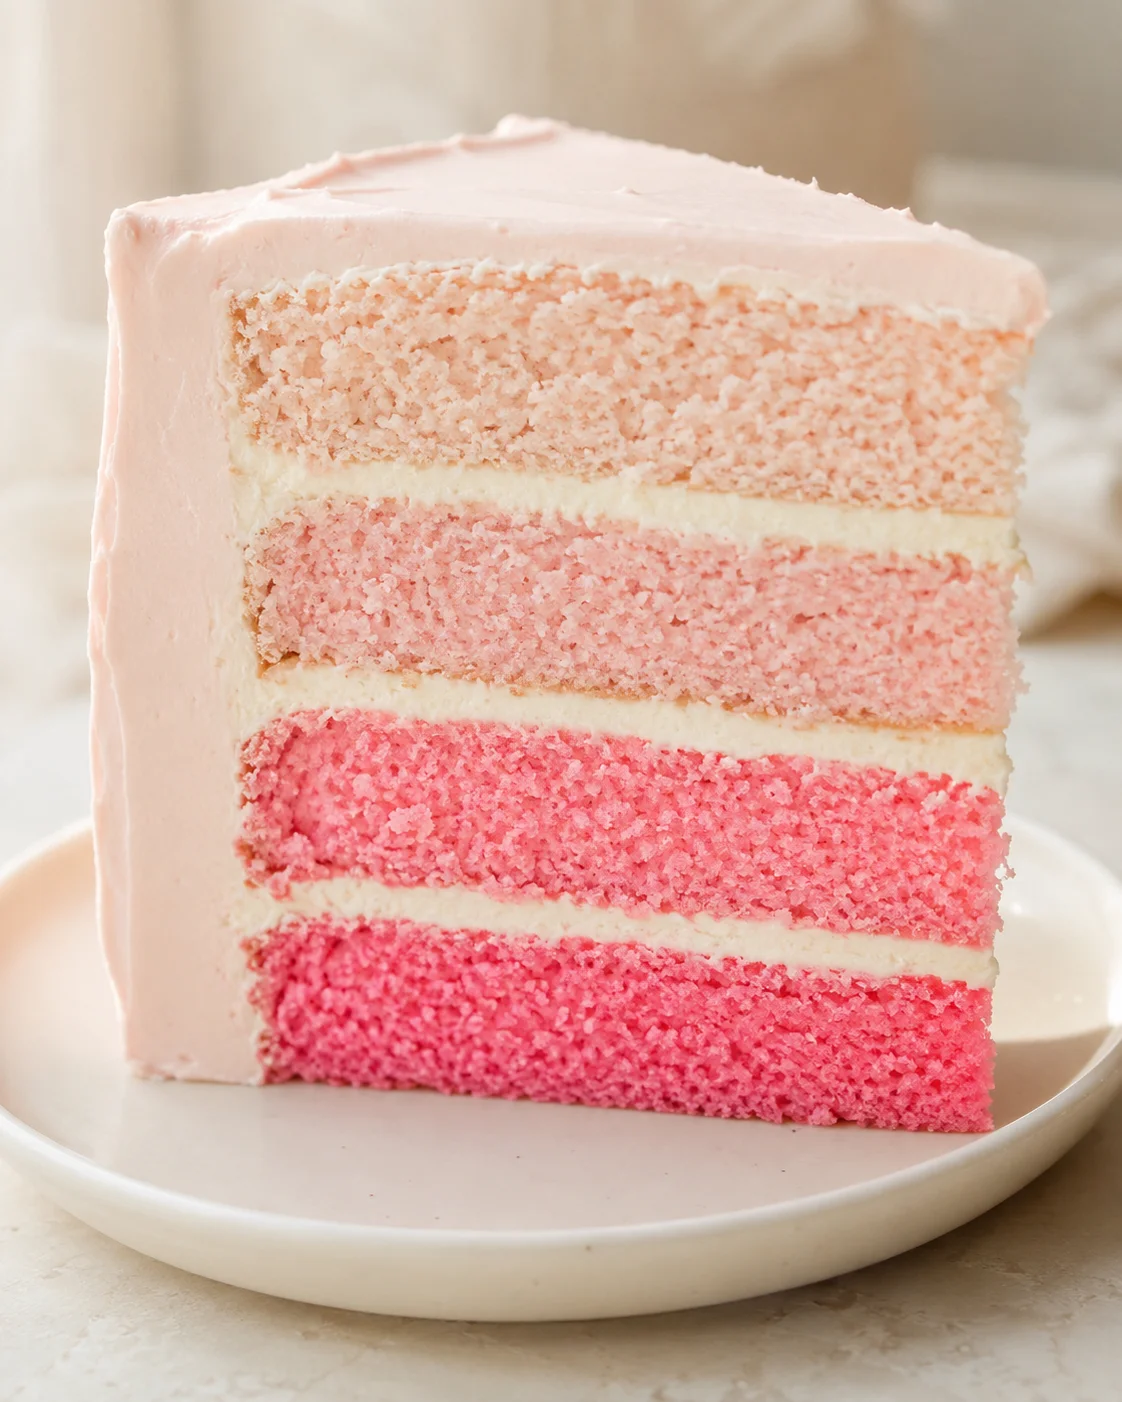
This vanilla layer cake is hands down my favorite! It’s super moist, full of classic flavor, and best of all, it holds together beautifully when stacked. With over a thousand 5-star reviews, I completely understand why so many bakers love it.
Since this is a butter cake, it’s a bit denser than your typical sponge cake but still wonderfully tender and rich.
- Flavor: timeless vanilla with a subtle tang from the buttermilk
- Texture: moist, tender but solid enough for stacking (classic butter cake style)
- Skill level: intermediate (reverse-creaming method + layer assembly, but I guide you step by step)
- Perfect for: birthdays, celebrations, tiered cakes, and vibrant colored layers
- Makes: 3×8-inch or 4×7-inch cake layers plus frosting
- Batter volume: about 10 cups / ~1800g
- Baking time: roughly 33–36 minutes per layer
If you’re dreaming of a classic vanilla layer cake that strikes the perfect balance between tender crumb and sturdy structure for stacking and decorating, you’re in the right spot. This butter-style vanilla layer cake is my go-to—it’s moist, lightly tangy thanks to buttermilk, and solid enough to create everything from birthday cakes to tiered beauties or colorful layered treats. The key is the one-bowl reverse-creaming technique, which ensures a consistently smooth crumb and makes every slice a delight. Plus, this recipe has earned thousands of glowing 5-star reviews for a reason!
In this post, I’ll walk you through everything you need—from a clear ingredients breakdown with weights, to easy-to-follow step-by-step instructions covering both the cake and the silky vanilla buttercream frosting. I’ll share handy tips on coloring, trimming, troubleshooting, and how to make it all ahead of time or store your cake so it stays fresh. Whether you want classic 8-inch layers, smaller 7-inch rounds, a sheet cake, or even cupcakes, you’ll have all the tricks to make your vanilla layer cake bake and assemble like a pro.
- Flavor: classic vanilla with a gentle buttermilk tang
- Texture: moist and tender but firm enough to stack (butter cake style)
- Makes: 3×8-inch or 4×7-inch layers (about 10 cups / ~1800g batter)
- Skill level: intermediate—I’ll guide you through reverse creaming, leveling, and assembly
- Includes: gear tips, timing, detailed directions, variations, troubleshooting, and storage advice
Why Bakers Love It
This vanilla layer cake is the perfect go-to for any celebration. It’s buttery, moist, tender, and thanks to the butter cake base, it’s sturdy enough to stack into a tiered masterpiece or bright, colorful layers for birthdays or parties. Made in just one bowl using the reverse-creaming method, it bakes up with an even texture and minimal doming. Plus, it dyes beautifully with gel food coloring (ideal for ombré or vivid hues), freezes well, and trims into clean layers ready for frosting and decorating. You can easily adapt it for cupcakes, sheet cakes, or even gluten-free tweaks. With straightforward pantry staples and clear troubleshooting tips, it’s a reliable recipe every home baker can trust.
- Moist crumb that’s tender but holds up well when stacked and frosted
- One-bowl method means fewer dishes and smooth, consistent results
- Works beautifully with gel food coloring to create vibrant layers
- Prepares ahead and freezes well, with layers that trim neatly for sharp edges
Ingredients and Equipment
- 3 cups all-purpose flour (375g)
- 3 cups granulated sugar (600g)
- 2 1/2 tsp baking powder (10g)
- 1 tsp fine salt (6g)
- 1 cup (2 sticks) unsalted butter, room temperature (226g)
- 1 cup carton egg whites or 7 large egg whites, room temperature (240g)
- 1 1/2 cups buttermilk, room temperature (360g)
- 2 Tbsp vegetable or canola oil (30g)
- 2 tsp vanilla extract or vanilla bean paste (8g)
- gel food coloring – if desired
- 2 cups (4 sticks) unsalted butter, room temperature (452g)
- 1 Tbsp vanilla extract or vanilla bean paste (12g)
- 1/2 tsp fine salt (3g)
- 7 cups powdered sugar (907g or a 2 lb. bag)
- 1/4 cup heavy whipping cream, room temperature (60g)
How to Make the Cake
- Preheat oven to 350°F (175°C); grease and line three 8-inch or four 7-inch pans with nonstick spray and parchment rounds.
- In a stand mixer with paddle attachment or with a hand mixer, combine 3 cups all-purpose flour, 3 cups granulated sugar, 2½ tsp baking powder, and 1 tsp fine salt on low until blended.
- With mixer on low, add 1 cup (226g) room-temperature unsalted butter a few tablespoons at a time and mix until the mixture resembles moist sand with no large butter chunks (reverse-creaming).
- Pour in 1 cup (240g) room-temperature egg whites and mix on low until just combined.
- Add 1½ cups (360g) room-temperature buttermilk in two additions, mixing on low after each addition.
- Add 2 Tbsp vegetable oil and 2 tsp vanilla extract (or vanilla bean paste); if using gel food coloring add it now with the oil and vanilla and mix gently.
- Scrape down the bowl, then beat on medium speed about 1 minute to finish blending and incorporate air.
- Divide the batter evenly between prepared pans, weighing pans if desired for even layers.
- Bake the layers 33–35 minutes at 350°F (175°C) or until a toothpick inserted comes out with a few moist crumbs.
- Cool the layers in the pans for 10 minutes, run a thin spatula around the edges to loosen, then place the pans in the freezer for 30 minutes to firm the layers for easy removal.
- Invert the chilled pans to release the cakes and level the tops with a serrated knife or cake leveler just before assembling, or wrap and freeze layers if making ahead.
- If layers are frozen, thaw about 20 minutes before assembling so they remain slightly chilled but workable.
- While cakes cool, beat 2 cups (452g) room-temperature unsalted butter on medium speed for 30 seconds until silky.
- Add 1 Tbsp vanilla extract and 1/2 tsp fine salt and mix on low.
- With mixer on low, gradually add 7 cups (907g) powdered sugar, pouring in 1/4 cup (60g) heavy cream halfway through to loosen the frosting; scrape the bowl as needed.
- Increase mixer speed to medium and beat several minutes until the frosting is light, fluffy, and spreadable.
- Adjust frosting consistency: add 1 Tbsp heavy cream at a time if too stiff or powdered sugar 1/4 cup at a time if too thin; add gel coloring after the frosting is fully mixed if desired.
- Place the first cake layer on a greaseproof cake board and secure it with a small dab of frosting.
- Using a large offset spatula, spread an even layer of buttercream on each layer and stack the layers, repeating until all are stacked.
- Apply a thin crumb coat of frosting around the cake, smooth with a bench scraper, and chill in the refrigerator for 30 minutes or in the freezer for 10 minutes until the crumb coat is firm.
-
Apply the final thicker layer of frosting, smooth the sides and top with a bench scraper and offset spatula, and decorate as desired.
- For cupcakes, fill liners 3/4 full and bake at 350°F for 19–21 minutes until a toothpick shows a few moist crumbs.
- For a 9×13 sheet cake, pour batter into a greased 9×13 pan and bake at 350°F for 45–55 minutes until a toothpick shows a few moist crumbs.
Baker’s Tips and Troubleshooting
For vivid, bright cake layers, gel food coloring is your best friend—I favor Americolor and Chef Master brands. While liquid food coloring can work, it tends to dilute the batter and results in less punchy colors.
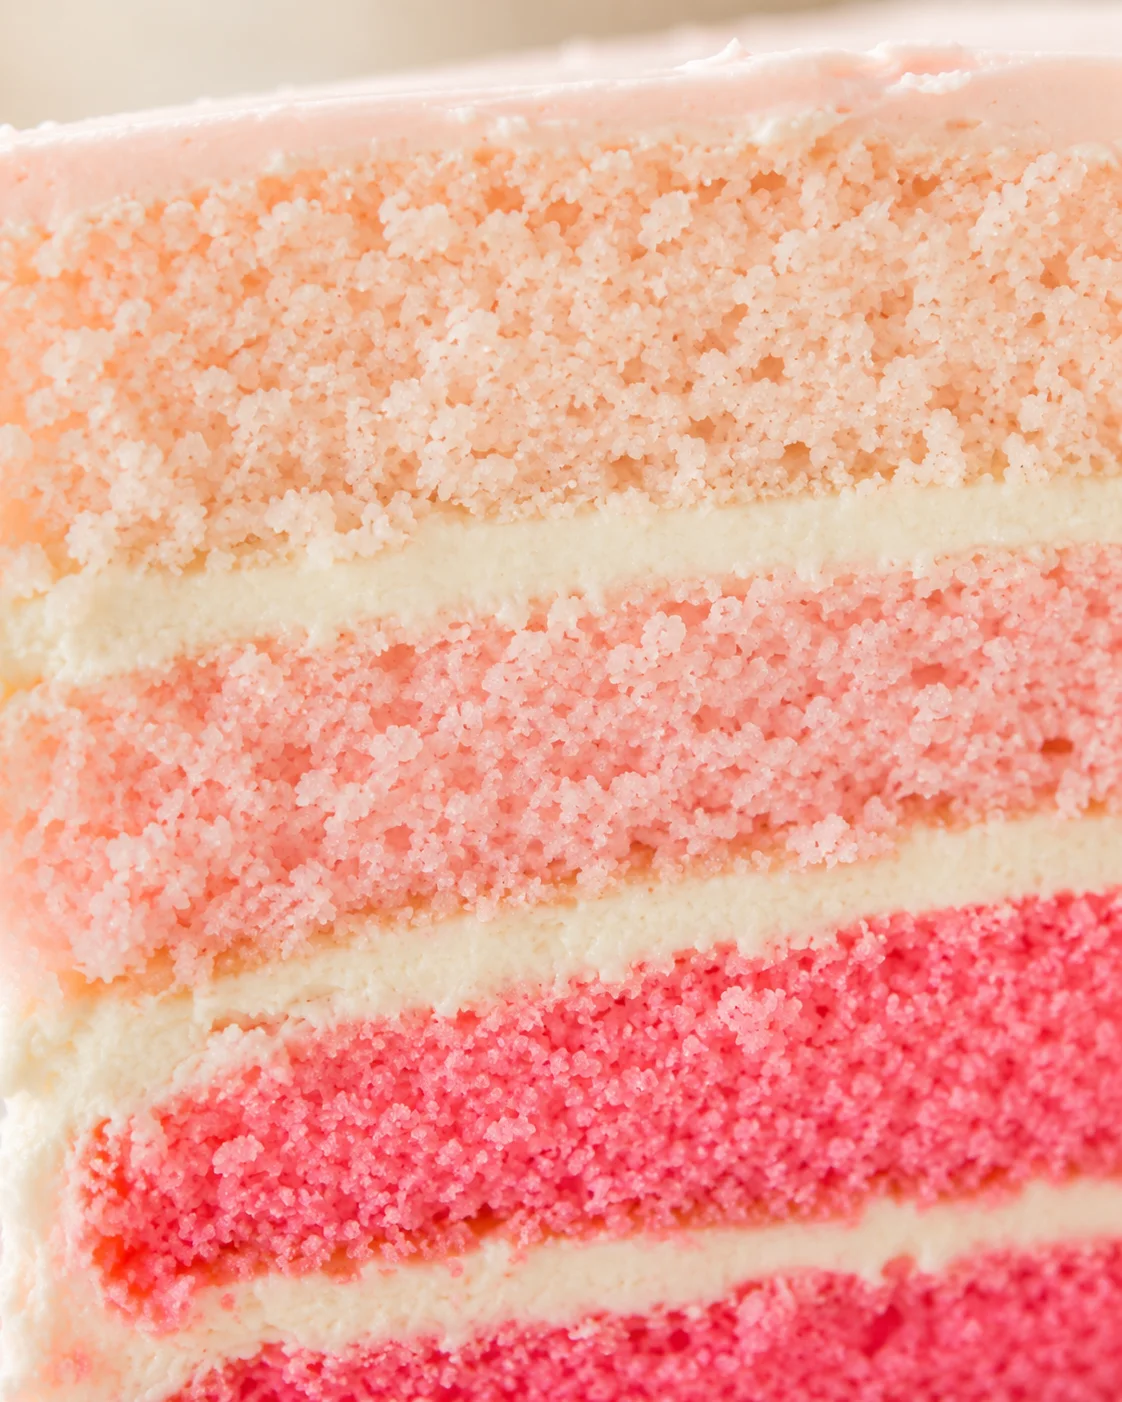
Gel colors are super concentrated, so you only need a little bit to get gorgeous, bold shades like in this pink ombré cake here.
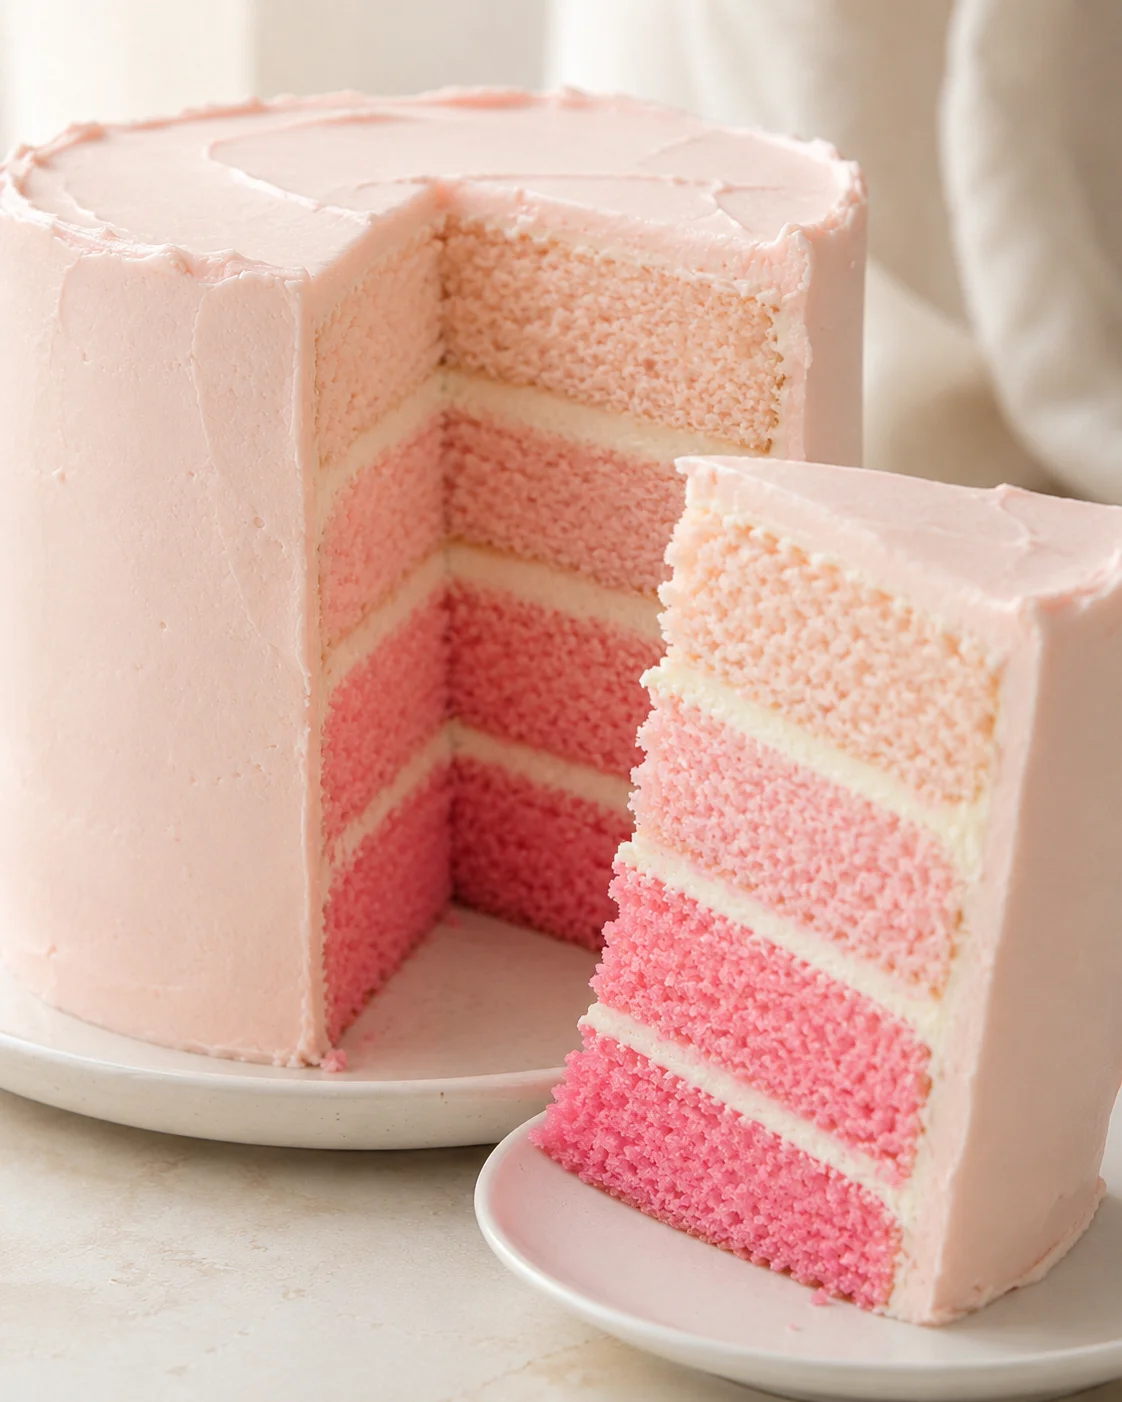
If you notice some browning or caramelization around the edges, trimming with a serrated knife after chilling your layers makes slicing neat and clean—great for stacked or tiered cakes.
Chilling cake layers first makes them nice and firm, so they cut easily without crumbling. I have a detailed video showing how I trim and level mine if you want to check it out.
Why did my cake sink in the middle?
Usually this happens because it’s underbaked (center isn’t set), your baking powder is old, or your oven temperature is too low.
Why is my cake dry?
Dry cake often means too much flour or you baked it too long. Be sure you’re measuring flour correctly—fluff, spoon, and level or weigh it—and pull the cake from the oven when a toothpick comes out with just a few moist crumbs.
Why are my layers falling apart when I frost them?
This cake is soft and tender; it can crumble if you frost while still warm. Make sure layers are fully cooled, then chill them in the freezer for 20 minutes before stacking and frosting.
Why are my cake layers browned at the edges?
That’s all natural caramelization from the sugar and butter. If you want perfect edges, wait until the layers are completely cool and trim them neatly with a serrated knife.
Why is my buttercream gritty or not smooth?
This usually means the powdered sugar isn’t fully mixed in. Beat longer on low or medium speed, scrape the bowl well, and add more cream gradually until smooth.
- Measure flour carefully every time—fluff, spoon, then level or use a scale for precision.
- Freeze your cake layers about 20 minutes before assembling so they’re firm and easier to work with.
- If your cake layers aren’t perfect, be sure to check the cake troubleshooting guide for common fixes.
- Need gluten-free? Substitute a 1:1 gluten-free baking flour blend and follow the same recipe steps.
Flavor Swaps and Substitutions
If you want to tweak flavors, change the cake format, or meet dietary needs, these swaps keep the texture and structure solid while mixing things up:
- Whole eggs instead of just egg whites: Use 4 large room-temperature eggs plus 1 large egg white for a richer, more golden cake.
- Buttermilk substitutes: Mix 1 Tbsp vinegar or lemon juice with milk to equal 1 cup, or swap plain yogurt or sour cream 1:1.
- Gluten-free: Swap all-purpose flour for a 1:1 gluten-free baking flour blend using the same method.
- Funfetti cake: Fold in 3–4 Tbsp rainbow sprinkles at the end of mixing (use gel food coloring to avoid extra liquid).
- Lemon vanilla twist: Add 1–2 tsp lemon zest and swap 1 tsp lemon extract for part of the vanilla for a bright citrus kick.
- Chocolate version: Replace 1/2 to 3/4 cup flour with the same amount of natural unsweetened cocoa powder, slightly reduce sugar, and expect a denser crumb. Watch bake time closely.
- Different frostings: Try cream cheese frosting, Swiss meringue buttercream, or chocolate buttercream instead of vanilla buttercream (adjust for warmer kitchens).
- Format swaps: This batter makes excellent cupcakes (350°F for 19–21 minutes, about 3 dozen) or a 9×13 sheet cake (bake 45–55 minutes).
Storing, Freezing, and Make-Ahead
Here’s how you can store, freeze, and prep your vanilla layer cake ahead to save time and keep it fresh:
- Unfrosted layers: Let layers cool completely, wrap each tightly in plastic wrap plus foil. Store in the fridge up to 3 days or freeze up to 3 months. When ready, thaw overnight in the fridge and bring to slightly cool room temp (~20 minutes) before assembling.
- Fully frosted cake: Keep in the fridge for up to 1 week (if no fresh fillings). Freeze up to 1 month wrapped well. Thaw in fridge overnight and then bring to room temp 30–60 minutes before slicing.
- Buttercream: Store in an airtight container in the fridge for up to 1 month or freeze for 3 months. Stir or re-whip after thawing and add a splash of cream if needed.
- Leftover slices: Cover the exposed cake with extra frosting or store in an airtight container in the fridge for 5–7 days.
- Serving tip: For best flavor and texture, let chilled or frozen cakes sit at room temperature for 30–60 minutes before serving. You can zap a single slice in the microwave for 5–8 seconds if desired, but avoid overheating so the crumb stays moist.
Answers to Common Questions
Can I use whole eggs instead of egg whites?
Absolutely! Using 4 large room-temperature eggs plus 1 egg white instead of all egg whites gives the cake a richer, slightly more golden crumb.
Can I make this in 2 (9-inch) pans?
Yes, one batch works for two 9-inch layers. They’ll be a bit thicker than 8-inch, so you’ll need to bake them longer. Keep an eye on doneness with that toothpick test.
Can I make cupcakes from this recipe?
Yes! Expect flatter tops since this batter is designed to bake level. Fill liners 3/4 full and bake at 350°F for 19–21 minutes (about 3 dozen). If you want just a small batch, try my vanilla cupcake recipe instead.
What can I use instead of buttermilk?
DIY buttermilk works perfectly—1 Tbsp vinegar or lemon juice plus enough milk to make 1 cup. Plain yogurt or sour cream also work great, just swap 1:1.
More in Recipes
Healthy Pumpkin Truffles
10-Minute Vegan Pumpkin Pasta
Gluten Free Pumpkin Muffins