The Best Moist Vanilla Cake Recipe
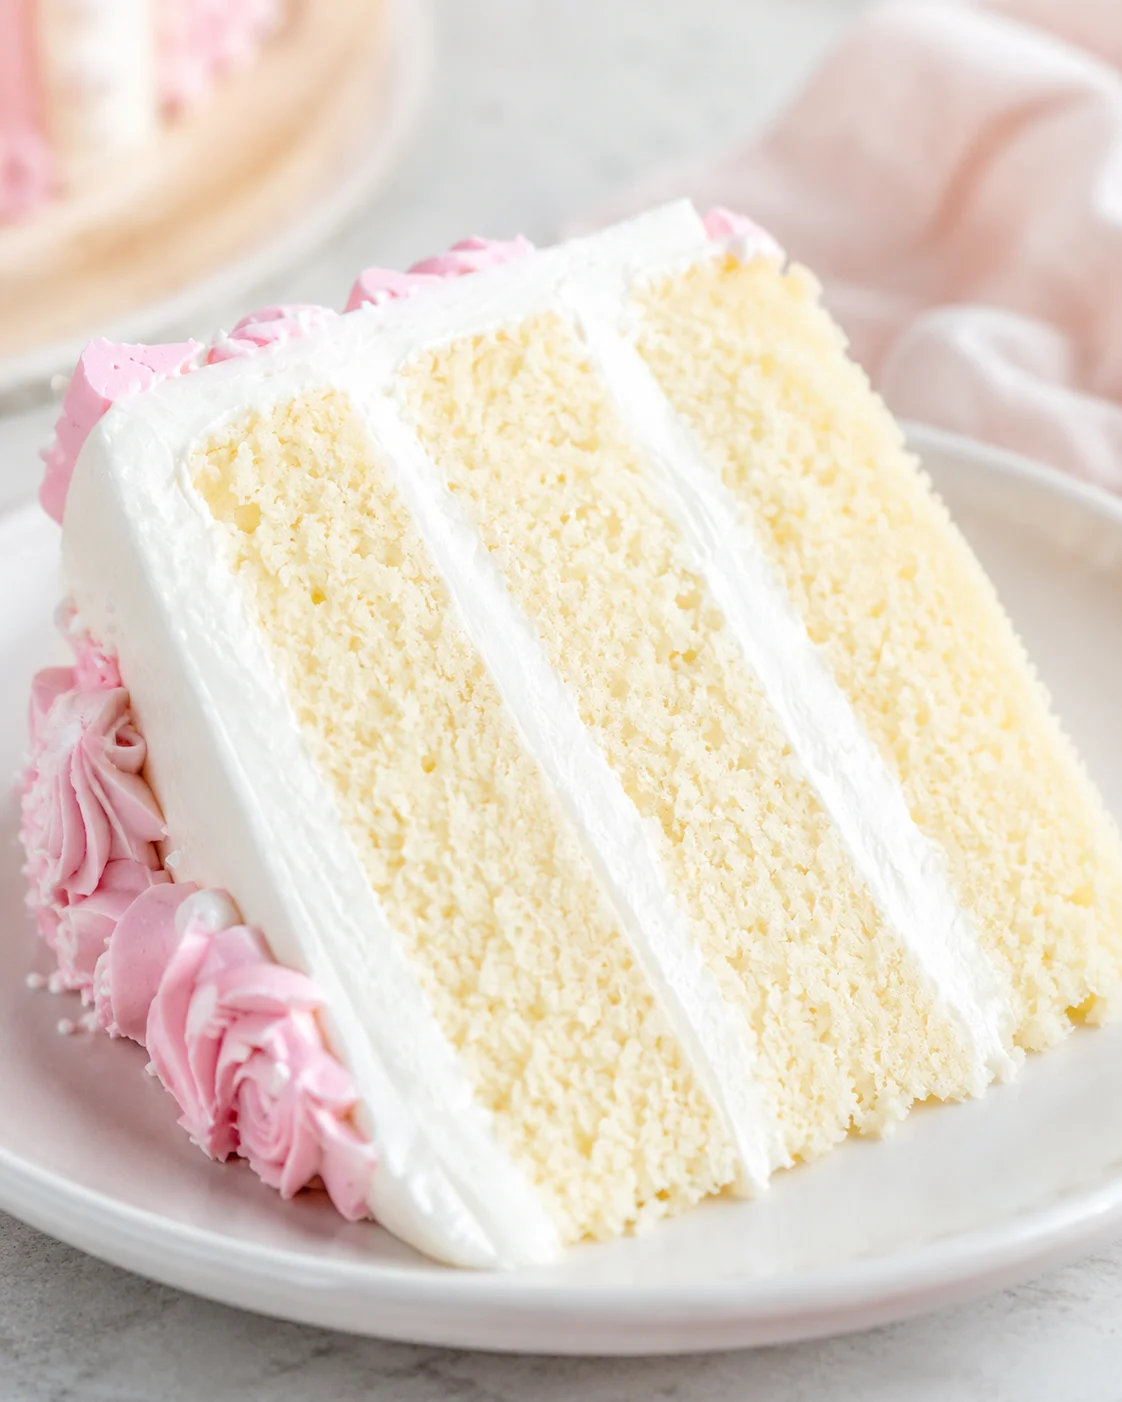
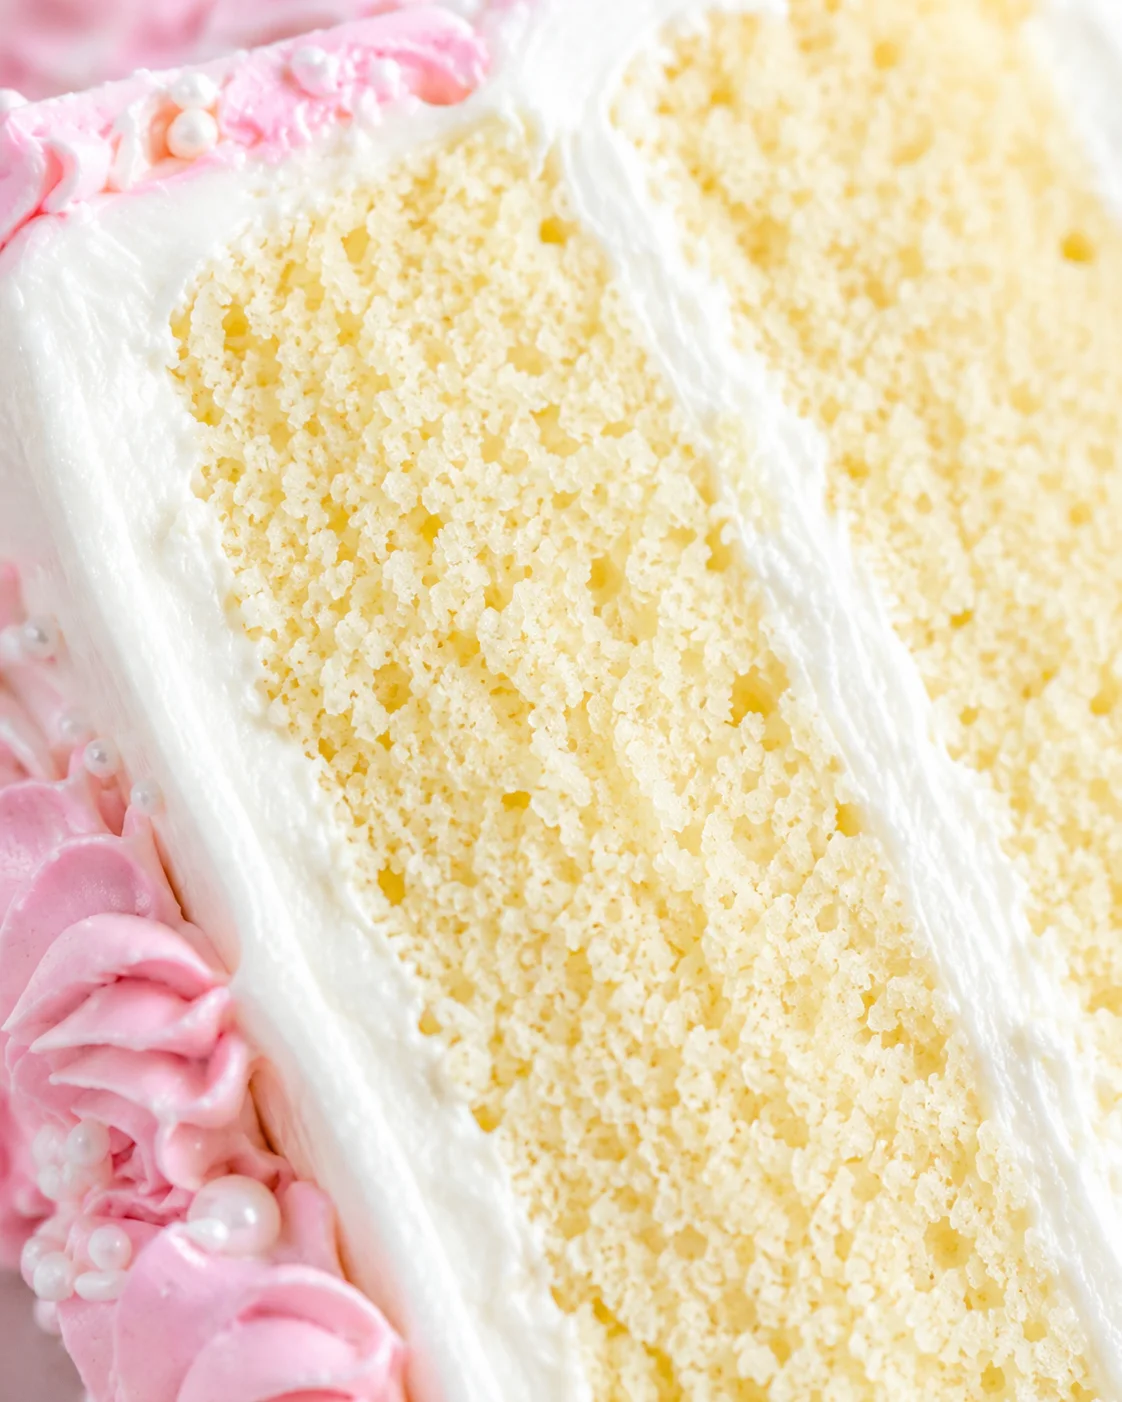
Vanilla cake is a must-have recipe in your baking toolkit, and this particular one has been my trusted favorite for over a decade, perfect for weddings, birthdays, and all the special celebrations in between. Thanks to the reverse creaming method, it bakes into an insanely moist, tender crumb that stays soft and fresh for days. Plus, it rises nice and flat, which means almost zero trimming and no wasted cake — what’s not to love?
- Recipe Name: Vanilla Cake Recipe
- Why You’ll Love It: A soft, buttery vanilla cake with a moist crumb that stays tender for days on end.
- Time and Difficulty: Prep time: 15 minutes Bake time: 20-30 minutes Difficulty: Intermediate
- Main Ingredients: Cake flour, butter, sugar, eggs, milk, vanilla extract
- Method: Reverse creaming method: Mixing butter with dry ingredients first, then blending in liquids.
- Texture and Flavor: Light, fluffy crumb bursting with rich vanilla goodness
- Quick Tip: Don’t skip mixing the batter for a full two minutes during the reverse creaming step — it’s key to building a perfect cake structure.
This moist vanilla cake recipe has been my secret weapon for professional baking at weddings, birthday parties, and every special occasion you can think of. It’s that dependable, buttery, ultra-moist layer cake that holds onto its tender crumb for days. Rooted in the reverse creaming method and exact ingredient weights, this cake consistently bakes up flat, meaning you barely need to trim the tops — saving you time and precious cake.
In this post, I’m sharing everything you need to bake this crowd-pleaser: a measured ingredient list, step-by-step instructions using the reverse creaming technique, an easy buttercream frosting recipe that I almost always reach for, plus photos to guide you through key steps. I even include notes on equipment (hello, kitchen scale and 8″ pans!), baking times and temps (about 15 minutes prep, 20-30 minutes baking at 335°F), troubleshooting tips, and some handy variations like white cake, funfetti, and non-dairy swaps.
Expect plenty of practical advice sprinkled throughout — like how to get your ingredients to room temperature just right, why that extra two minutes mixing makes a huge difference, how to freeze or store cake layers, and simple tweaks if you want cupcakes or different pan sizes. Follow these steps, use a scale, and you’ll be rewarded with evenly baked, tender moist vanilla cake layers every single time.
Why You’ll Love the Texture
A big reason this cake turns out so tender is the reverse creaming method. This technique mixes softened butter with the dry ingredients first, coating the flour so it doesn’t develop too much gluten. The result? An incredibly soft, delicate crumb that practically melts in your mouth.
The texture you get here is super soft and extra moist, which might surprise some bakers who expect a lighter, drier crumb. But that velvety softness is just what makes this cake so irresistible.
This recipe also cleverly combines butter with oil. Butter brings that classic rich flavor we all love, while oil helps keep the cake moist for days — marrying the best of both worlds.
Another cool bonus: this cake bakes very flat. That means less trimming, less waste, and easier stacking if you’re making multi-layer cakes — a real game changer for celebration cakes.
If you’re after a bright white crumb instead of this warm vanilla hue, swap whole eggs for just egg whites and try my white cake version instead.
Ingredients and Helpful Substitutions
- ▢ 4 ounces milk (to mix with oil)
- ▢ 3 ounces canola oil
- ▢ 6 ounces milk (to mix with eggs)
- ▢ 1 tablespoon vanilla extract or 1 vanilla bean pod
- ▢ 3 large eggs, room temperature
- ▢ 13 ounces cake flour
- ▢ 13 ounces granulated sugar
- ▢ 3 teaspoons baking powder
- ▢ ¼ teaspoon baking soda
- ▢ ½ teaspoon salt
- ▢ 8 ounces unsalted butter, softened but not melted
- ▢ 16 ounces powdered sugar
- ▢ 4 ounces pasteurized egg whites
- ▢ 2 teaspoons vanilla extract
- ▢ 16 ounces unsalted butter, softened but not melted
- ▢ ¼ teaspoon salt
- ▢ 1 tiny drop purple food coloring (optional, to counter yellow tint)
- ▢ 3 drops electric pink food coloring (for flowers)
- ▢ 1 tablespoon white sprinkles (for decorating)
Step-by-Step Baking Instructions
- Bring butter, eggs, and milk to room temperature.
- Preheat oven to 335°F (168°C) and grease three 8″x2″ cake pans with pan release.
- Combine 4 oz milk and 3 oz oil in a measuring cup and set aside.
- Whisk 6 oz milk, vanilla, and the room-temperature eggs until combined; set aside.
- Place cake flour, granulated sugar, baking powder, baking soda, and salt in the mixer bowl fitted with the paddle.
- On low speed, add softened butter in pieces and mix until the dry mixture resembles coarse sand.
- Pour the milk/oil mixture into the mixer and beat on medium speed for 2 minutes.
- Scrape down the bowl thoroughly.
- Slowly add the milk/egg mixture while mixing on low, pause halfway to scrape the bowl, then mix just until combined.
- Divide the batter evenly into the prepared pans, filling each about 3/4 full.
- Bake at 335°F for 20–30 minutes, or until a toothpick inserted in the center comes out clean and the surface springs back.
- Remove cakes from the oven and tap the pans on the counter to release trapped air.
- Cool cakes in the pans until barely warm, about 10 minutes.
-
Invert the pans onto a wire rack to release the cakes and cool completely.
- Wrap cooled cake layers tightly in plastic wrap and chill in the fridge or freezer for about 30 minutes to firm for stacking.
- For the buttercream, combine pasteurized egg whites and powdered sugar in a mixer, mix on low, then whip on high for 5 minutes; add vanilla and salt.
- Add softened butter in chunks and beat until combined, continuing to whip (mixture may look curdled at first).
- Whip the frosting on high for 8–10 minutes until bright white, light, and shiny.
- Optionally add a tiny drop of purple food coloring to neutralize yellow tint.
- Optionally switch to a paddle attachment and mix on low for 15–20 minutes to smooth out air bubbles.
- Spread frosting between chilled layers and cover the outside of the cake.
Baker’s Tips for Best Results
- Always measure your ingredients with a kitchen scale. Baking’s a science and scales give you the most accurate, repeatable results.
- Bring butter, milk, and eggs to room temperature. Mixing at the right temp helps your batter come together smoothly and hold air, which means a tender crumb.
- Stick with the two-minute mixing stage during the reverse creaming method — it’s what develops crumb strength and keeps your cake moist and even.
- If you’re baking above 5,000 feet, try reducing baking powder a little to avoid your cake collapsing.
Using cold ingredients. When your butter, eggs, and milk are cold, they can’t blend smoothly. That leads to a curdled batter and uneven crumb. So, pull them out an hour before you start, or warm eggs in warm water and heat milk briefly to get the right temp.
Overbaking the cake. Low heat baking at 335°F helps the cake rise evenly and avoid dry edges, but leaving it in too long will still dry it out—start checking at 30 minutes and test with a toothpick. A few moist crumbs are fine; completely clean often means it’s a little overdone.
Skipping the two-minute mixing stage. The full two minutes after adding milk/oil is critical to build your cake’s structure; shorting this step risks dense spots and a cake that can sink.
Not scraping the bowl. Hard lumps of butter and flour hide in the bottoms of mixing bowls. If you don’t scrape them down thoroughly, you’ll end up with dense, uneven spots in your cake.
Using low-quality vanilla extract. Since this cake’s flavor depends heavily on vanilla, use a good pure vanilla extract or vanilla bean paste. Artificial vanilla tends to give a weaker flavor that’s noticeable.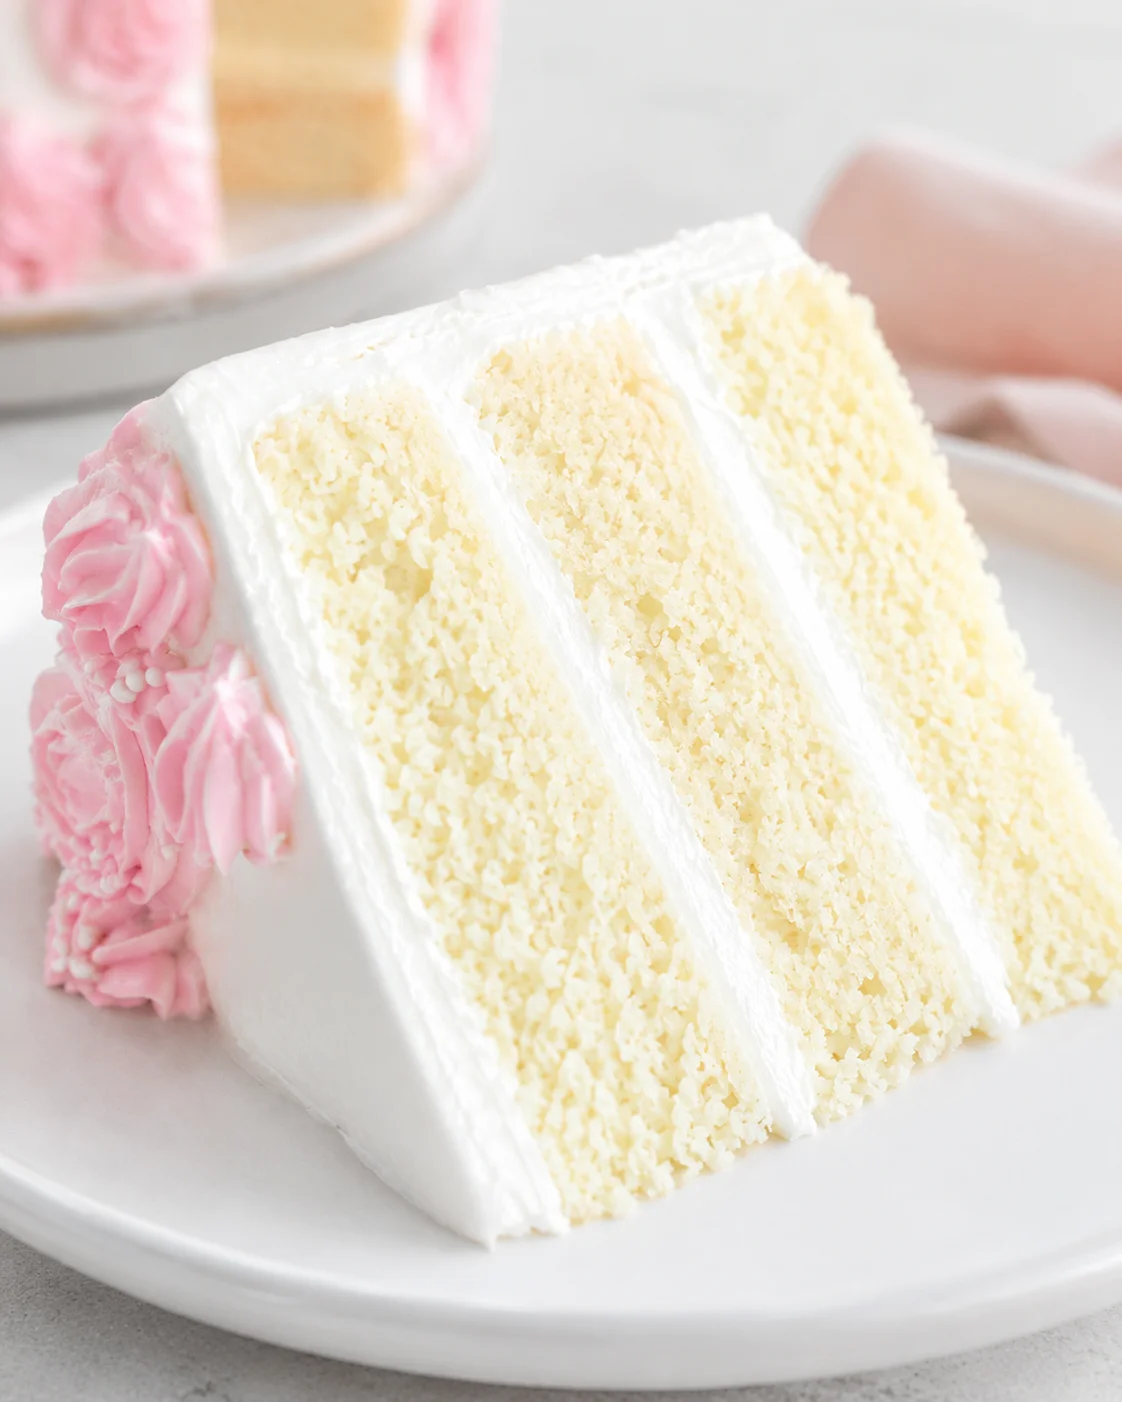
Easy Flavor Swaps and Add-Ins
This moist vanilla cake recipe is super adaptable. Keep the reverse creaming method and ingredient ratios the same, then try these simple variations to switch things up:
- White cake: Use only egg whites (replace whole eggs with equal whites) for a bright, pale crumb (see my white cake notes above).
- Citrus vanilla: Add 1–2 teaspoons of freshly grated lemon or orange zest for a fresh, bright vanilla twist.
- Almond vanilla: Swap out a teaspoon of vanilla for almond extract to add a delicate nutty flavor.
- Funfetti: Gently fold in ½ cup rainbow sprinkles at the end of mixing — use “jimmies” sprinkles to avoid color bleeding.
- Mix-ins: Add up to ¾ cup mini chocolate chips or fresh berries (toss berries in flour first to avoid sinking) for extra texture without deflating the batter.
- Oil swaps: Use canola, grapeseed, or other neutral oils in place of canola. Avoid oils with strong flavors unless you want that flavor coming through.
- Non-dairy: Replace milk with unsweetened almond, oat, or soy milk (unflavored) for dairy-free versions. For a fully vegan cake, substitute vegan butter and egg replacer, though expect some texture differences.
- Gluten-free: Try a 1:1 gluten-free baking blend made for cakes. Texture will be slightly different but method stays the same.
- Cake to cupcakes: Fill cupcake liners two-thirds full and bake at 350°F for 18–20 minutes (see recipe notes).
- Buttercream tweaks: Add 2–3 tablespoons unsweetened cocoa powder to part of the buttercream for chocolate frosting, or mix in 1-2 teaspoons lemon juice with zest for lemon buttercream.
Storing, Freezing, and Make-Ahead
This recipe yields three 8-inch layers, two 9-inch layers, or about 24 cupcakes. The buttercream frostings recipe makes approximately 8 cups of frosting — plenty to fill and frost a layered cake. Store any leftover frosting in the fridge for up to one week, or freeze it for up to six months.
For best handling, tightly wrap the cake layers in plastic wrap once cooled and chill in the fridge or freeze. Chilling firms the cake, making it easier to stack and frost smooth.
Answers to Common Questions
Why use cake flour instead of all-purpose flour?
Cake flour has less protein than all-purpose, which means less gluten forms when mixing — perfect for a soft, tender crumb. The reverse creaming method coats flour with butter so gluten formation is minimized even more. If you only have all-purpose flour, substitute two tablespoons of flour per cup with cornstarch to mimic cake flour, but expect subtle texture differences.
Can I bake this vanilla cake in different pan sizes?
Absolutely! This recipe is flexible: it makes three 8-inch layers, two 9-inch layers, or about 24 cupcakes. For sheet pans, you might need multiple batches to fill it. Smaller pans bake faster, so keep an eye and start testing doneness early.
Can I make cupcakes with this recipe?
Yes! Fill cupcake liners two-thirds full and bake at 350°F for 18-20 minutes or until a toothpick comes out clean or with moist crumbs. You can expect around 24 cupcakes from the full recipe.
Can I freeze the cake layers and frosting?
Definitely. Wrap cooled cake layers tightly and freeze for up to 2 months. Thaw at room temp for a couple of hours before frosting. Buttercream frosting freezes well too—just store it in an airtight container for up to six months.
Can I substitute milk with non-dairy milk?
Yes, unsweetened and unflavored almond, oat, or soy milk work well here. Keep in mind some non-dairy milks are thinner than whole milk, which may slightly change texture but the cake will still be delicious.
How can I add other flavors to this moist vanilla cake?
This vanilla cake serves as a fantastic base. Add lemon zest for a citrus zing, almond extract for nutty warmth, or rainbow sprinkles for a funfetti party vibe. Folding in mini chocolate chips, fresh berries, or jams between layers also elevates flavor without messing with the texture.
Why do you bake at 335°F instead of 350°F?
Baking at 335°F gives you a slower, even rise without the top doming or cracking. At 350°F, the edges cook faster than the center, often making a dome and dry edges. The lower temp means flat, tender layers that stack neatly with minimal trimming—perfect for decorating.