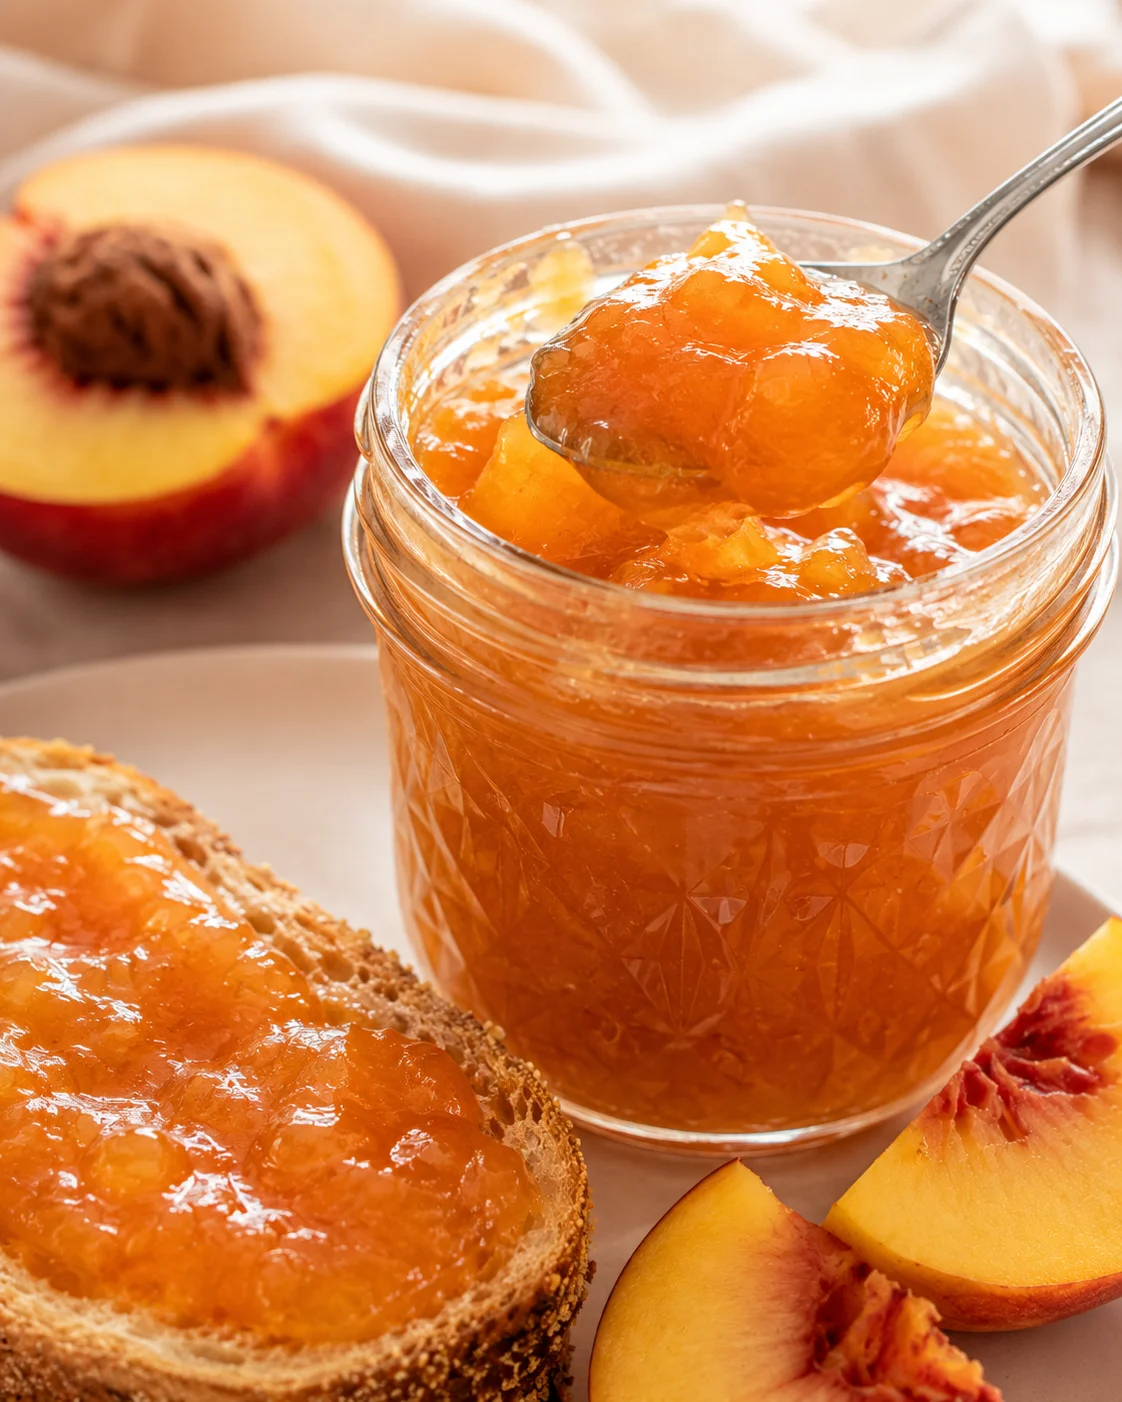
Easy Nectarine Jam

I’m excited to share this classic, Easy Nectarine Jam recipe with you. It’s hands down one of the best ways to savor the sweet, fragrant, stone fruit and keep that sunshine flavor hanging around well into the cooler months. With just three simple ingredients — fresh nectarines, sugar, and lemon juice — you’ll see how effortless it is to make jam at home, no extra pectin needed! This golden-hued jam truly locks in the bright, summery tastes of nectarines at their peak, making it a perfect starter project for preserving your fruit bounty.
Notes
- Nectarines: The weight given is for prepared fruit—stones and blemishes removed. Choose ripe, good-quality fruit for the best jam. Avoid bruised or overly ripe nectarines as they have less natural pectin, which is important for jam setting. You can use good frozen nectarines too — just thaw and cook as usual. The skin is left on because it softens nicely during cooking and gives your jam beautiful color, which can vary depending on the fruit.
- Sugar: Don’t chop down on the sugar amount. It’s more than just a sweetener—it helps preserve the jam and lets it set properly. Cutting sugar can make the jam too soft and less shelf-stable.
- Lemon juice: This bright juice balances the sweetness, adds natural pectin, and provides acidity to help the jam gel and keep well.
- Sterilising jars: Hey, sterilising is key to keeping your jam safe and fresh. It gets rid of bacteria that could mess with your preserves.
- Chilled plates: Those frozen plates are for quickly cooling jam spoonfuls so you can test if it’s set — a quick and easy trick!
- Saucepan: I recommend a tall, wide saucepan so the jam can boil fast without splattering everywhere. Avoid reactive metals like aluminum, copper, or iron, as the fruit’s acids can cause off tastes in your jam.
- Wooden spoon: Always use a long-handled wooden spoon—it stays cooler and keeps your hands safe from splashes of hot jam. Metal spoons get too hot for comfort.
- Setting point: My batch took about 18 minutes of full boil to reach the perfect set but it might change depending on your stove and pot.
- Storage: When done right with proper sterilisation, the jam will store safely on your pantry shelf for up to a year. Once opened, pop it in the fridge and use within 2–3 months. This recipe isn’t designed for water-bath canning, so for that, you’ll want a tested canning-specific method.
- Nutritional info: The calories and macros are calculated per whole jar, and they’re estimates based on the ingredients given.
Nutritional Disclaimer:
The nutrition facts are just an estimate made with online calculators. For the most accurate info, I recommend calculating details yourself based on specific brands and ingredients you use.
Hey there! If you’ve got a surplus of ripe nectarines and want a fuss-free way to preserve them, this Easy Nectarine Jam is exactly what you need. It’s a classic recipe with just three kitchen staples—nectarines, sugar, and lemon juice—and doesn’t require extra pectin. Plus, there’s no peeling involved; the skins soften and blend right into the jam, giving it that gorgeous golden color and authentic summer taste in every jar.
In the post, you’ll find easy-to-follow steps, handy photos, and practical advice to help you make your nectarine jam with total confidence. This recipe yields about 4 jars of 300ml (10 oz) each and takes about 50 minutes overall (20 minutes prep, 30 minutes cooking). I’ll also walk you through sterilizing the jars, testing the jam’s setting point using a couple of reliable methods, storing tips, and some simple tweaks to customize the flavor.
- No fancy equipment needed — just a large non-reactive pot, a long wooden spoon, and some jars.
- Simple timing and testing tips so you nail the jam’s perfect set every time.
- Helpful notes on picking fruit, making substitutions, and gift ideas for your homemade jam.
Why Make It Yourself
- One of the best things about making your own jam is knowing exactly what goes in. You get to skip all those artificial preservatives, additives, and weird thickeners you see in store-bought jams.
- No special gear required — it’s just a straightforward kitchen project anyone can tackle.
- You don’t have to peel the nectarines. The skins are smooth and soft enough to cook down nicely, helping your jam keep its lovely texture and color.
- This jam is super versatile — its sweet, fragrant flavor complements everything from breakfast toast to cheese boards.
Ingredients and Smart Substitutes

- 1 kg (2.2 lbs) fresh nectarines – weight after preparing the fruit
- 750 g (3 ⅓ cups) white granulated sugar
- 80 ml (⅓ cup) lemon juice – freshly squeezed
Step-by-Step Cooking Method
- Wash glass jars and metal lids in hot soapy water, rinse thoroughly and dry.
- Check lids for rubber seals; air dry those lids instead of warming in the oven.
- Preheat oven to 130°C (270°F) and place jars inside for 15–20 minutes to sterilize.
- Keep sterilized jars warm until ready to fill.
- Place two small saucers or plates in the freezer to chill for testing the jam.
- Wash and dry nectarines.
- Cut nectarines in half, remove stones and stems, and trim away blemishes.
- Cut nectarines into ~2.5 cm (1 inch) chunks.
- Place nectarines, sugar, and freshly squeezed lemon juice into a large non-reactive saucepan and mix thoroughly with a long-handled wooden spoon.
- Let the mixture sit for 10 minutes to macerate.
- Put the saucepan on low heat and stir gently until the sugar completely dissolves (about 8–10 minutes).
- Scrape any sugar crystals from the edge of the pot with a spatula to prevent crystallization.
- Turn the heat up to bring the mixture to a rolling boil.

- Boil 15–20 minutes, stirring frequently to prevent sticking and burning, and start checking for set at about 15 minutes.
- Spoon a small amount onto a chilled saucer, let cool for 30 seconds, then run your finger through it; if it wrinkles, the jam is set.
- If the jam is still runny, return to the heat for 1–2 minutes and test again.
-
Alternatively, cook until the jam reaches 105°C (220°F) on a candy thermometer.
- Turn off the heat when the jam reaches the setting point.
- Skim foam or scum from the surface with a spoon.
- If a smooth jam is desired, blend with an immersion blender.
- If not blending, let the jam stand for 5 minutes before filling jars.
- Carefully ladle hot jam into the warm sterilized jars and seal them immediately.
- Wipe any drips from the jars and let them cool completely on the counter.
Pro Tips and Safety Notes
You don’t need special tools for this jam, but here are some pointers: use a wide, tall saucepan so the jam boils well without bubbling over. Stay away from aluminum, copper, or iron pans because the fruit’s acid can react and make your jam taste metallic. Always use a long-handled wooden spoon to stir — it keeps your hand safe from hot splashes and won’t get too hot like metal spoons do.
Wondering how to enjoy your fresh nectarine jam? Here are a few ideas:
- Spread it on a buttery croissant or morning toast for an easy breakfast boost.
- Swirl some into plain Greek yoghurt for a fruity morning snack or dessert.
- Serve alongside cheese — it’s especially tasty with bold blue cheese or creamy Brie. The sweet and salty combo is irresistible.
- Make a glaze for holiday ham — the jam’s flavor adds amazing depth.
- Wrap a jar with a pretty ribbon as a thoughtful homemade gift for friends and family.
I hope this jam becomes a cherished favorite in your kitchen, just like it is in mine. Don’t forget to drop me a comment and let me know how your batch turns out!
Flavor Twists and Add-Ins
Spices: For a cozy twist, stir in a pinch of cinnamon or a bit of fresh or ground ginger. Just keep in mind these spices can slightly change the jam’s color.
Vanilla extract: Adding a splash of vanilla gives the jam a lovely, warm depth of flavor that pairs beautifully with nectarine.
Storage and Shelf-Life Tips
When you follow the recipe and properly sterilize and fill your jars while the jam is hot, the sealed jars will keep for up to a year in a cool, dark, dry spot away from direct light. I recommend marking your jars with the date so you use the oldest ones first.
After opening, keep the jam in the fridge and always scoop with a clean spoon. For best quality, finish the jar within 2–3 months.
If any jars don’t seal correctly (if the lid is not concave or flexes when pressed), pop them in the fridge right away and use the jam within 2 to 4 weeks.
- Freezing: Jam freezes beautifully if you want to store it longer without relying on shelf stability. Let your jam cool completely, transfer it to freezer-safe containers leaving space for expansion, and freeze for up to a year. Thaw overnight in the fridge before using; texture might be a little different but the flavor stays wonderful.
- Reheating/loosening: If your jam is a bit thick for glazing or spreading, warm a small amount gently in a saucepan over low heat, stirring until it loosens. Avoid boiling once the jam is set. If using a microwave, heat short bursts with stirring in between to stop splatters.
Note: This jam recipe and jar sterilizing instructions are shared here, but it hasn’t been tested with formal water-bath canning methods. If you want to safely water-bath can for long-term shelf storage, be sure to follow a trusted, tested canning protocol.
Answers to Common Questions
How do I select nectarines?
Choose nectarines that are ripe but still firm — they should have a little give when gently pressed, a vibrant color, and a fresh scent. Avoid overripe or damaged fruit since it contains less pectin, which is important for the jam to set. A few underripe fruits are actually helpful since they contain more pectin.
How long will Nectarine Jam last?
If you carefully follow the recipe for jar sterilization, sugar amount, and cooking, your jam will be shelf-stable for up to a year.
Where should I store the jam?
Keep jam jars in a cool, dark, dry place. Once opened, put the jar in the fridge and always use a clean spoon to avoid contamination.
What is pectin and why is it important?
Pectin is a natural carbohydrate found in fruits and veggies. It helps jams and jellies gel and thicken. Fruits vary in how much pectin they have, so we add fresh lemon juice here to boost the pectin and acidity, which makes sure your jam sets well.
Can I use less sugar?
I recommend not reducing the sugar. It’s not only for sweetness but also essential as a preservative and a setting agent. Using less sugar risks your jam being soft and less shelf-stable.

More in Recipes


Carrot and Lentil Soup
Spiced Carrot and Apple Soup