Crispy Cornbread Waffles for Irresistible Breakfast Bliss
Nothing smells quite like fresh cornbread baking in the kitchen, right? It’s like an instant hug from Grandma’s house! Today, I’m thrilled to share my version of a true Southern classic: cornbread waffles that are perfectly crispy on the outside and tender on the inside. These cornbread waffles are so golden and flavorful, they’re great for breakfast, brunch, or even dinner. Plus, they’re easy to make gluten-free if you need that option! Whether you like yours topped with sweet maple syrup or loaded with spicy jalapeños and melty cheese, this recipe has you covered. Ready to whip up some of these delightful cornbread waffles? Let’s get started and chat about your favorite toppings while we cook!
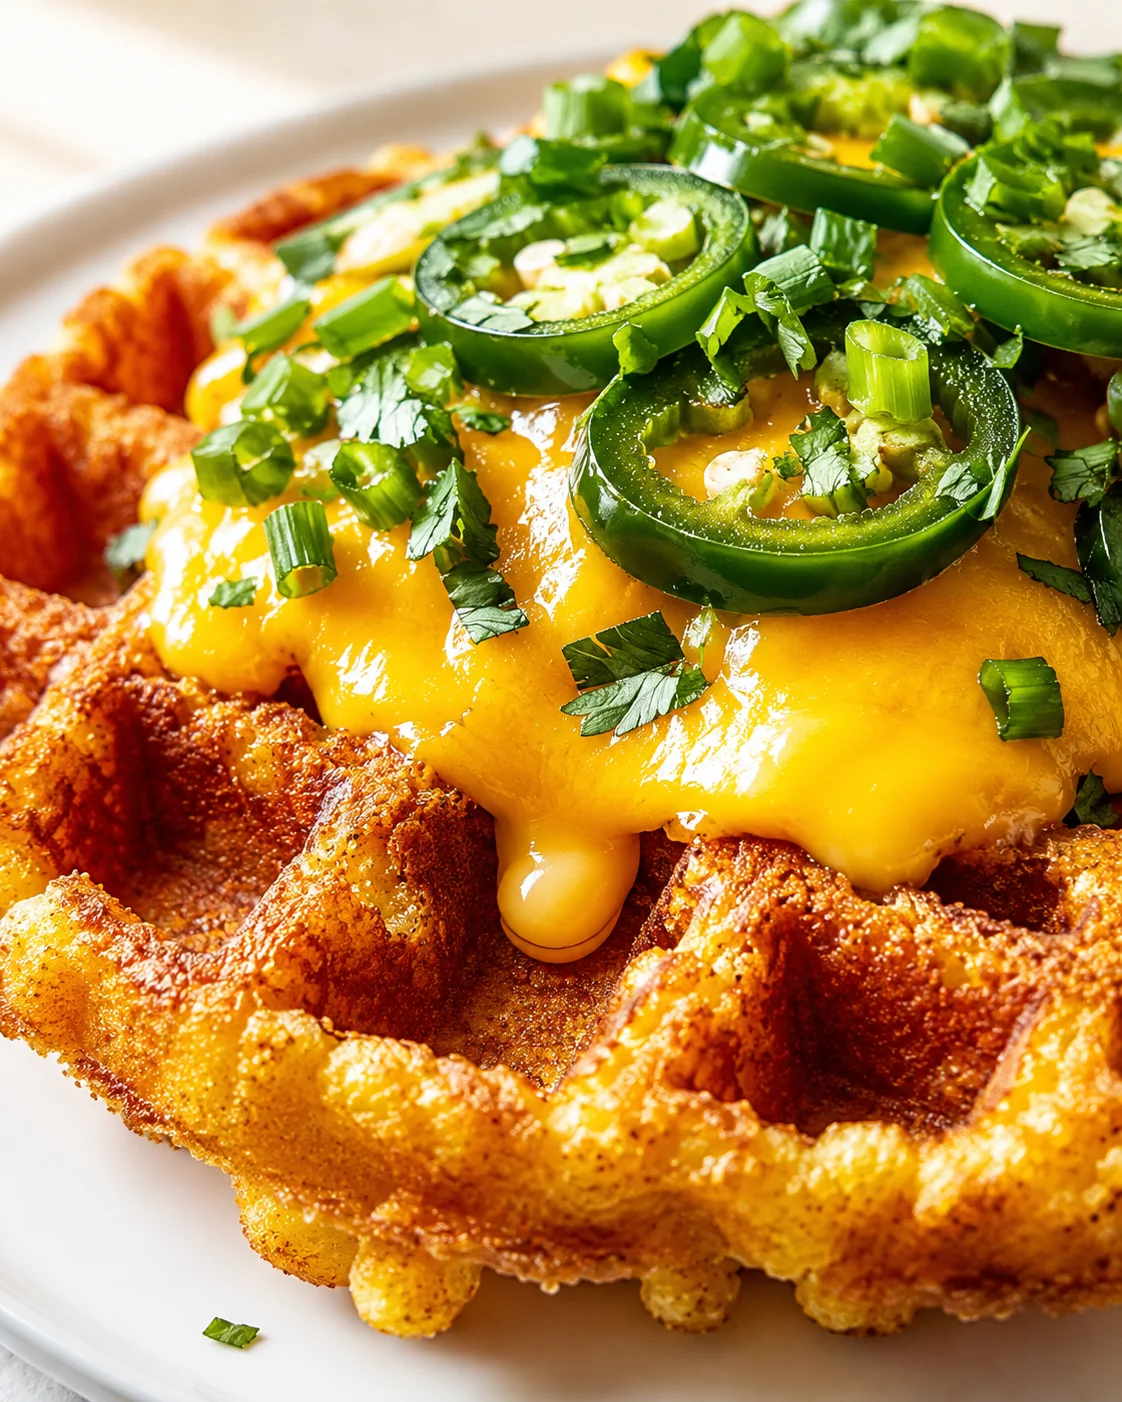
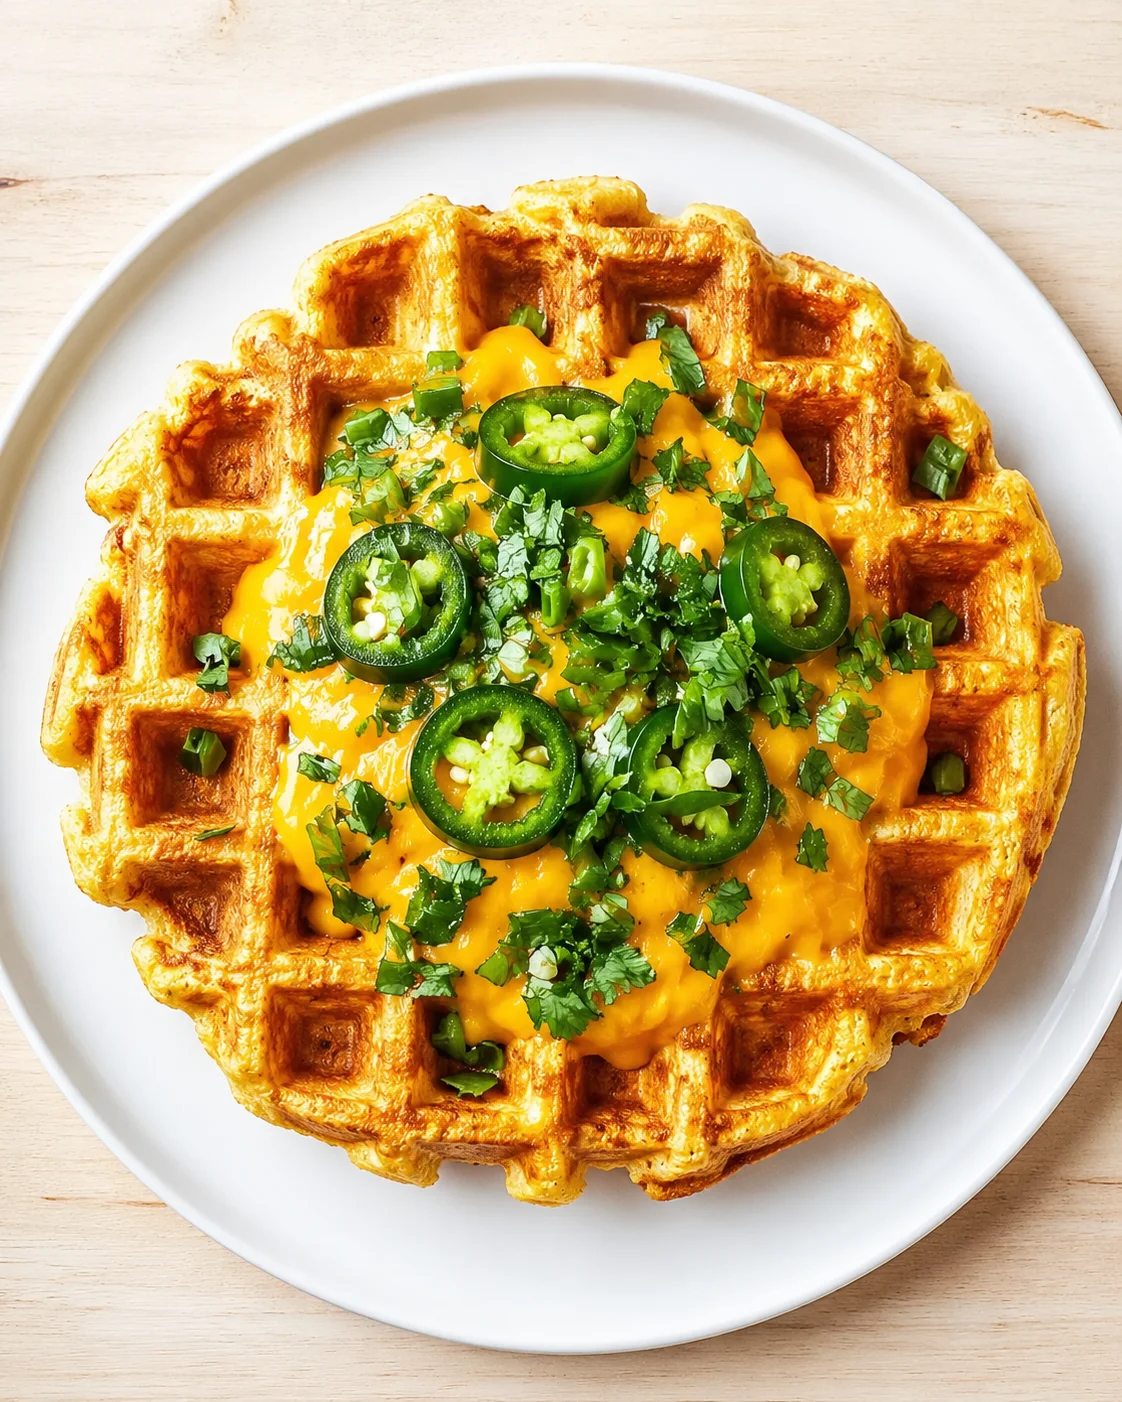
Picture this: the warm, inviting smell of freshly baked cornbread combined with the satisfying crunch of a well-made waffle. That’s exactly what these Crispy Cornbread Waffles deliver. They have a crunchy golden crust with a fluffy, cornmeal-packed center that’s both nostalgic and fresh.
In this guide, I’ll walk you through every step to get them just right at home. You’ll find a simple batter that’s easy to tweak for gluten-free diets, options to add in savory extras like sharp cheese and spicy jalapeños, plus tips on how to cook them perfectly in your waffle maker. I’ll also share how to keep your waffles crispy, store leftovers properly, and freeze them for busy days. Ready to make some scrumptious cornbread waffles that the whole family will love? Let’s go!
- Texture: How to get that perfect crispy crust with a tender crumb inside.
- Adaptability: Simple gluten-free swaps and sweet or savory add-ins to make them your own.
- Practical tips: Testing your waffle maker’s heat, letting the batter rest, and reheating without losing crispness.
Got your waffle maker ready? Grab your toppings—think buttery maple syrup or spicy fried chicken—and let’s cook some cornbread waffles you’ll want to make again and again!
What Makes Them So Irresistible
Cornbread waffles bring together the best of both worlds: the crispy, golden exterior of a waffle with the rich and tender crumb of classic cornbread. They’re super quick to prepare, gluten-free, so everyone at the table can enjoy these crispy cornbread waffles—try topping them with quick rhubarb applesauce for a bright, fruity finish. And don’t forget—they’re just as good served for dinner, paired with hearty sides like crispy garlic Parmesan roasted broccoli for a filling, flavorful meal.
Shopping List and Ingredient Swaps
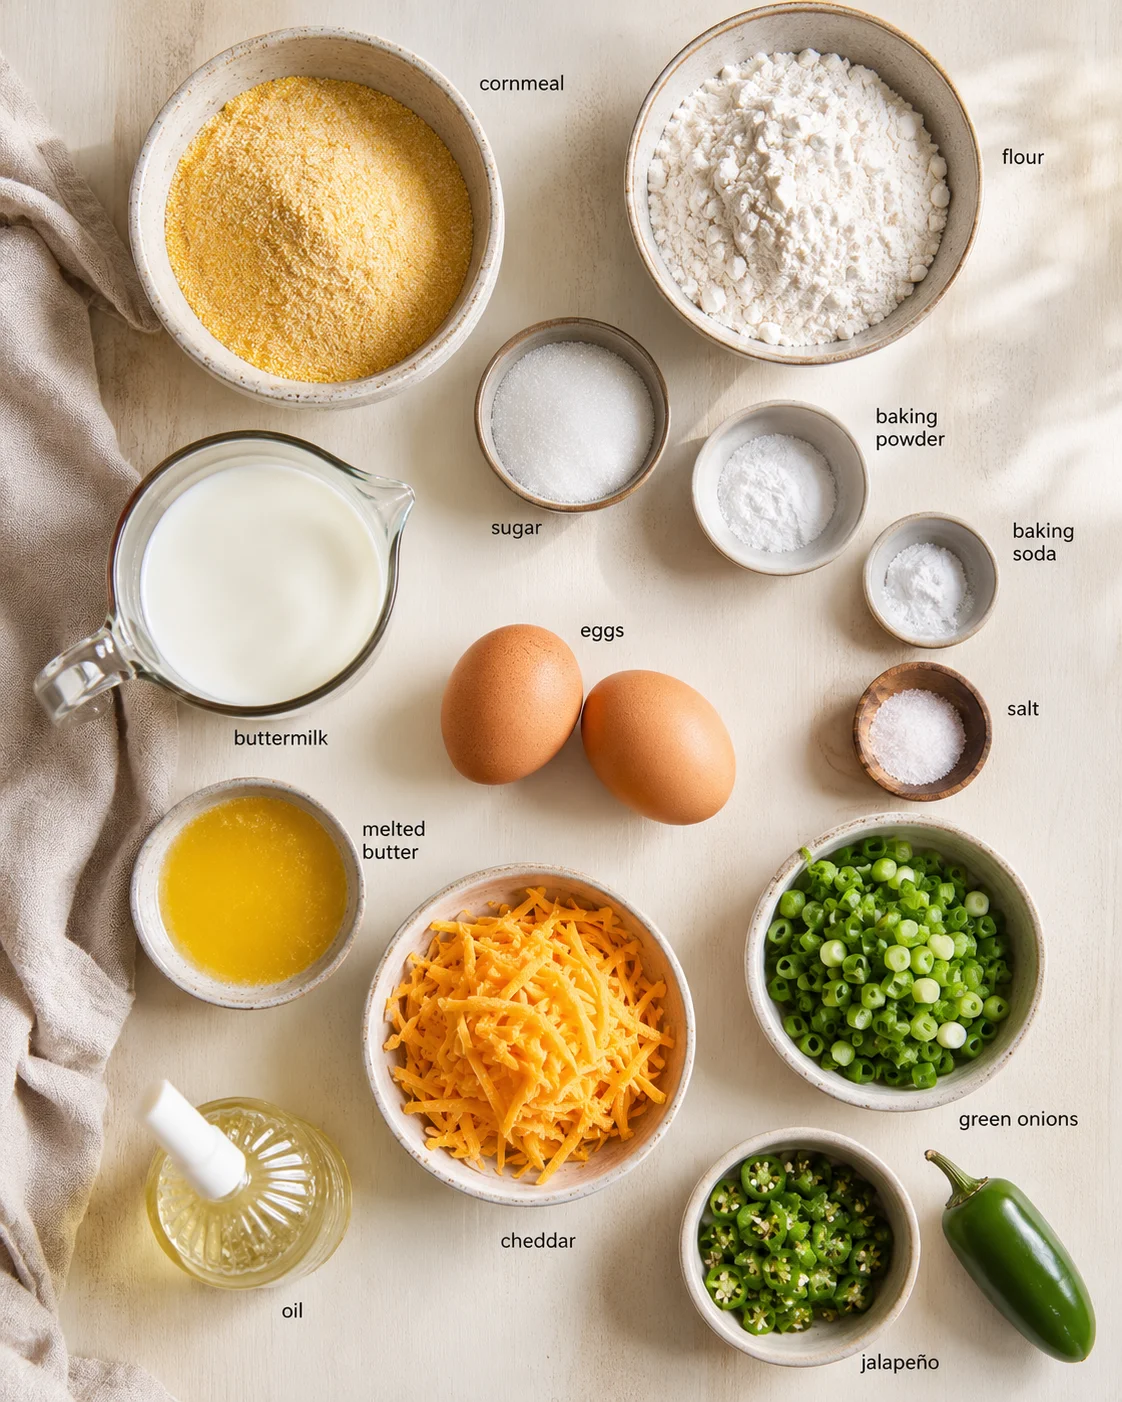
- 1 cup Yellow Cornmeal (Certified gluten-free if needed)
- 1 cup All-Purpose Flour (Or 1:1 gluten-free flour blend)
- 2 tablespoons Granulated Sugar (Optional for savory-only)
- 2 teaspoons Baking Powder
- 1 teaspoon Baking Soda
- 1 teaspoon Salt
- 1 cup Buttermilk (Or milk + lemon juice)
- 2 large Eggs
- 1/4 cup Melted Butter or Neutral Oil
- 1 cup Shredded Sharp Cheddar Cheese (Optional)
- 1/4 cup Chopped Green Onions (Or chives)
- 1 jalapeño, finely chopped (Optional)
- Cooking Spray or Oil (For greasing)
Make the Waffles
- Preheat waffle maker according to the manufacturer’s instructions and lightly grease the plates with cooking spray or oil.
- If not using buttermilk, combine milk with a splash of lemon juice and let sit 5 minutes to sour.
- Whisk cornmeal, flour (or gluten-free blend), sugar, baking powder, baking soda, and salt in a large bowl until smooth and lump-free.
- In a separate bowl, whisk buttermilk (or soured milk), eggs, and melted butter or neutral oil until well combined.
- Pour the wet ingredients into the dry ingredients and stir gently just until moistened; batter should be slightly lumpy.
- Let the batter rest for 5 minutes.
- Gently fold in shredded cheddar, chopped green onions, and finely chopped jalapeño, if using.
-
Spoon batter into the preheated waffle maker to fill the molds without overflowing, close the lid, and cook 4–6 minutes or until steam slows and waffles are golden and crisp.
- Carefully remove waffles and place them on a wire rack to cool and prevent steaming; do not stack.
Pro Tips for Crispier Results
- Make sure your waffle maker is good and hot: This is the secret to that crave-worthy crispy outside. If it’s not heated thoroughly, your waffles might come out soggy.
- Let your batter rest for 5 minutes: Giving it a short break helps the cornmeal absorb moisture and improves your waffle’s texture, keeping them fluffy.
- Mix gently and briefly: Stir just enough to bring things together; overmixing creates a tough, dense crumb—the same rule that keeps Greek Yogurt Pancakes tender and fluffy.
- Steam is your guide: Watch for the steam to taper off from your waffle maker—this signals your cornbread waffles are nearly done and ready for a crisp golden finish.
- Use a wire rack after cooking: Placing your waffles on a wire rack instead of stacking them prevents sogginess. This keeps them crisp and inviting bite after bite.
Flavor Boosts and Mix-Ins
Let’s get creative and make each batch of cornbread waffles just what you want!
- Gluten-Free Friendly: Swap in a 1:1 gluten-free flour blend for the all-purpose flour to keep these waffles safe and tasty for gluten sensitivity.
- Bacon Boost: Toss crispy chopped bacon into the batter for that smoky, irresistible depth of flavor. It makes the waffles feel extra special.
- Pumpkin-Spiced Upgrade: Stir in a few tablespoons of pumpkin puree and a dash of cinnamon for a cozy fall vibe that fills your kitchen with wonderful smells.
- Cheesy Jalapeño Fire: Add extra jalapeños and cheese for a bold, spicy kick. Pair with sour cream or guac to mellow the heat perfectly.
- Herb Infusion: Fresh thyme or rosemary work wonders to brighten up the savory notes for a restaurant-worthy twist.
- A Touch of Sweet: Mix in a tablespoon of honey or maple syrup into the batter for a slight sweetness that plays beautifully against savory toppings.
- Veggie Power: Fold in sautéed spinach, bell peppers, or zucchini to sneak in extra nutrients and color, turning your waffles into a satisfying meal-on-the-go.
- Pancake Swap: Use this batter as pancake batter if you want a different texture but the same great cornbread flavor. Just watch the cooking time to get pancakes perfectly cooked.
These variations are so fun to try and let you personalize your cornbread waffles for every season and craving. Don’t be afraid to experiment and find your family’s new favorite combo!
Next, let’s talk about how to round out your meal to really shine alongside those crispy cornbread waffles.
- Classic Fried Chicken: Everything tastes better with fried chicken! The crispy, juicy pieces are the perfect match and add a hearty touch.
- Warm Maple Syrup: A drizzle of maple syrup adds that sweet warmth that brings a comforting contrast to the savory waffles—try a quick vanilla maple syrup for extra depth.
- Spicy Honey Drizzle: Sweet and spicy honey cuts through the richness and plays up the jalapeño heat beautifully.
- Fresh Coleslaw: A crunchy, creamy slaw balances the warmth and crispness, adding freshness and texture.
- Creamy Avocado Slices: Soft and buttery avocado adds richness that makes every bite feel a little more indulgent and smooth.
- Sour Cream Dollop: Pops of creaminess offer a tangy counterpoint that lifts and rounds out the savory flavors.
- Roasted Veggies: Add color and nutrition with some simple roasted vegetables—garlic parmesan broccoli also makes a great side.
- Refreshing Drinks: Pair with iced tea or lemonade to keep the meal light and thirst-quenching.
- Fresh Fruit Salad: Bursting with juicy, seasonal fruits, it’s a bright and sweet way to finish your plate.
Storing, Freezing, and Reheating
One of the best things about these crispy cornbread waffles? They’re wonderful for prepping ahead to save precious time on busy days—just like our Mini German Pancakes recipe! You can mix your dry and wet ingredients separately up to 24 hours before you plan to cook. Store them in the fridge separately and combine just before cooking, adding any savory extras last minute. Your cooked waffles can also be kept fresh in the refrigerator for up to 3 days in an airtight container. To bring back that crispy magic, just toast or warm them in the oven for a few minutes before serving.
Fridge Tip: Keep leftovers sealed tight in an airtight container and enjoy within 3 days for the best flavor and texture.
Freezer Tip: Freeze the waffles flat on a baking sheet first so they don’t stick together. Then pop them in a freezer bag or container for up to 2 months of ready-to-go breakfasts. This freeze-flat method also works for muffins, like these Rhubarb Greek Yogurt Muffins.
Reheat Instructions: Reheat your waffles in a toaster or at 375°F in the oven for 5-7 minutes until they’re warm and crispy again. Perfect for quick mornings or last-minute snacks!
Common Questions
What kind of cornmeal works best for cornbread waffles?
Yellow cornmeal is my go-to for flavor and texture. If you need gluten-free cornbread waffles, make sure to pick cornmeal that’s labeled gluten-free to avoid any issues and keep the taste just right.
How long can I store leftover cornbread waffles?
Leftover waffles last up to 3 days in the fridge when stored in an airtight container. For longer storage, freeze them—wrapped well between parchment paper in a freezer bag—they’ll stay great for up to 2 months!
Can I freeze cornbread waffles? What’s the best method?
Yes! After cooking and cooling completely, freeze them in a single layer on a baking sheet for 1-2 hours. Then, stack with parchment paper between layers in a freezer-safe bag. Reheat straight from frozen in a toaster or oven until hot and crispy.
What if my waffles turn out soggy?
Soggy waffles usually mean the waffle maker wasn’t hot enough or stacking them before fully cooling trapped steam. Always preheat your waffle iron well, cook until golden and steaming slows, and place waffles on a wire rack instead of piling them up.
Are cornbread waffles good for dietary restrictions?
Definitely! They’re easy to make gluten-free by swapping flours and cornmeal. For vegan versions, try flax eggs and almond milk with lemon juice instead of dairy and eggs. Just pick your toppings carefully to fit your diet!
Nutrition
- Serving: 1 waffle
- Calories: 220 kcal
- Carbohydrates: 30 g
- Protein: 6 g
- Fat: 10 g
- Saturated Fat: 5 g
- Polyunsaturated Fat: 1 g
- Monounsaturated Fat: 3 g
- Cholesterol: 70 mg
- Sodium: 500 mg
- Potassium: 150 mg
- Fiber: 2 g
- Sugar: 2 g
- Vitamin A: 500 IU
- Vitamin C: 1 mg
- Calcium: 200 mg
- Iron: 1 mg
Notes
Let your batter rest for 5 minutes before cooking—it really helps make your cornbread waffles light and fluffy. Serve them right away for that perfect crispy texture every single time. For a hearty savory spin, top your waffle with creamy mushroom chicken.
Golden and flavorful cornbread waffles with a crispy crust and tender crumb that are perfect for breakfast, brunch, or dinner. Easily adaptable to gluten-free diets and customizable with sweet or savory mix-ins.
- Prep Time: 10 minutes
- Cook Time: 4-6 minutes per waffle
- Total Time: 15-20 minutes
- Yield: 4 servings (approx. 4 waffles) 1x
- Category: Breakfast
- Cuisine: Southern
Ingredients
- 1 cup Yellow Cornmeal (Certified gluten-free if needed)
- 1 cup All-Purpose Flour (Or 1:1 gluten-free flour blend)
- 2 tablespoons Granulated Sugar (Optional for savory-only)
- 2 teaspoons Baking Powder
- 1 teaspoon Baking Soda
- 1 teaspoon Salt
- 1 cup Buttermilk (Or milk + lemon juice)
- 2 large Eggs
- 1/4 cup Melted Butter or Neutral Oil
- 1 cup Shredded Sharp Cheddar Cheese (Optional)
- 1/4 cup Chopped Green Onions (Or chives)
- 1 jalapeño, finely chopped (Optional)
- Cooking Spray or Oil (For greasing)
Instructions
- Preheat waffle maker according to the manufacturer’s instructions and lightly grease the plates with cooking spray or oil.
- If not using buttermilk, combine milk with a splash of lemon juice and let sit 5 minutes to sour.
- Whisk cornmeal, flour (or gluten-free blend), sugar, baking powder, baking soda, and salt in a large bowl until smooth and lump-free.
- In a separate bowl, whisk buttermilk (or soured milk), eggs, and melted butter or neutral oil until well combined.
- Pour the wet ingredients into the dry ingredients and stir gently just until moistened; batter should be slightly lumpy.
- Let the batter rest for 5 minutes.
- Gently fold in shredded cheddar, chopped green onions, and finely chopped jalapeño, if using.
- Spoon batter into the preheated waffle maker to fill the molds without overflowing, close the lid, and cook 4–6 minutes or until steam slows and waffles are golden and crisp.
- Carefully remove waffles and place them on a wire rack to cool and prevent steaming; do not stack.
Notes
Let your batter rest for 5 minutes before cooking—it helps make waffles light and fluffy., Use a wire rack to cool the waffles to maintain crispiness and avoid sogginess., The recipe is easily made gluten-free by substituting the all-purpose flour with a gluten-free flour blend and using certified gluten-free cornmeal., Reheat waffles in a toaster or oven at 375°F for 5–7 minutes to restore crispness., For vegan versions, use flax eggs and almond milk with lemon juice in place of dairy and eggs, but toppings should be chosen accordingly.
Nutrition
- Serving Size: 1 waffle
- Calories: 220 kcal
- Fat: 10 g
- Carbohydrates: 30 g
- Protein: 6 g
More in Recipes

Carrot and Lentil Soup
Spiced Carrot and Apple Soup