Macaroni and Cheese Baked Cheese Balls – ForkandPan

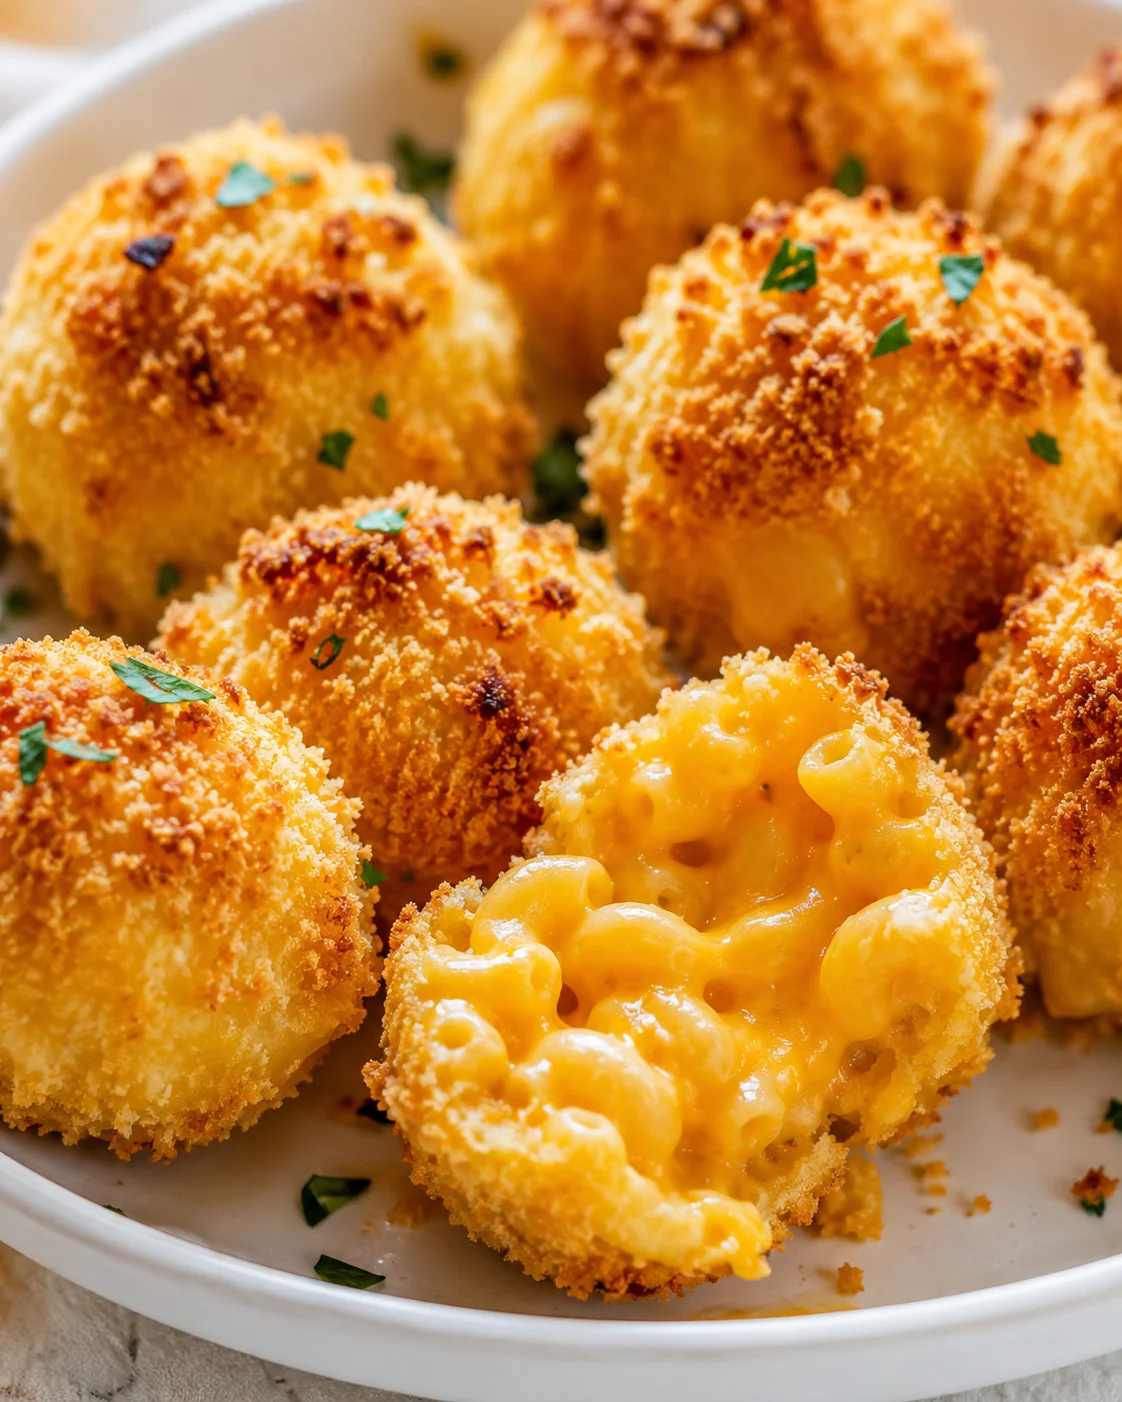
These baked mac and cheese balls turn leftover or freshly made mac ‘n’ cheese into a crispy little treat that disappears in no time. They’re super easy to put together, forgiving when shaping, and bake up golden and crunchy outside while staying ooey-gooey creamy inside. I love making a batch whenever I have extra mac ‘n’ cheese — they take it from a simple side to a fun, party-ready finger food everyone loves.
There are two handy tips that really set these apart: chill your mac ‘n’ cheese well so it firms up for shaping, and add a drizzle of olive oil halfway through baking to get an even, perfect brown crust all over. Other than that, this recipe keeps things simple—no fancy steps, just patience at the chilling stage and a foolproof breading setup.
If you’re feeding a crew, these are great for small plates, tailgate snacks, or kid-friendly dinners. They reheat wonderfully, freeze with ease, and use ingredients you probably have in your pantry right now. Keep reading for a full rundown of the ingredients, step-by-step instructions, troubleshooting advice, and make-ahead tips so your baked mac and cheese balls come out crisp and irresistible every time.
Chilled mac ‘n’ cheese is scooped, breaded, and baked until crisp, making bite-sized baked mac and cheese balls that are perfect as an appetizer or snack.
Equipment
- Oven
- Baking Sheets
- parchment paper or silicone mat or aluminum foil
- Three Shallow Bowls
- Cookie scoop or tablespoon
- freezer
Let’s turn your leftover or freshly made mac ‘n’ cheese into bite-sized golden treats everyone will devour in minutes. These baked mac and cheese balls are crunchy on the outside but creamy inside, simple to shape once your mac is well chilled, and forgiving even if your mac mixture is a bit on the loose side. They’re wonderful for gatherings, kid-friendly dinners, or whenever you want your comfort food to double as finger food.
The secret? Chill the mac ‘n’ cheese to firm it up for shaping, and add a drizzle of oil halfway through baking so the crumbs brown evenly and beautifully. Other than those small tricks, this recipe is straightforward — no fancy kitchen moves, just a simple breading station and a hot oven doing all the work.
Here’s what you’ll find in this post:
- A full ingredient list and equipment needs
- A clear, step-by-step guide with the freezer blast and mid-bake flip included
- Tips for troubleshooting, helpful substitutions, and make-ahead/freezing advice
Active work time is short — around 20 minutes prepping and 20 minutes baking — but plan ahead so your mac chills overnight or at least 12 hours for the best shaping texture. Read on and get ready to enjoy crispy, cheesy baked mac and cheese balls every single time.
Why You’ll Love Them
Because they’re crispy on the outside and cozy, cheesy on the inside. That texture contrast feels like the best kind of comfort food. You get the familiar, nostalgic flavors of mac ‘n’ cheese but wrapped up in a portable, easy-to-eat form—much like these Baked Mac and Cheese Bites. Plus, they’re really forgiving: even if your mac is a bit on the soft side, chilling and a quick freezer chill help everything firm up so you can shape without a hitch. Prefer an even crunchier exterior? Try these Fried Mac and Cheese Balls.
They’re also a smart way to use up leftover mac ‘n’ cheese, which rarely stays appealing when just reheated—or turn leftovers into Easy Mac and Cheese Cups for grab-and-go lunches. These bites travel well for game day snacks or casual family meals, and they hold up nicely on a buffet or snack tray without losing their charm.
And don’t forget how versatile they are! Switch up your breadcrumbs, play with the seasoning in the mac, or stuff a few with extra cheese cubes for some ooey-gooey surprises. Little tweaks help these baked mac and cheese balls fit any occasion or craving.
What You’ll Need
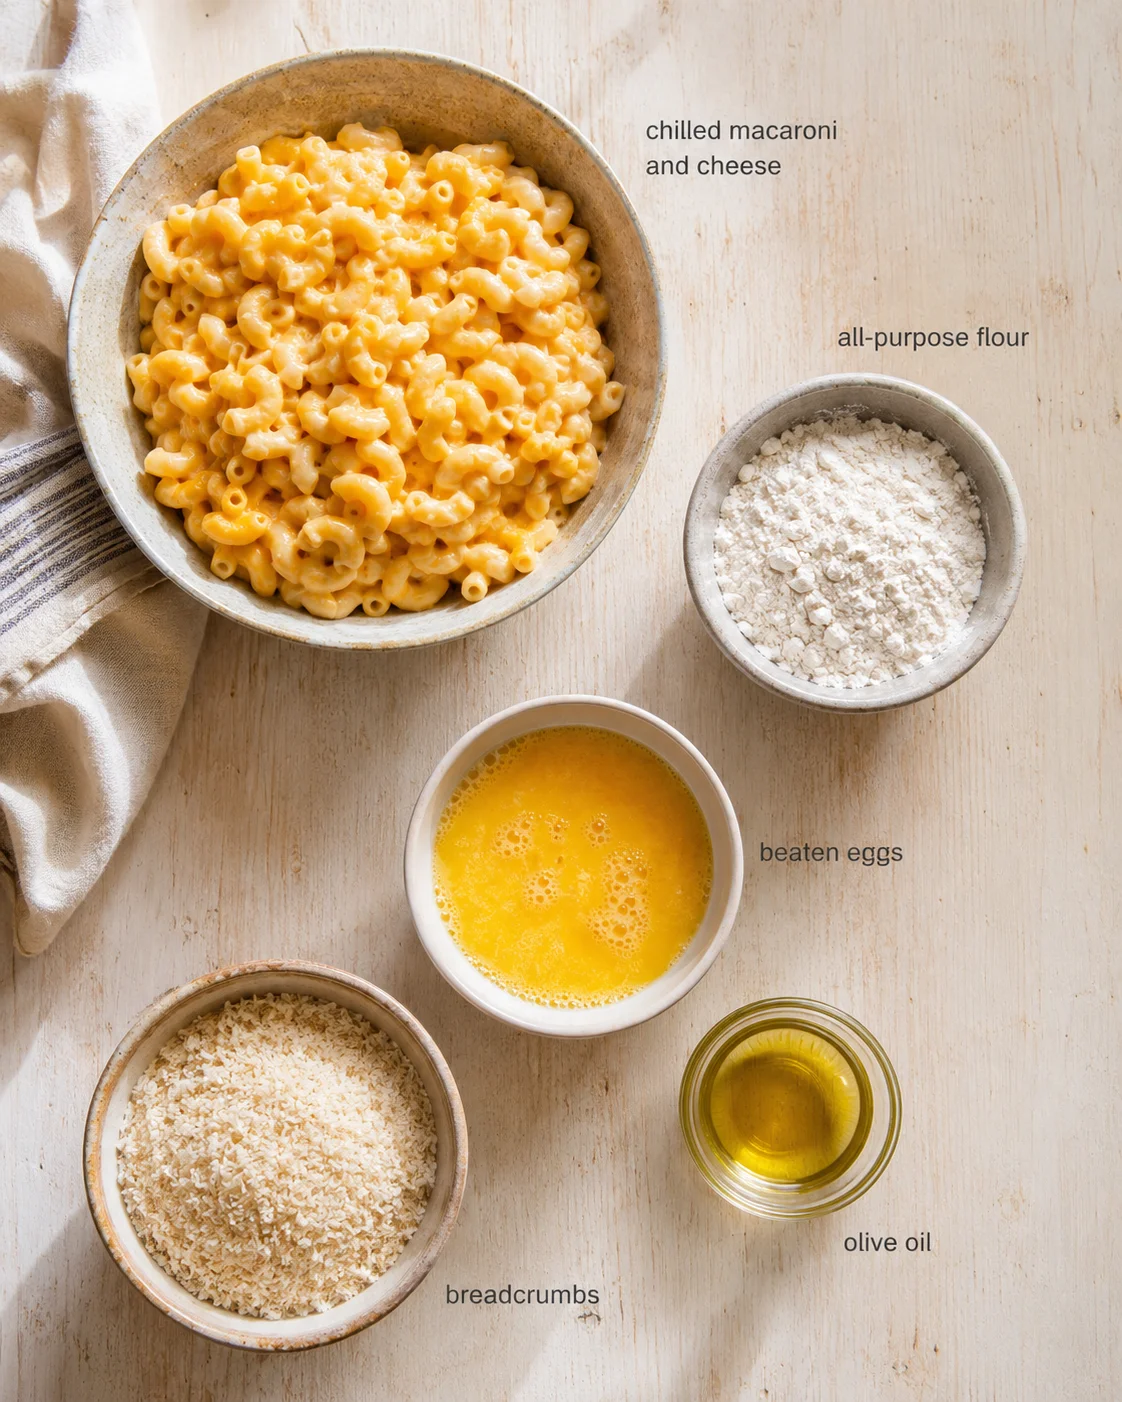
- 1 batch macaroni and cheese, prepared as directed and well chilled (store-bought or homemade, I used one 5.5-ounce box Kraft)
- 1/2 cup all-purpose flour
- 2 large eggs, beaten
- About 1 cup breadcrumbs, seasoned if you like; I prefer unseasoned Trader Joe’s breadcrumbs
- 4 tablespoons olive oil, divided
Forming, Breading, and Baking
- Make a batch of macaroni and cheese as directed, transfer to a sealed container, and refrigerate at least 12 hours (up to 3 days) to firm.
- About 15 minutes before shaping, place the chilled mac and cheese in the freezer to quick-chill.
- Preheat the oven to 425°F (220°C) and line two baking sheets with parchment paper, silicone mats, or foil.
- Drizzle 1 tablespoon olive oil onto each prepared baking sheet and spread to coat the surface.
- Set up a breading station with three shallow bowls: 1/2 cup flour, 2 beaten eggs, and about 1 cup breadcrumbs.
- Remove the mac and cheese from the freezer and use a 1-inch cookie scoop, tablespoon, or your hands to form balls about 1 inch in diameter, pressing gently to compact if needed.
- Roll each ball in flour, dip briefly in the beaten eggs, then coat thoroughly in breadcrumbs.
- Place the coated balls on the prepared baking sheets, spacing them apart (about 10 per sheet).
- Bake the trays on the middle oven racks for 10 minutes.
- Remove the trays, drizzle the remaining olive oil (1 tablespoon per tray) over the balls and spread it around, then flip each ball so the unbrowned side faces up.
-
Return the trays to the oven and bake 7–10 more minutes, or until the balls are evenly golden and crunchy all over.
- Remove the baking sheets from the oven.
Breading, Baking, and Serving Tips
Prep and breading station
- Three shallow bowls work best: one for flour, one for beaten eggs, and one for breadcrumbs.
- A 1-inch cookie scoop or tablespoon helps keep the bites uniform and speeds up the shaping process.
- A rimmed tray or cutting board nearby gives you a neat spot to roll and stage your balls.
Cooking and finishing
- Two baking sheets are perfect so there’s plenty of room around each ball to crisp up nicely.
- Parchment paper, silicone mats, or foil keep your pans clean and help get a crispier crust.
- Preheat your oven to a high 425°F (220°C) to brown the breadcrumbs quickly without drying out the center.
- Use a spatula or tongs to gently flip the balls halfway through baking for even color.
Chilling your mac ‘n’ cheese thoroughly is a must. If it’s too warm or just barely cool, the balls won’t hold together as you shape them. Also, don’t crowd the baking sheets — give the balls space so they crisp instead of steam.
Don’t skip the flour step in your breading—it really helps the egg and crumbs stick, creating a sturdy crust. And that mid-bake oil drizzle? It’s a game changer for getting an even, professional-looking golden brown all over.
The right ball size matters too. Too big and the inside won’t heat before the crust browns; too small and they dry out quickly. I stick with about 1-inch diameter for just the right texture and bake time.
Chill time really makes a difference. I tested shaping after just 4 hours in the fridge versus a full 12 hours. The longer chilled batch was much easier to scoop and kept its shape better while breading. The quick freezer blast right before shaping firms the surface just enough to let you work fast without losing the shape.
Try different crumb types too! Panko gives a lighter, fluffier crunch; regular breadcrumbs offer a tighter, consistent crust. Both taste great. And always add that mid-bake oil — it turns a half-browned batch into a beautifully golden one.
Use freshly made or leftover mac ‘n’ cheese for this recipe. For a luxe twist, start with Lobster Mac and Cheese, then chill thoroughly before shaping. Serve these baked mac and cheese balls fresh from the oven with your favorite dipping sauce — marinara, ranch, or a little spicy mayo are all winners. They’re great as a party appetizer or fun side dish for weeknight meals, especially alongside crispy air fryer broccoli bites. With a simple breading station and the extra chilling step done ahead of time, you’ll have these in the oven in no time.
Make a batch. Watch them disappear. And if you try any swaps or add-ins, please drop me a note — I love hearing how you make these your own!
These baked mac and cheese balls are super versatile! Serve them alongside a fresh green salad or roasted veggies like garlic parmesan broccoli for a balanced meal. They’re fantastic dipped in marinara sauce, ranch dressing, or spicy sriracha mayo. For a party, place them on a platter with toothpicks and a few dipping bowls on the side. Or pair them with Mini Macaroni and Cheese Bites for an all-mac-and-cheese appetizer spread. They also make a fun snack with a cold drink or a side for your favorite soup.
Swaps, Mix-Ins, and Substitutions
If you’re vegetarian, you’re already set as long as your mac ‘n’ cheese doesn’t have meat. For a vegan version, swap your mac ‘n’ cheese base to a dairy-free, vegan recipe that firms when chilled (either from the store or homemade). Use a vegan binder like thick aquafaba, a commercial egg replacer, or a flax egg made thicker than usual to help the crumbs stick.
Use vegan breadcrumbs or panko, and swap olive oil for any plant-based oil you prefer when brushing. Baking times and temperatures usually stay the same, though vegan versions may need a bit more chilling time if they’re softer.
Out of plain breadcrumbs? Panko gives a great crunch and works beautifully here. Or pulse stale bread in a food processor to freshen up some rustic breadcrumbs. Seasoned crumbs add extra flavor, but unseasoned breadcrumbs give you control over the seasoning in your mac ‘n’ cheese.
Trying butter in place of olive oil will give a richer flavor and a slightly different crust color, but olive oil keeps things simple and reliable. If your mac mixture is very loose, stir in a tablespoon or two of cooked pasta or some crushed crackers before chilling to help it bind better.
Want to mix it up? Stuff some baked mac and cheese balls with a small cube of extra cheddar, mozzarella (see this creamy mozzarella bake for that ultra-stretchy melt), or even pepper jack for an extra cheesy surprise. Mix shredded cooked bacon or pulled pork into your mac before chilling for a smoky twist. Swap breadcrumbs for crushed crackers or a classic cornflake topping for a different texture. Add some finely diced jalapeños or a sprinkle of chili powder in the breadcrumb mix if you like a little heat.
Storing, Reheating, and Freezing
Once your baked mac and cheese balls have cooled completely, store them in an airtight container in the fridge for up to 3–4 days. When you’re ready to eat, place them on a baking sheet and warm them at 350°F (175°C) for 8–10 minutes until hot and crisp again. Skip the microwave if you want to keep that crunchy crust — microwaving tends to make them soft and soggy.
If you want to freeze them, first cool the baked balls completely. Freeze them spread out on a tray until solid, then transfer to a freezer bag for up to a month. To reheat, bake directly from frozen at 375°F (190°C) for 12–18 minutes or until nice and hot. You can also freeze them before baking: shape and bread your balls, freeze on a tray, then bag and bake from frozen, adding extra time so the center warms fully.
Chilling your mac ‘n’ cheese overnight or up to three days ahead is key for shaping your baked mac and cheese balls easily. You can also shape, bread, and freeze the balls before baking — just make sure to flash freeze them first to keep their shape. Then store in a freezer bag until ready to pop in the oven. This makes them a perfect make-ahead party snack or quick dinner addition! For a complete make-ahead spread, pair them with fridge-friendly sides like these 30-minute pasta salads.
Recipe FAQs and Troubleshooting
Q: Can I make these without eggs?
A: You definitely can! Use a thick binder like aquafaba, a commercial egg replacer, or a flax egg made with 1 tablespoon ground flax and 3 tablespoons water (thickened by chilling) to help the crumbs stick. Aquafaba tends to mimic egg adhesion best, but results will vary slightly.
Q: Will the baked mac and cheese balls fall apart if I skip the freezer blast?
A: They might be a bit trickier to handle, but if your mac ‘n’ cheese has been chilled thoroughly overnight and feels firm, you can probably skip that step. The freezer blast just firms the surface quickly, making shaping faster and cleaner.
Q: Can I add fillings inside the balls?
A: Absolutely! Small cubes of sharp cheddar cheese or a spoonful of pulled pork make tasty fillings. Just be sure not to overstuff so the balls keep their shape and nothing leaks out while baking.
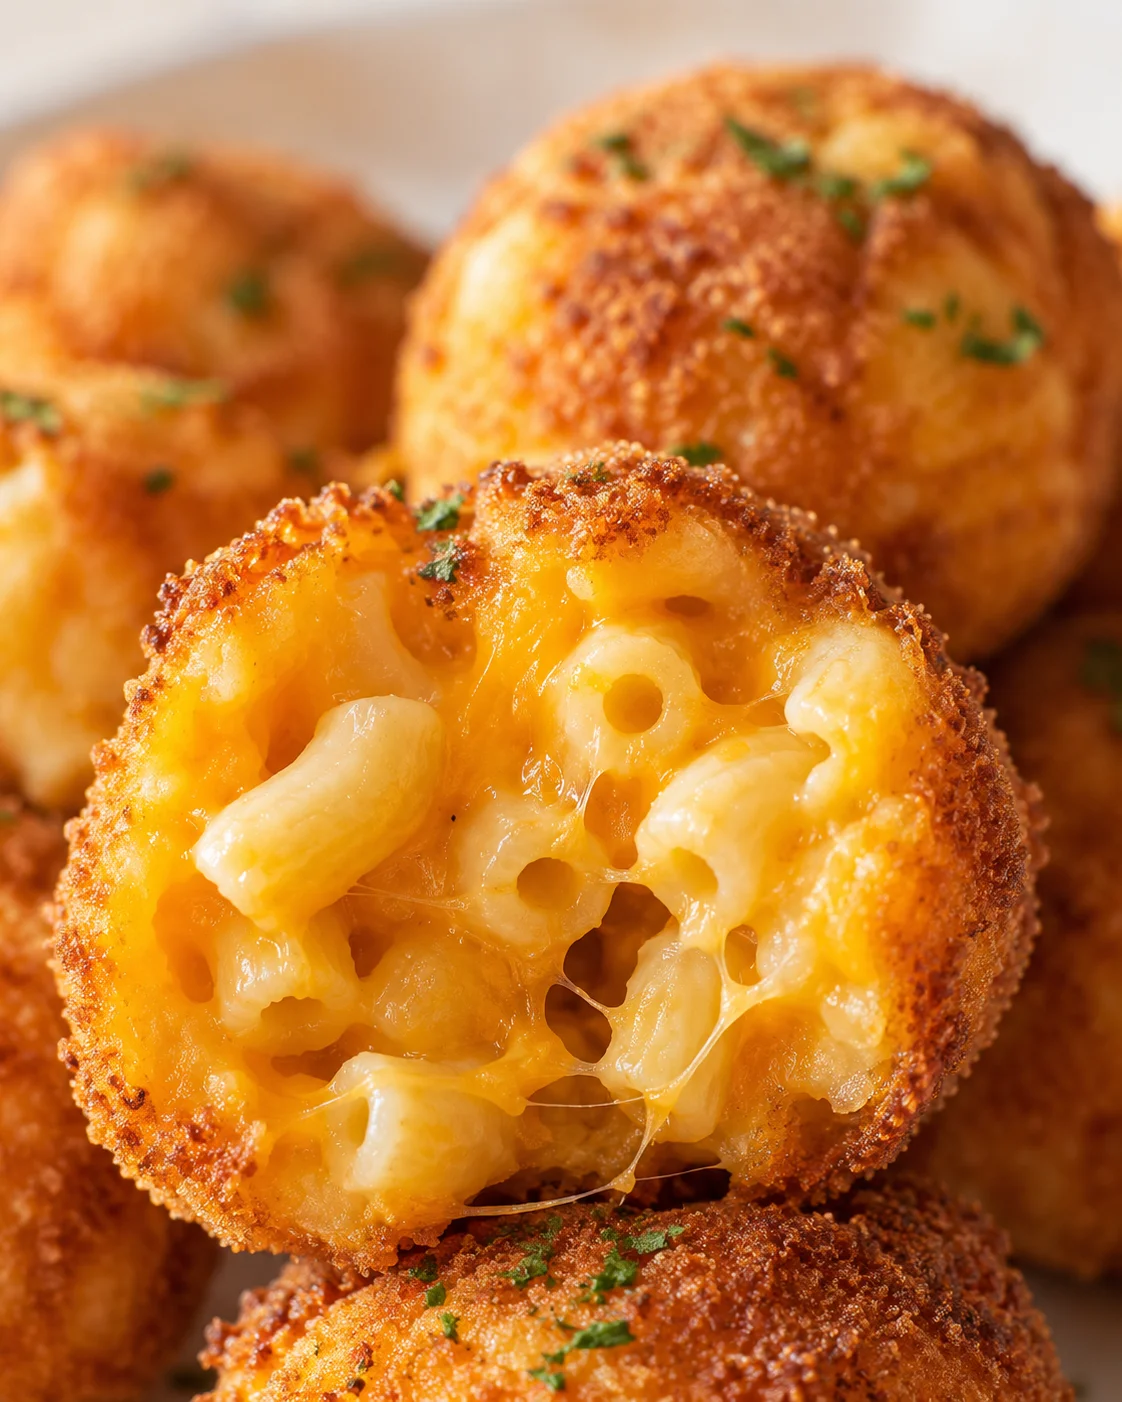
Crispy on the outside, creamy on the inside bite-sized baked mac and cheese balls made from chilled macaroni and cheese, breaded and baked to golden perfection. Perfect as an appetizer, party snack, or kid-friendly finger food.
- Prep Time: 20 minutes
- Cook Time: 20 minutes
- Total Time: 40 minutes
- Yield: About 21 balls 1x
- Category: Appetizer
Ingredients
- 1 batch macaroni and cheese, prepared as directed and well chilled (store-bought or homemade, author used one 5.5-ounce box Kraft)
- 1/2 cup all-purpose flour
- 2 large eggs, beaten
- About 1 cup breadcrumbs (seasoned if preferred; author used unseasoned Trader Joe’s breadcrumbs)
- 4 tablespoons olive oil, divided
Instructions
- Prepare 1 batch of macaroni and cheese according to package or preferred homemade recipe. Transfer to a sealed container and refrigerate for at least 12 hours, up to 3 days, to allow it to firm up.
- About 15 minutes before shaping, place the chilled mac and cheese in the freezer to quick-chill.
- Preheat the oven to 425°F (220°C). Line two baking sheets with parchment paper, silicone mats, or foil.
- Drizzle 1 tablespoon olive oil on each baking sheet and spread evenly to lightly coat the surface. Set aside.
- Set up a breading station with three shallow bowls: one with 1/2 cup flour, one with 2 beaten eggs, and one with about 1 cup breadcrumbs.
- Remove mac and cheese from freezer. Using a 1-inch cookie scoop, tablespoon, or your hands, scoop and form balls about 1 inch in diameter. Press gently to compact if needed.
- Roll each ball first in flour, then dip briefly in beaten eggs, and finally coat thoroughly with breadcrumbs.
- Place the coated balls on the prepared baking sheets, spacing them about 10 per sheet.
- Bake on the middle oven racks for 10 minutes.
- Remove trays from oven. Drizzle remaining olive oil (1 tablespoon per tray) over the balls, spread around, and flip each ball so the unbrowned side faces up.
- Return to oven and bake for another 7 to 10 minutes, until the balls are golden and crunchy all over.
- Remove from oven and serve hot immediately for best texture and flavor.
Notes
Chill your mac and cheese thoroughly before shaping to help the balls hold their shape better., Drizzling olive oil halfway through baking enhances even browning and crispiness., Use parchment paper, silicone mats, or aluminum foil on baking sheets for easy cleanup and crispier crust., Balls should be about 1 inch in diameter to balance interior creaminess with exterior crispiness., These balls reheat well in the oven at 350°F for 8–10 minutes; avoid microwaving to keep crust crisp., They freeze nicely either after baking or before baking (after flash freezing)., Substitute panko breadcrumbs or crushed crackers for different textures., Optional fillings include small cubes of cheeses or cooked meats, but avoid overstuffing to maintain shape., For vegan adaptation, use dairy-free mac and cheese, vegan binders (aquafaba, commercial egg replacer, thick flax egg), and vegan breadcrumbs.
Nutrition
- Serving Size: 1 ball
- Calories: Approximately 90-110 calories per ball (varies with mac and cheese recipe used)
- Fat: Approximately 5-7 grams per ball
- Carbohydrates: Approximately 10-12 grams per ball
- Protein: Approximately 3-4 grams per ball (varies with mac and cheese recipe)
More in Recipes

Carrot and Lentil Soup
Spiced Carrot and Apple Soup